Re- Learning. Is that a word?

Just a SHOUT OUT to everyone that has sent in
their block for the JUST ONE STAR project. I had the honor to start sewing some of the blocks together into quilt tops.

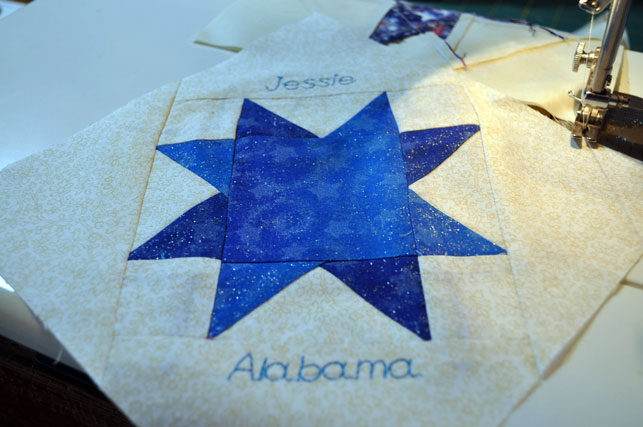
I joined the blocks into rows of 6 chain piecing them as I went along.

I have been quilt for 30 years and I continue to learn or RE-LEARN things. I recently attended a quilt guild meeting where Bonnie Hunter was the speaker. It was so good I went to another guild meeting 2 nights later. Bonnie has won the award for making the most fantastic quilts from scraps, leftovers and recycled, re purposed fabrics. Bonnie’s blog, Quiltville is a must read.

Bonnie’s book, Leaders and Enders, published by Kansas City Star is amazing.

This is the part where I re-learned.

Bonnie wrote an entire book that utilizes Leaders and Enders. The picture above shows what a leader is. Basically a piece of fabric to begin sewing on, before you start chain piecing your blocks together.
The leader does a couple of things.
1. It keeps your needle from coming un threaded.
2. It makes you not have those long pieces of thread to trim away.
The bonus thing it does is you can actually sew an entire separate project just by using leaders and enders.
You may remember my candy bar post from 2 days ago. I am making the dresden plate sections as my leaders and enders while I assemble Just One Star quilt tops.

Here is my ender (another dresden plate fan section) To make an ENDER sew half way and stop. Cut off the sections that you have chain pieced. Your ENDER now becomes your LEADER and you are ready to start chain piecing the next section. I love my auriful thread and using the LEADERS and ENDERS saves thread.
I never thought I needed to use a leader or ender. I didn’t have much trouble with my needle coming un threaded BUT I did hate trimming those excess threads. The back of my projects looks so much neater.
and
Did I forget to mention that I got Bonnie to autograph 2 of the books while she was in town?
AND I am giving them away here.
Leave a comment with a sewing TIP or something you have RE-LEARNED
and I will randomly draw for 2 books
and post the winners on April 7th.
(1 book per person)

151 comments

  1. Linda says:

    Self taught quilter so every day is a learning or re-learning experience. Leaders – enders, snipping ears, going outside my "quilting comfort zone" (which is basically just squares so there is alot outside my comfort zone! LOL), folding fabric for better organization, fuzzy hair ties to keep bobbins and thread from unraveling, and many many more things or techniques – Thank Goodness for bloggers!! Plus I get some AMAZING inspiration… and a huge " I wanna do this" list! LOL
    Happy Sewing!! 🙂

  2. bingo~bonnie says:

    I found you from Bonnie's post today 😉 and love the Just One Star Project! What a great way to be part of something BIG! 🙂 Can't wait to make one and send in myself.

    I also noticed something that you wrote: "To make an ENDER sew half way and stop. Cut off the sections that you have chain pieced."

    Why sew only half way? Seems like you are cutting yourself short – It would be just as easy to sew the entire piece then snip the thread behind it… much easier to get to behind the needle and then start off with a 2nd dresden plate fan blade…. then your L/E project will go twice as fast with very little effort. 😉

    My tip that I read in a magazine – is to use an old calendar to cut up the dates with numbers and use them to pin to quilt blocks or rows to keep them from getting mixed up 🙂

    Glad I found your blog today!

    Love from Texas! ~bonnie

  3. I'm loving learning everyone's scraps is anothers treasures. I've happily accepted scrap fabric & enjoyed passing on what I can't use.
    Thanks for chance to own one of Bonnie's books

    Love Leanne

  4. Barbara says:

    Measure twice, cut once…not a new tip, but one I should remember daily (I have an extra 2 1/2" strip I did not plan to have because I did not follow this tip). I have both of Bonnie's books, so if I win I will donate it to my Guild library.

  5. Pauline says:

    My sewing tip is to keep a stiletto and half of a spring-loaded wooden clothespin close to the bed of my sewing machine while I piece. The stiletto is used to guide the fabric over the feed-dogs and the clothespin is used as a wooden iron if I need to press open seams quickly without having to use a regular iron.

    Thank you for the opportunity to win one of Bonnie's books!

  6. Anya says:

    I relearned that if I give the paper a bit of a spritz of water, it comes off very easily after paper piecing. Thanks for the chance!

  7. Karen says:

    I just relearned how to sew on my binding. The way I learned in a class kept confusing me and sometimes I would get it all twisted up when I joined it together. A wonderful friend of mine (she's been quilting for years) came over and showed me a way that works to join it perfectly every time – no twisting – just flat perfect bindings! I love my friends – they are a wealth of information!

  8. WhiteStone says:

    My tip is to use a can of pressurized air (with the long skinny straw) to clean the bobbin area of my machine every time I change the bobbin. My machine is an old vintage Singer, so this works well. If yours is new, and computerized, you may want to be careful you do not blow lint INTO the workings instead of AWAY from them.

  9. kt says:

    I'm a new quilter, so am still learning, rather than relearning. I'm anxious to try Bonnie's technique for making the bonus HST that she posted recently–need to get some time at the machine! Would love to win one of Bonnie's books! Thanks for the chance!

  10. Sarah says:

    I am signed up for a Bonnie Hunter workshop soon, and I can't wait!
    If you do free motion quilting, when you drop off your machine for servicing, tell the person who will be working on it. Leave the foot with it, too. I recently did not mention it, and when I got it back and tried to quilt, it was a nightmare. Piecing was fine, but quilting was a disaster. They fixed it right away, and now I know to remind them.

  11. Meri says:

    I've learned to always have several bobbins wound in tan thread (my usual piecing choice). Nothing's worse than to sew a couple of feet with no thread!
    Thanks for the great giveaway!

  12. pcflamingo says:

    Working on a Big Project involving sewing quilt squares out of the clothing of someone who was killed in the line of duty. It's totally random sizes of blocks – and now the challenge is to get them to fit together happily. I have rediscovered what can be done with strips of 2" blocks sewn together. They serve as "coping strips" to join the colors and the sizes of the blocks together.

  13. Barb in Mi says:

    I always seem to conveniently 'forget' to square my blocks – and it ends in disaster. Definitely a re-learn issue that needs to be re-inforced once more… Thanks for the give away!

  14. Ebony says:

    My sewing tip is to finger press everything before taking it to the ironing board, or maybe I should say fingerNAIL press. Running my nail down the seam on the front of the piece really helps open those seams all the way and helps keep your blocks the right size. Also, I never press with the iron until the block is complete. The fingernail pressed seams are easier to nest, and I have less distortion if I don't overpress.

    Thanks for the chance to win Bonnie's books!

  15. Hi, here's a tip I learned many years ago and now I really need to use it…put a tiny bit of saliva on the sewing machine needle and the thread goes right into the hole. I love it. It works every time.
    Thanks for the chance to win one of Bonnie's books.

  16. Elaina says:

    I don't usually pre-wash but when I have to I make small diagonal cuts on the end just abpove the selvedge…it really does save me the tangly strings – they are too small to even be crumbs though, so not savers!

  17. Gidget says:

    I am a new quilter and just learned several hints by reading these posts!
    Including the leader and enders, I never thought of that! I'm gonna give it a try thank you.

  18. Brenda says:

    change the needle more often than you think you should. My sewing machine was clunking along and finally I realized the needle was bent. and my second tip: it's always more fun to make a quilt with your friends because the end result is totally different than what you had anticipated. thanks for the chance to win the books.

  19. Karen says:

    My tip is to sew the second seam before you cut off the triangle when using 2 1/2" strips to make a hst unit. These little bonus hst are so cute to use in a future project and sewing the seam first eliminates handling all those tiny triangles. Would love one of Bonnie's books!!

  20. MonaR says:

    This is also a "Bonnie-learned" tip. It saves so much time and handling if you pair (right sides together) your fabrics and cut triangle units out. I always try to nub the corners off and then it's just smooth sailing at the sewing machine. Mona R

  21. Saska says:

    I met you that night in Texas too! I've been a Bonnie-follower for so long, but isn't it fun to actually see her in person and some of her tricks just make more sense?!

    Fun!

  22. Bonnie says:

    I haven't been quilting very long, so I have lots to learn. Binding was a problem until a friend told me to cut it narrower and it fits just fine now. Would love to win one of Bonnie's books.

  23. Phyllis says:

    From Bonnie I have learned to use the easy angle ruler. I love it now and can't imagine quilting without it. I love Bonnie's quilts and would sure enjoy having this book!

  24. Linda in NC says:

    I've had to re-learn: replace the machine needle! The corollary is replace the blade in the rotary cutter before you think it really, really needs it. Yes, now would be good!

  25. Debbie says:

    I have a tip and that is to always put a copy of the pattern you are using with the project when you put it away just in case it is quite awhile before you get back to it. I love Bonnie's blog and would love a book.

  26. krisgray says:

    One of my favorite tips has been to press my binding to the back after attaching it to the front of the quilt. This makes it so easy to finish the back either by machine, and pin pin pin, or by hand.

  27. Marsha says:

    I like to do applique and hand work. I always have several needles threaded with my floss colors and ready to go. I keep them on a magnetic "pin picker upper" so I don't lose them. Also, I re-use a take out salad bowl to collect my snips and threads. Bonnie's blog is one of my favorite ones and I read it every day. I'd love to have one of her books. And I sent 14 stars in for the project, hope we get to see more pictures of the quilts they are going into!

  28. JeanieG says:

    One new thing I learned recently was using Elmer's School Glue on a binding to hold the quilt and binding together. Heat with an iron and you don't have to use any pins!

  29. Every time I put on a mitered border I re-learn how to do it…thankfully I keep the instructions pinned to the bulletin board in my sewing room! (maybe the real teaching point is to keep instructions you use often somewhere they can't be covered in fabric or cat!)

  30. Katie says:

    Oh goodness. I relearn something everytime I sit down to sew! Just this weekend I "relearned" to check and recheck the size of my seam allowance and the resulting size of my blocks. Sigh. Re-sewing is no fun! 🙂

  31. Blogless me says:

    The most useful tip is to always have blocks prepped, so you can pick them up and sew when you have to wait for an appointment. Works for me since I work by hand.

  32. Ida says:

    My tip is this. When you buy a book that is not spiral bound, or coiled, take it to your local copy shop. For a couple of dollars, they will coil the book for you. Then when you are trying to follow directions to learn a new technique, the book will lie flat.

  33. Pat says:

    I am always a student. I love to learn and find out all the different ways things can be done. I do like to look at household items and find a quilting use for them. ie hair clips work great to hold down a binding while hand sewing.

  34. rjk says:

    I have had to learn to press no iron my quilt blocks. It was hard to make a switch. I am trying. I love how Bonnie uses shirts in her quilts.

  35. Jeanne says:

    I follow Bonnie Hunter's blog and done her last mystery quilt learning to do string blocks. I would never have tried them if it wasn't for her. You never know what you can accomplish
    until you try it. Love her quilta and love her books. Would love to win one.

  36. Cathy says:

    My tip is if you are trying to make a quilt in a hurry then you need to keep the seam ripper handy.

    In re the book – I have the mens shirts ready to cut up just don't have the book yet.

    P.S. – I sent 3 stars. Cathy L from Iowa

  37. Betty says:

    I am excited that Bonnie will be teaching a class for my guild in May. Would be great to have one of her books!
    My tip is to re-purpose a dental floss container to use in your sewing kit for traveling by plane when scissors aren't allowed. When you pop it open and remove the insides, a filled bobbin fits in perfectly. Mine is Crest Glide brand, others may not work as well. Bring the thread up and through the cutter. Be sure to have a needle threader handy as it doesn't make as clean a cut as scissors.

  38. Cousin Jill says:

    I have learned that when I need to rip out a seam (more often than I'd like lol)… that if you snip every 5th thread on one side then grab the thread on the other side, it will pull out easily.

  39. ~Kathleen says:

    I agree that Carrie Nelson's recent binding tutorial was a great refresher course (and sanity check or recheck) on finishing. She included many great photos and valid, sensible reasons for the steps she uses for binding. Great job, Carrie! We love you! BTW, I'm just beginning to follow Bonnie and would love to win her book. Thanks!

  40. mckie2 says:

    We've been using the little plastic containers that baby food comes in now to hold our spool of thread when doing applique. Just poke a hole in the top of the lid and thread the thread through the hole in the top. Put the spool in the bottom and close it up. The spool stays clean and untangled and you just pull the thread end when you want another piece.
    Thanks,
    Susan

    mckie2@gmail.com

Leave a Reply to MonaR Cancel reply

Your email address will not be published. Required fields are marked *