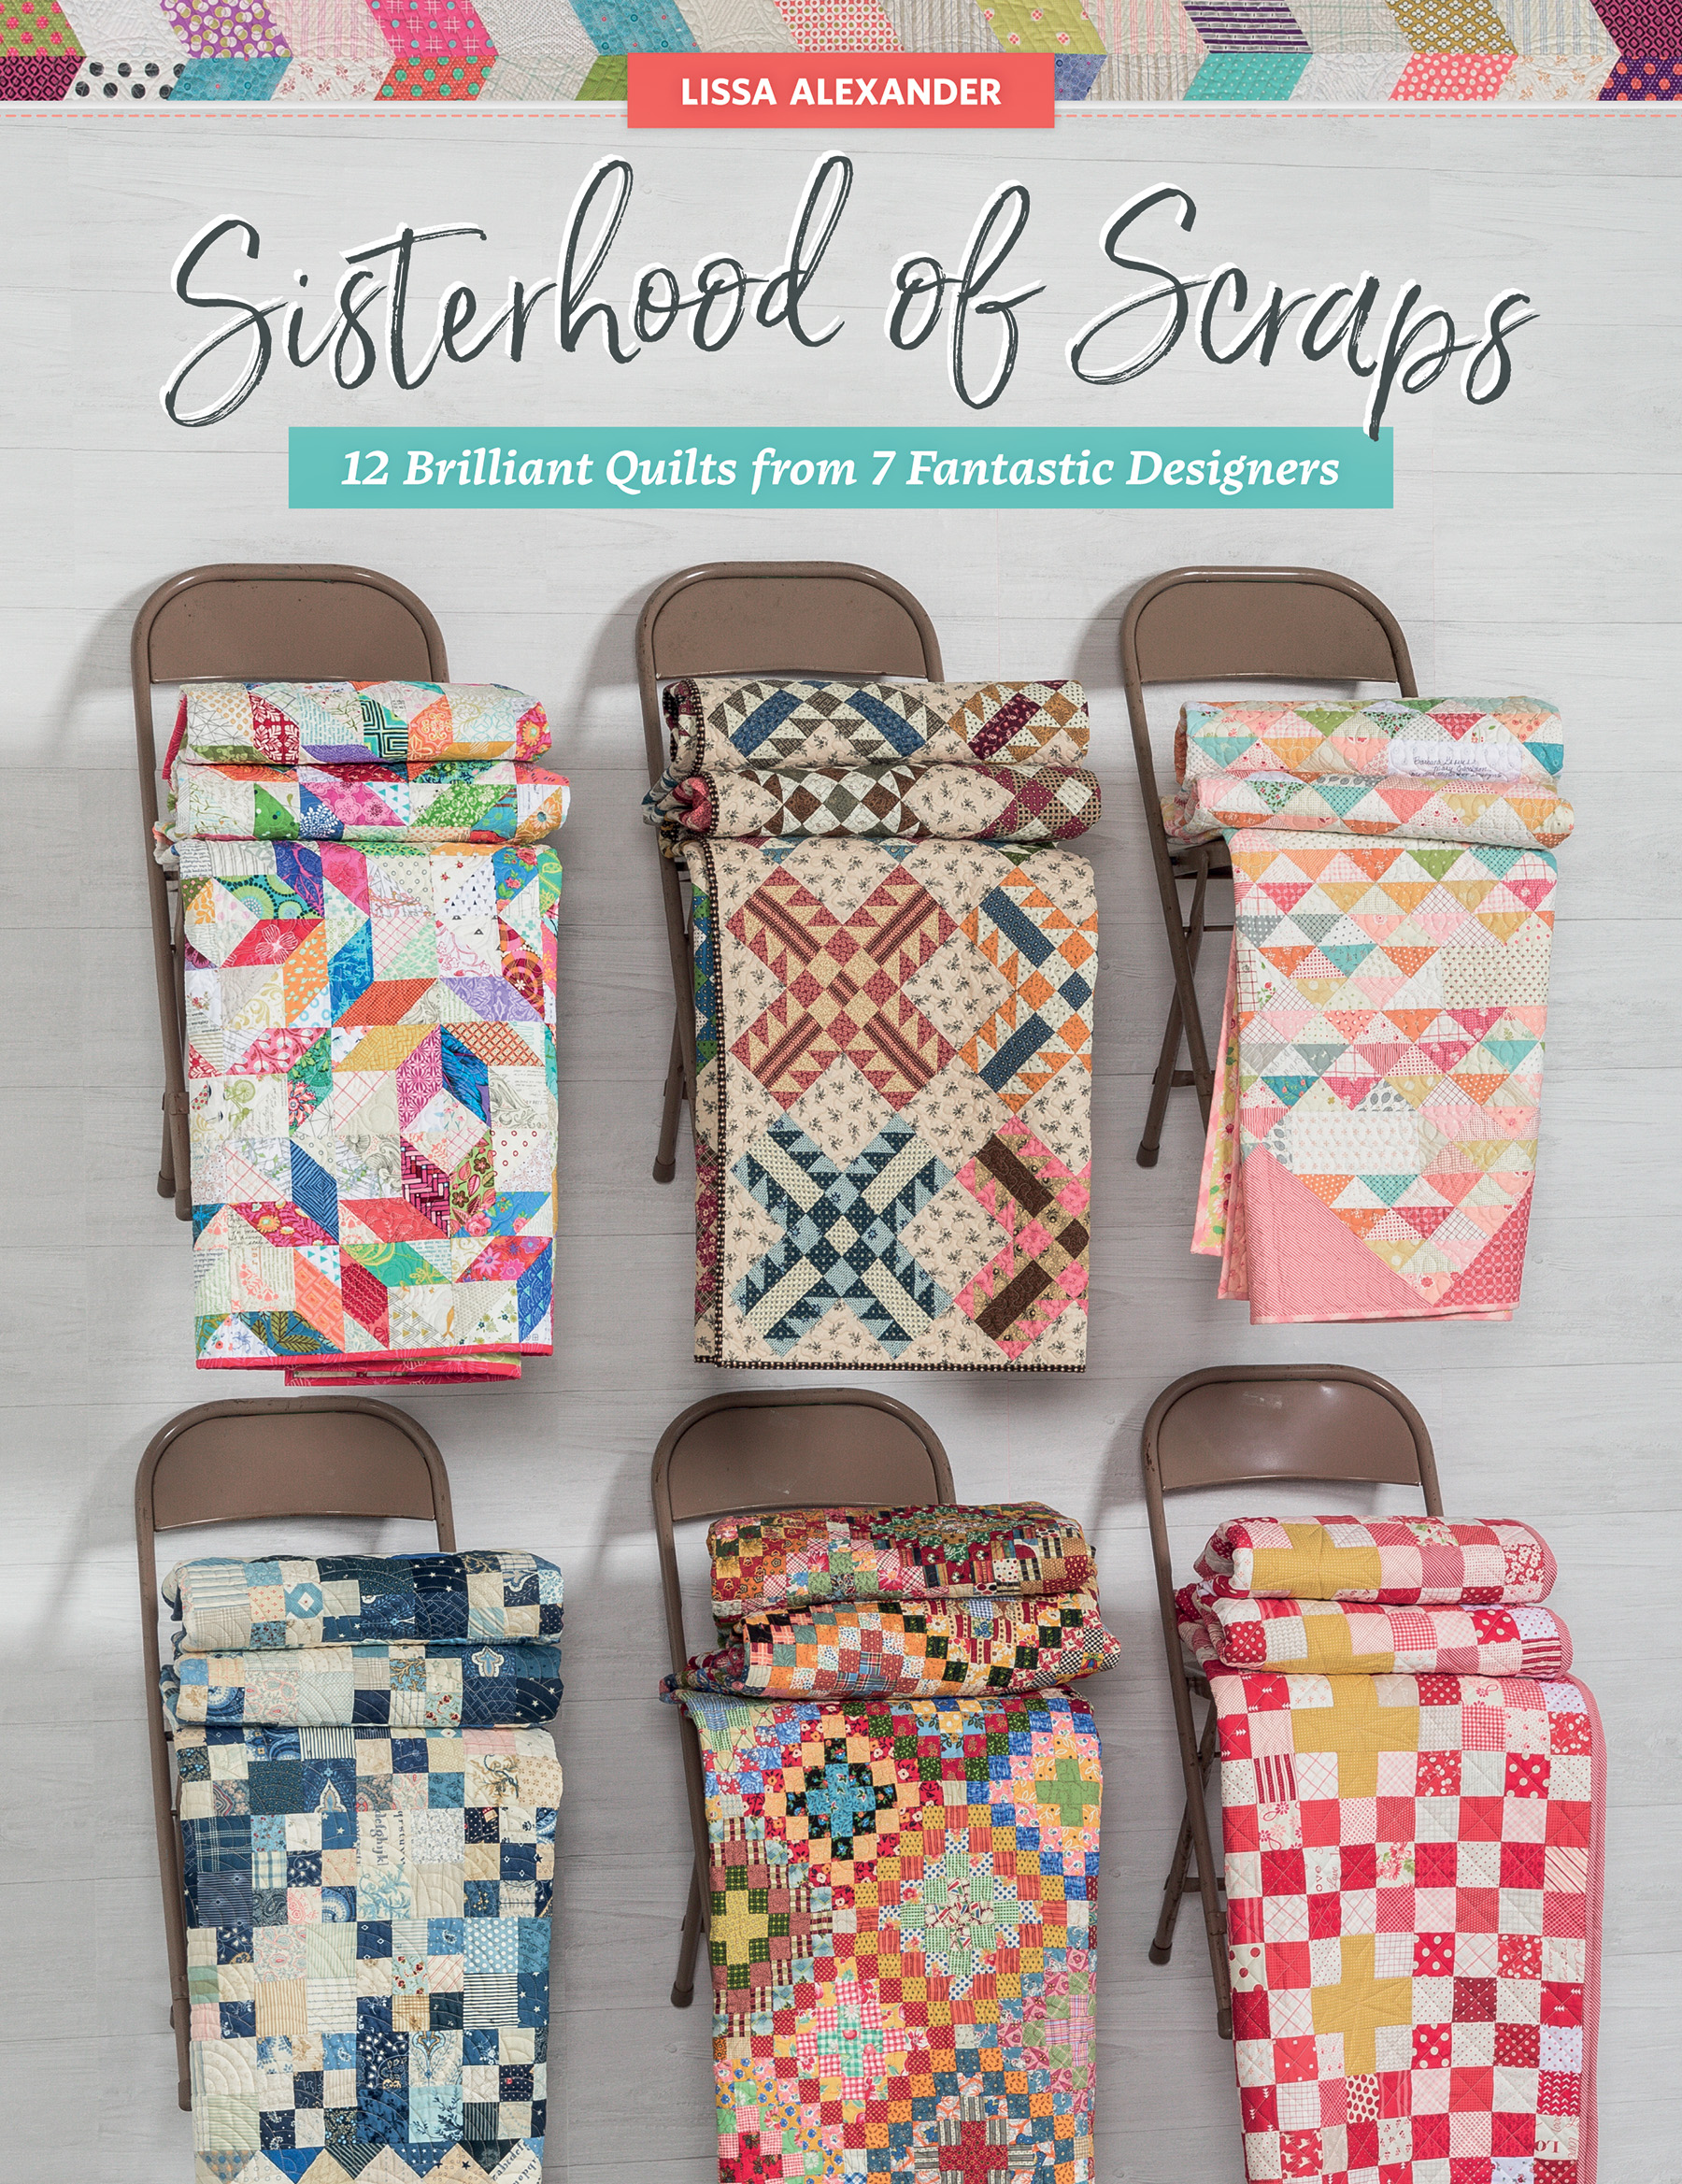
Today is my mom’s birthday or as we all called her, Gammy, you know like the Grammy’s. We all won the biggest award by having her in our lives. She was so creative and taught us all to work with our hands. In honor of my mom’s birthday, January 6th is the best day to announce the debut of Sisterhood of Scraps.
 Sisterhood of Scraps is a follow-up book to Oh Scrap, but this one is bigger and better because some of my friends have come along for the journey. Laurie Simpson, Susan Ache, Barbara Brackman, Sandy Klop, Kim Brackett and Sheryl Johnson all helped make this book happen. Each of these talented women said YES when I asked them if they wanted to take on the challenge.
They weren’t scared!!
I paired with each person to make a quilt incorporating a certain shape. I would do the same shape but neither of us knew anything else. No other rules or limitations and I hope these quilts inspire you to join the Sisterhood of Scraps.
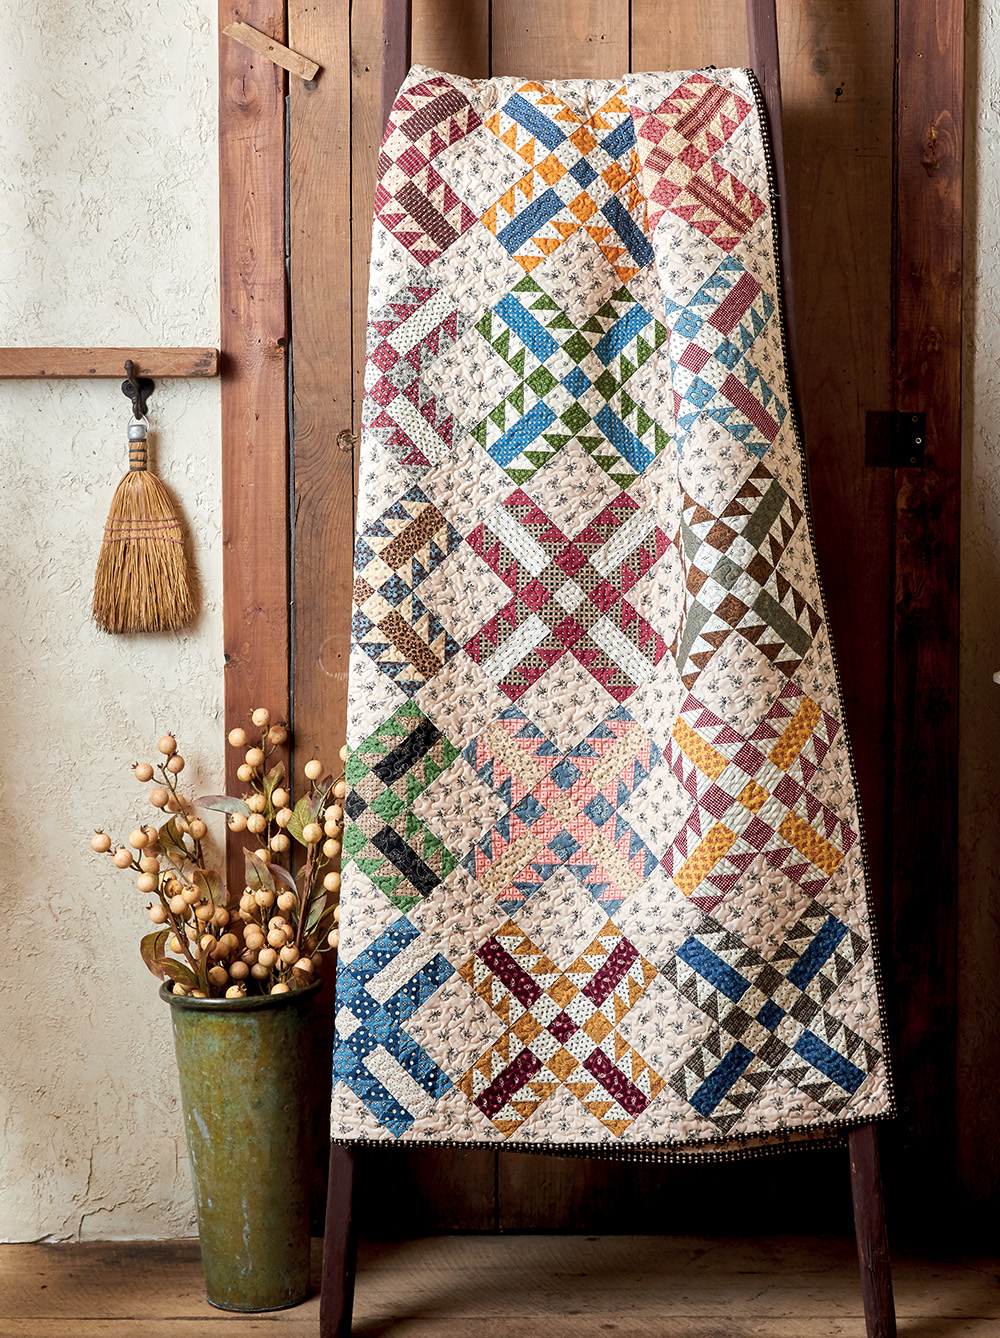
First up is Laurie Simpson of Minick & SImpson. Laurie has a very classic and timeless style and this quilt did not disappoint. The challenge for Laurie was 4 patches and 9 patches. Remember that was the only rule. There are so many secondary patterns in this quilt that I can look at it over and over and see different patterns created by the lights and darks throughout. The stacked brick border sends your eye back into the quilt. The quilting pattern is what I call a baptist fan. The curved shape of the quilting compliments the linear piecing.
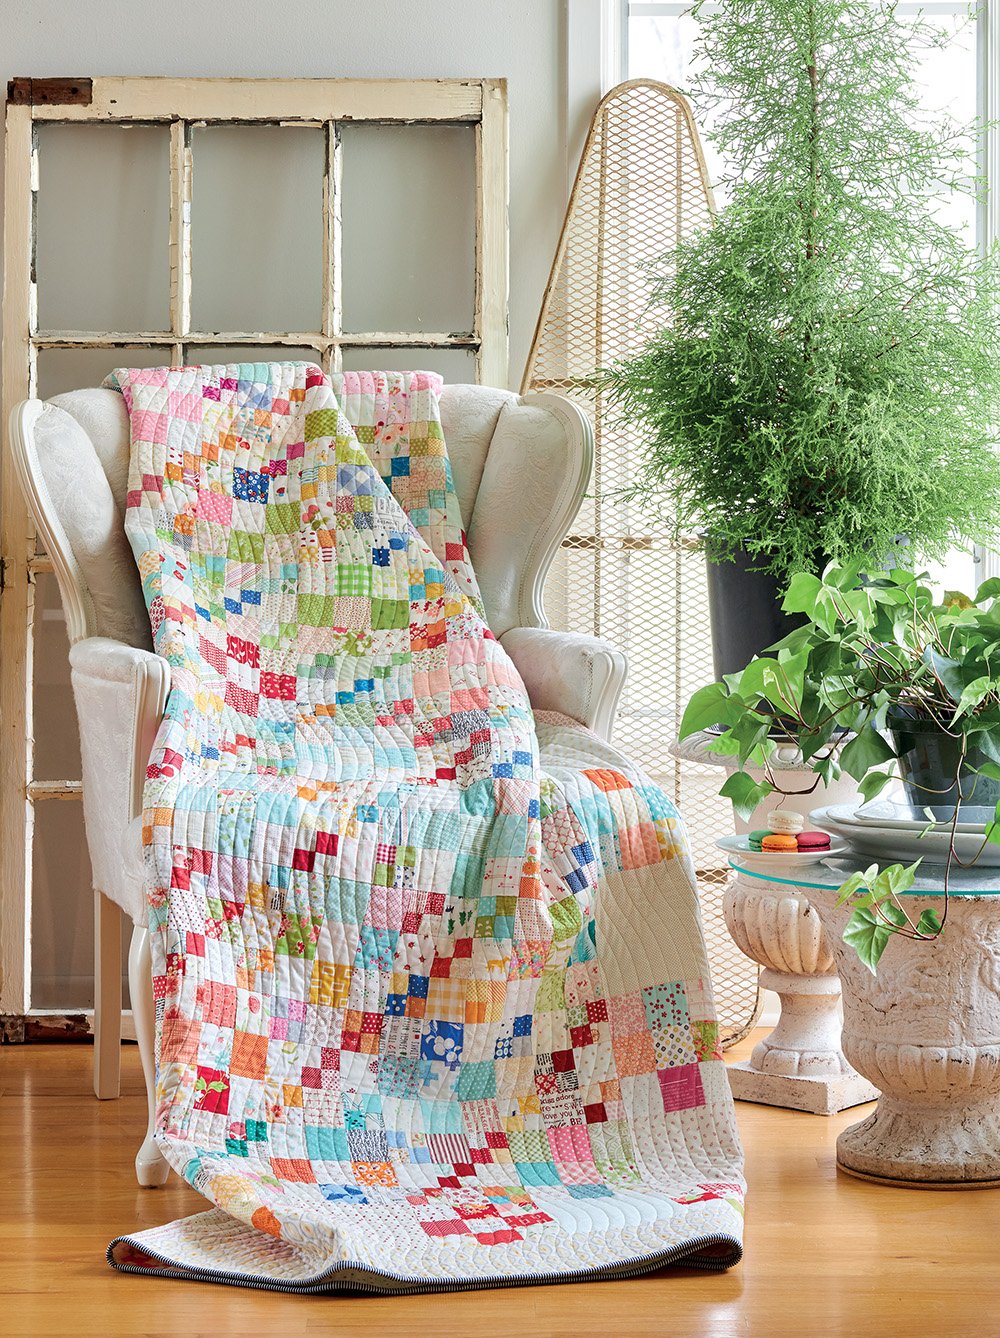
This is my version of 4 patches and 9 patches. I don’t know how most people go about making a scrap quilt but most of the time I just start sewing shapes. It is my therapy, mindless sewing at the end of the day while binge-watching my favorite show.
This quilt is bits and pieces from a couple of other quilts I have made. I call it Friendship Starter because it reminded me of the Amish Friendship bread recipe. Friendship bread you create the starter, keep adding to it and wait patiently until it is time to make bread all the while the starter is shared with others to cultivate their recipe.
SIDE NOTE: I did pass along all the little four patch starters.
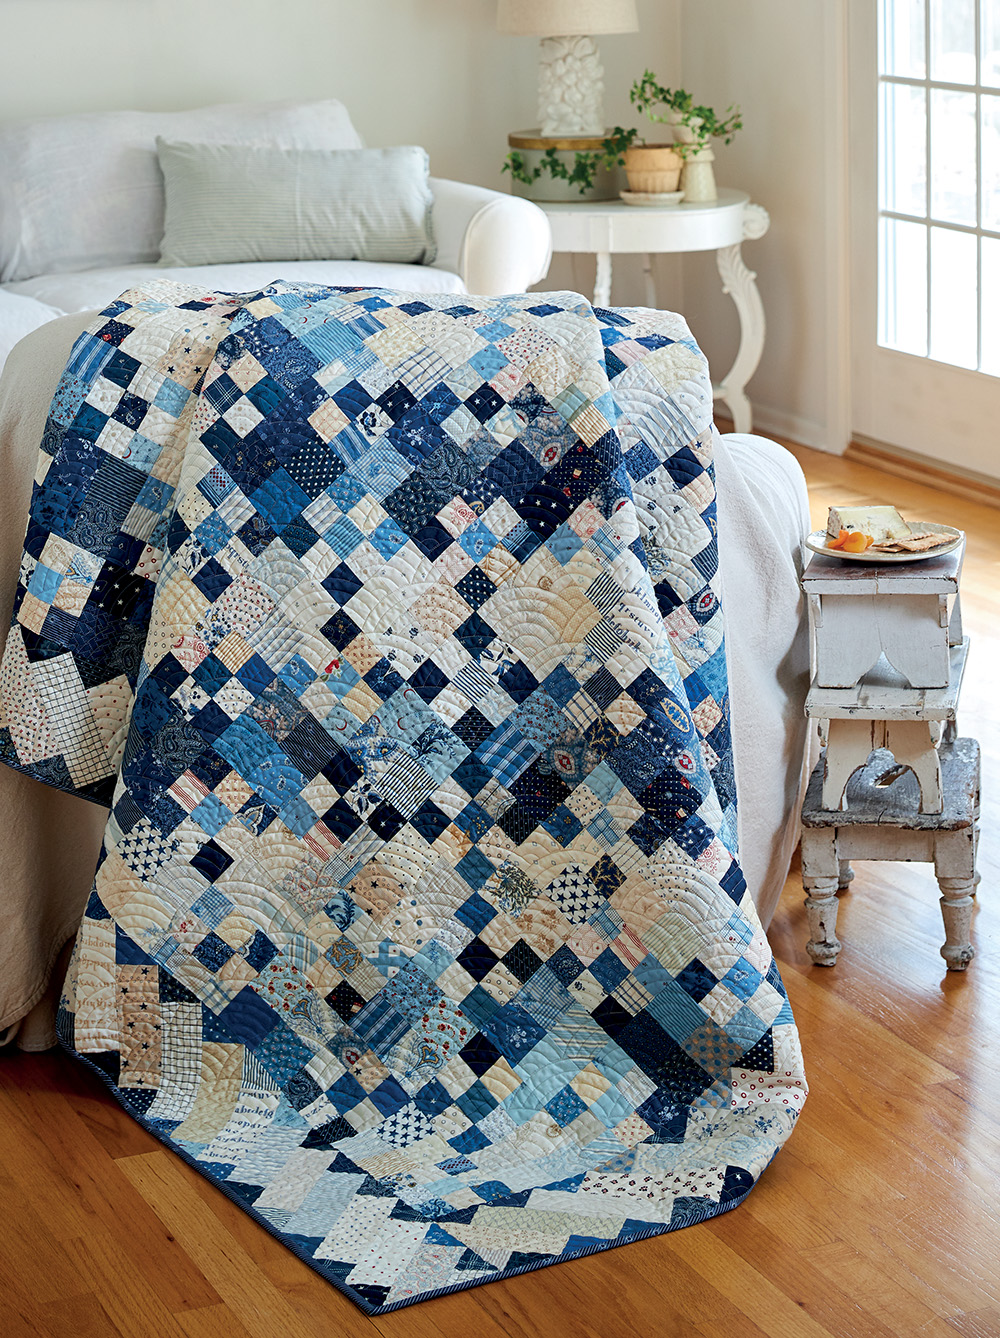
Susan Ache of @yardgrl60 Has created just the perfect pop of color using a red background for her LeMoyne stars surrounded by Log Cabins. The quilt is brand new but has that wonderful soft vintage feel as if it had been around for decades. A red binding finished it off beautifully.
Log Cabin was our shape in common. I made a log cabin on point with different centers, half dark and half light to create a woven pattern. If you have followed me you know I love using a combination of different Moda fabric designers’ fabrics. It just makes me happy and I think of each of them as I touch each piece. I love the quilting on this quilt. A floral design was quilted on the light section and simple straight lines in the dark. This also helps create an optical illusion on how the blocks were even pieced. All I need now is an actual log cabin house to go with the quilt. This is a great scrap buster for sure!!
I will give you a minute or two to catch your breath from this quilt.
Ok, got it?
Do you need to scroll up to see the picture again?
This quilt is even more spectacular in person.
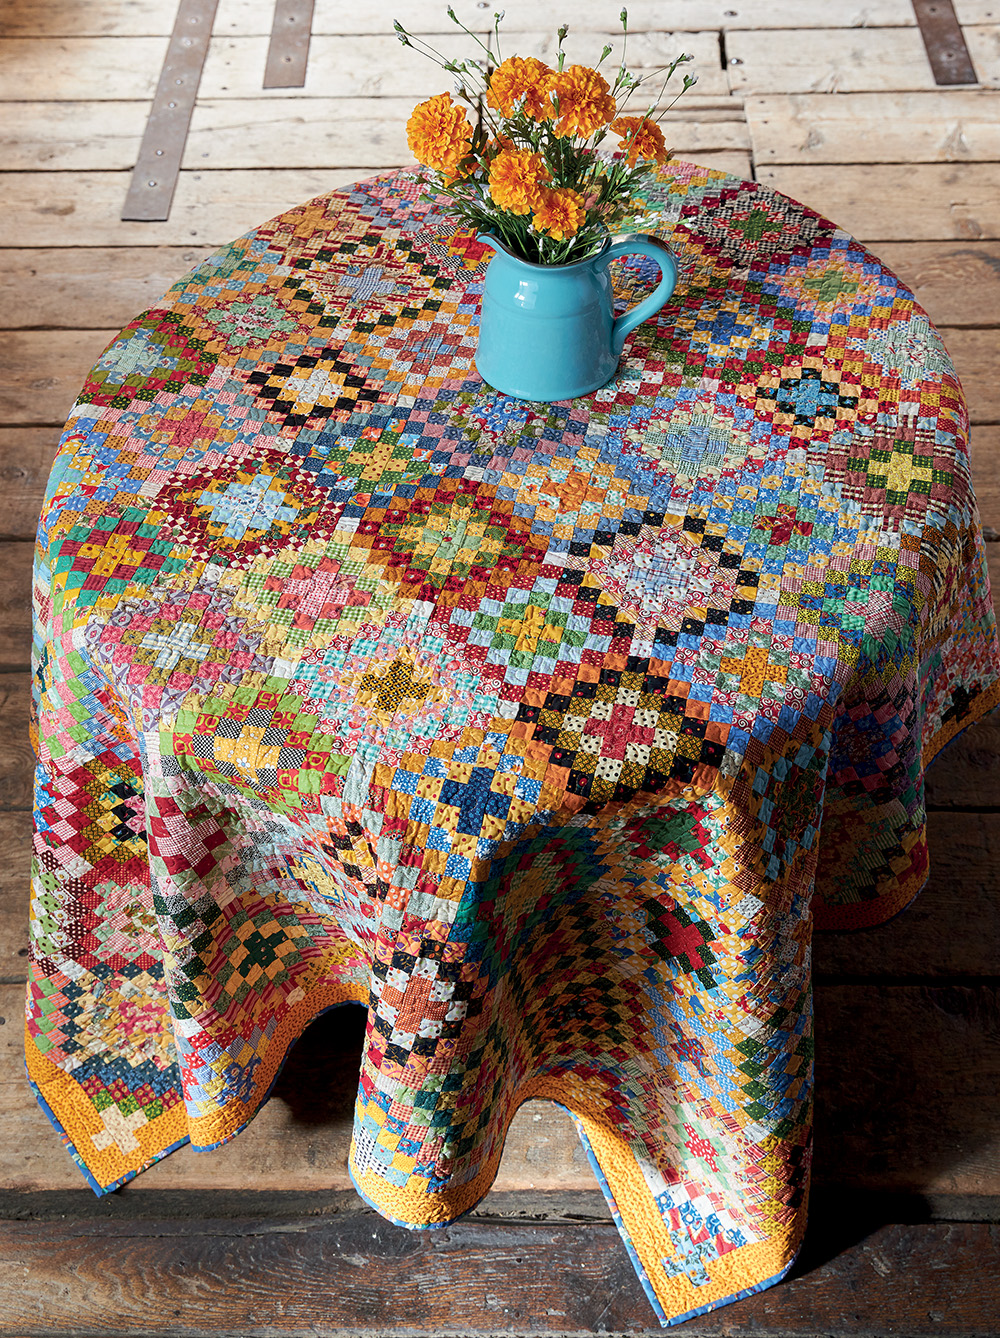
Sandy Klop of American Jane is the creator of this quilt. Forever Friends is Sandy’s quilt. I look at this quilt and think about how each fabric tells a story and what was Sandy thinking about as she worked on this. The shape that Sandy and I both went with was a 1 patch square.
When I made my quilt and knew that my sister on the project was Sandy I knew I had to use reds and that my quilt had to be bright and vibrant just like Sandy’s personality and friendship is to me.
One main difference is her squares are uber small and mine and big and funky.
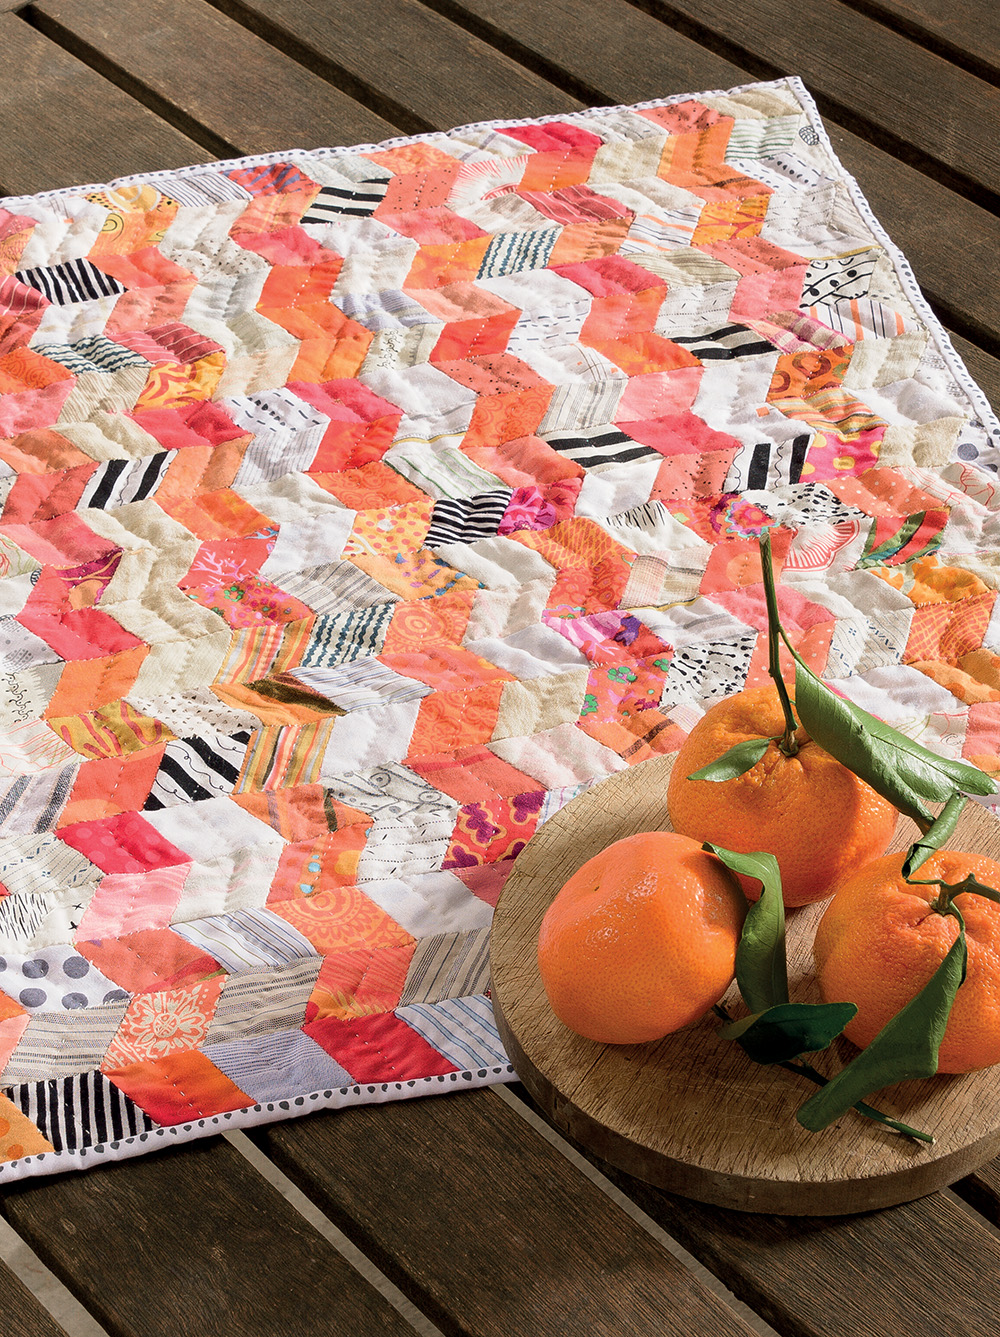
My quilt is named Ketchup and Mustard and is perfect for a picnic quilt.
( thank you Tammy Vonderschmitt for the quilt name.)
It is hard to have just one favorite quilt from the book,
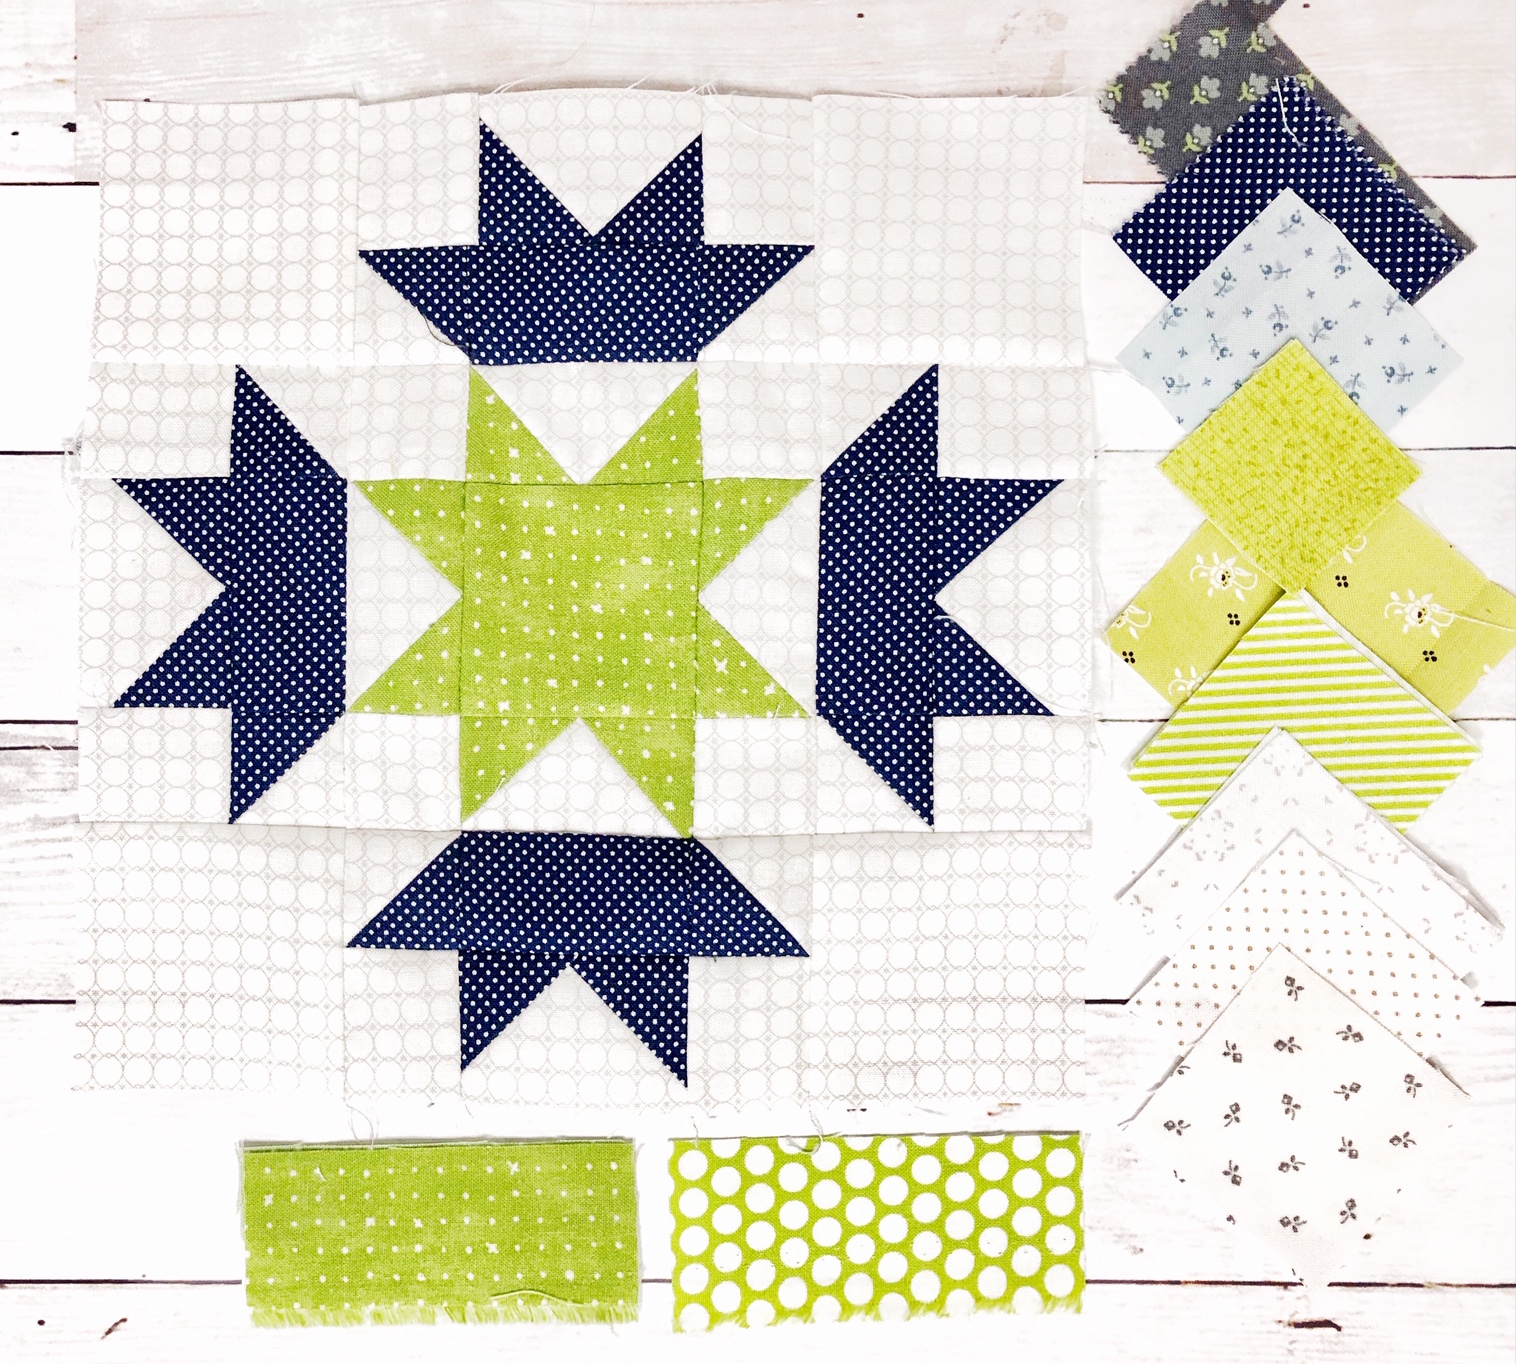
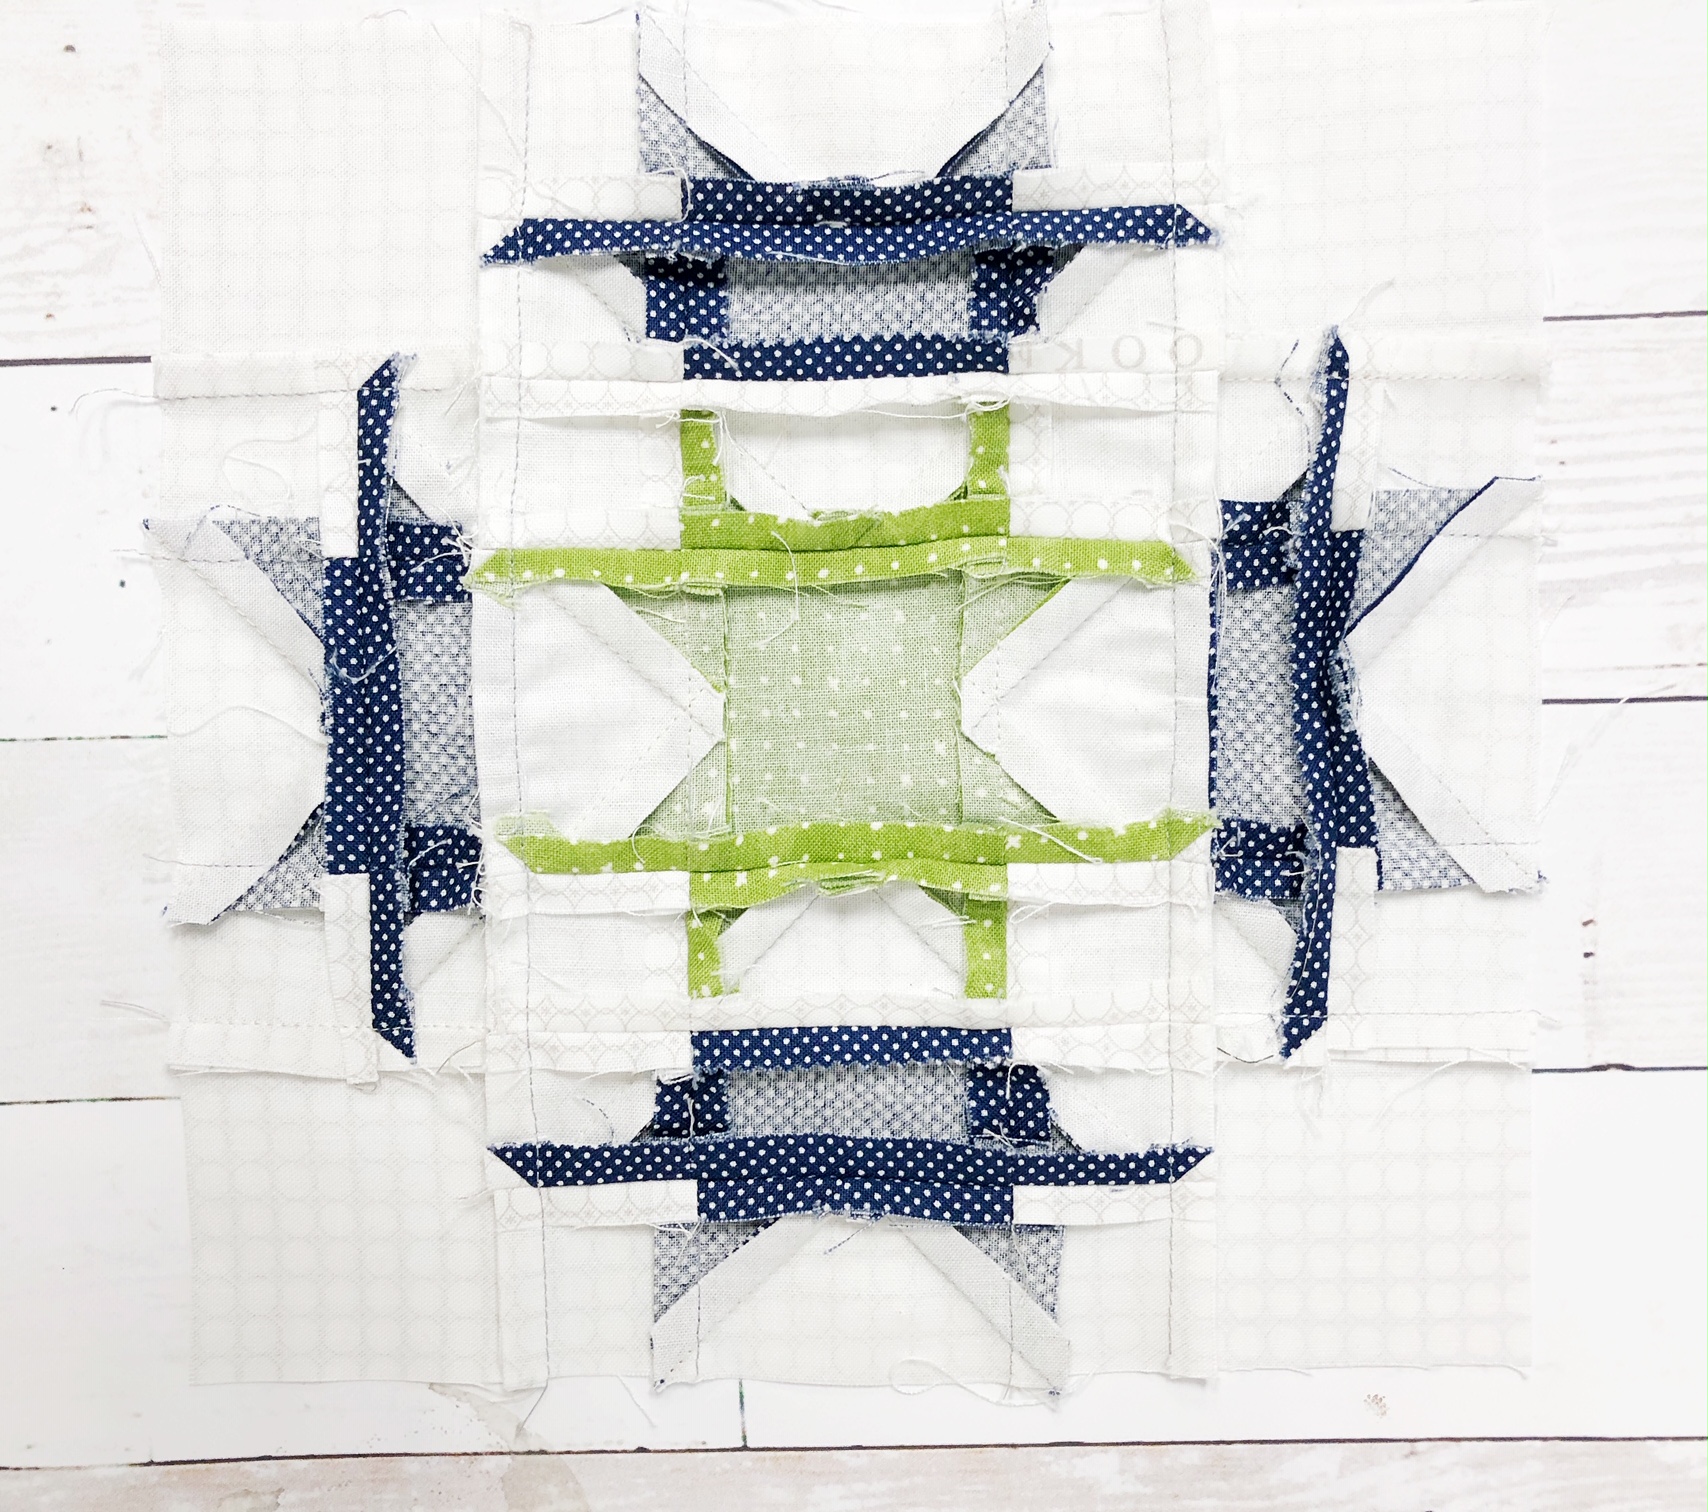
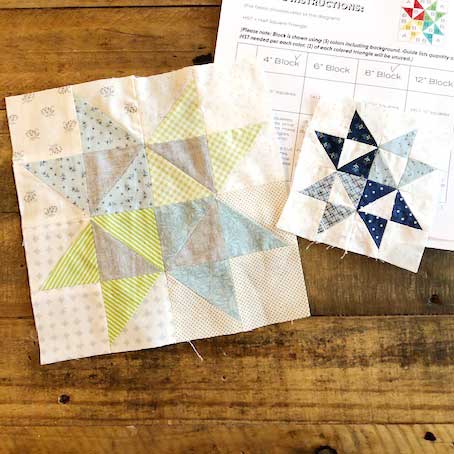
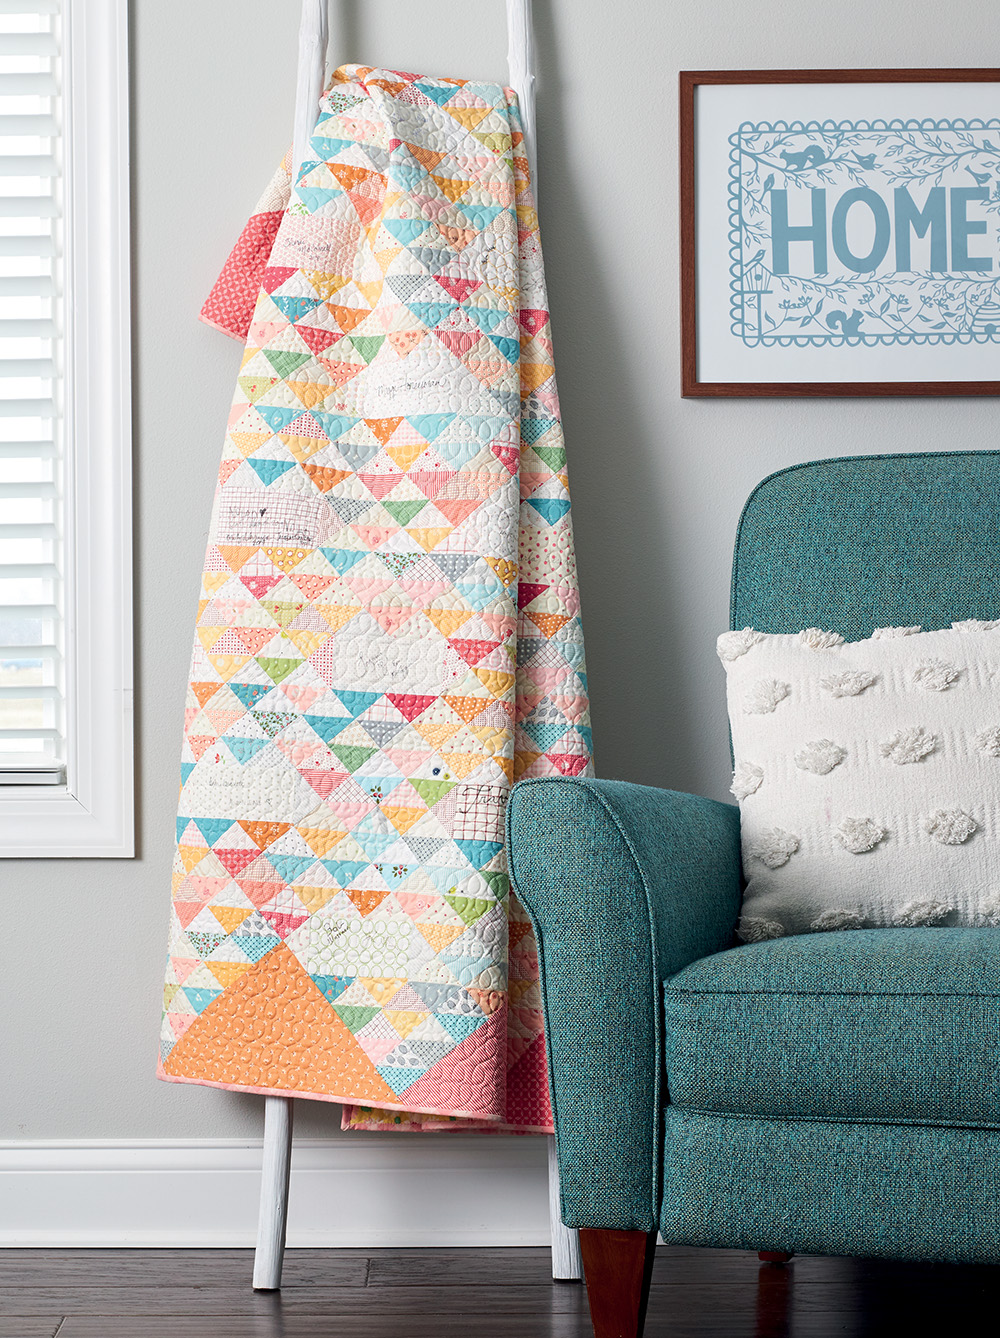
just like it would be hard to have a favorite child but this quilt Half Square Hashtags from Sheryl Johnson will be the first one I reproduce.
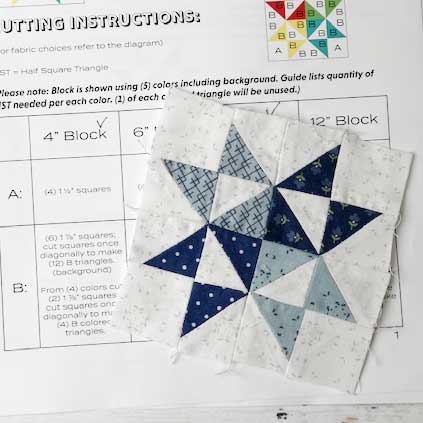
I have always been a fan of Sheryl and her shop Temecula Quilts but had not met her in person until we started working on this book. The challenge I gave Sheryl was make something with half-square triangles, yes that was all I said and she created this beauty.
Part friendship quilt and part signatures from people that have influenced my life is the inspiration for my sister quilt to Sheryl’s, INFLUENCERS. I was able to get signatures some of my teachers, designers, friends, family even the president of Quilts, inc and Moda fabrics. I got signatures from new friends at quilting events and hope to travel some with this quilt, so if I see you I will most likely pull out a pen and ask you for your signature. Thanks for your influence.
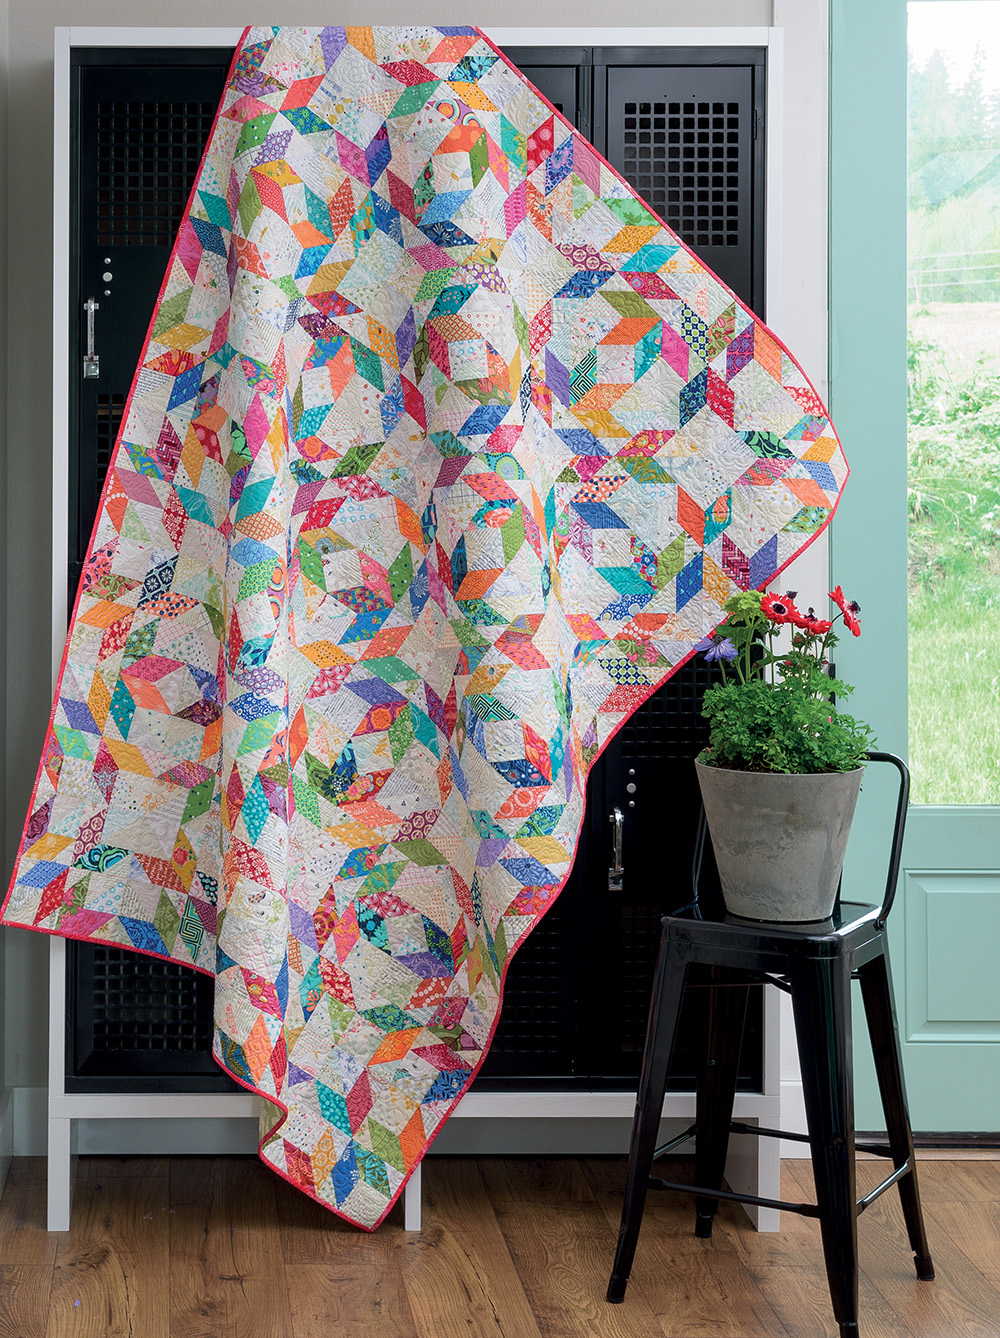
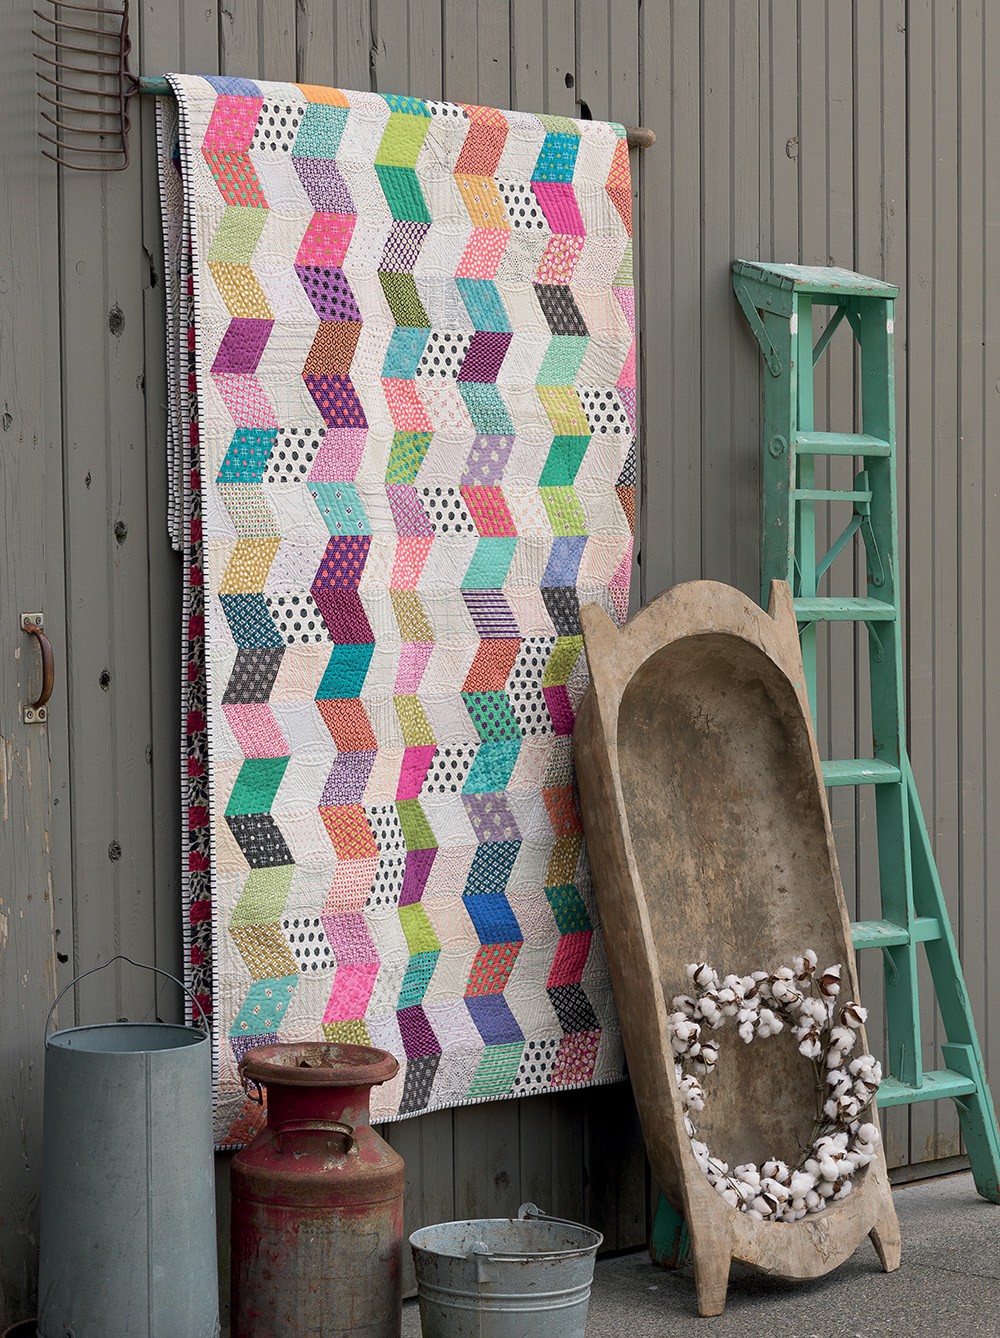
Kim Brackett hit it out of the part with her DIVERGENCE quilt. So much pattern,
color and movement throughout the quilt without a single set in-seam.
My kind of quilt looks hard but it is easy.
The quilt just makes me happy!
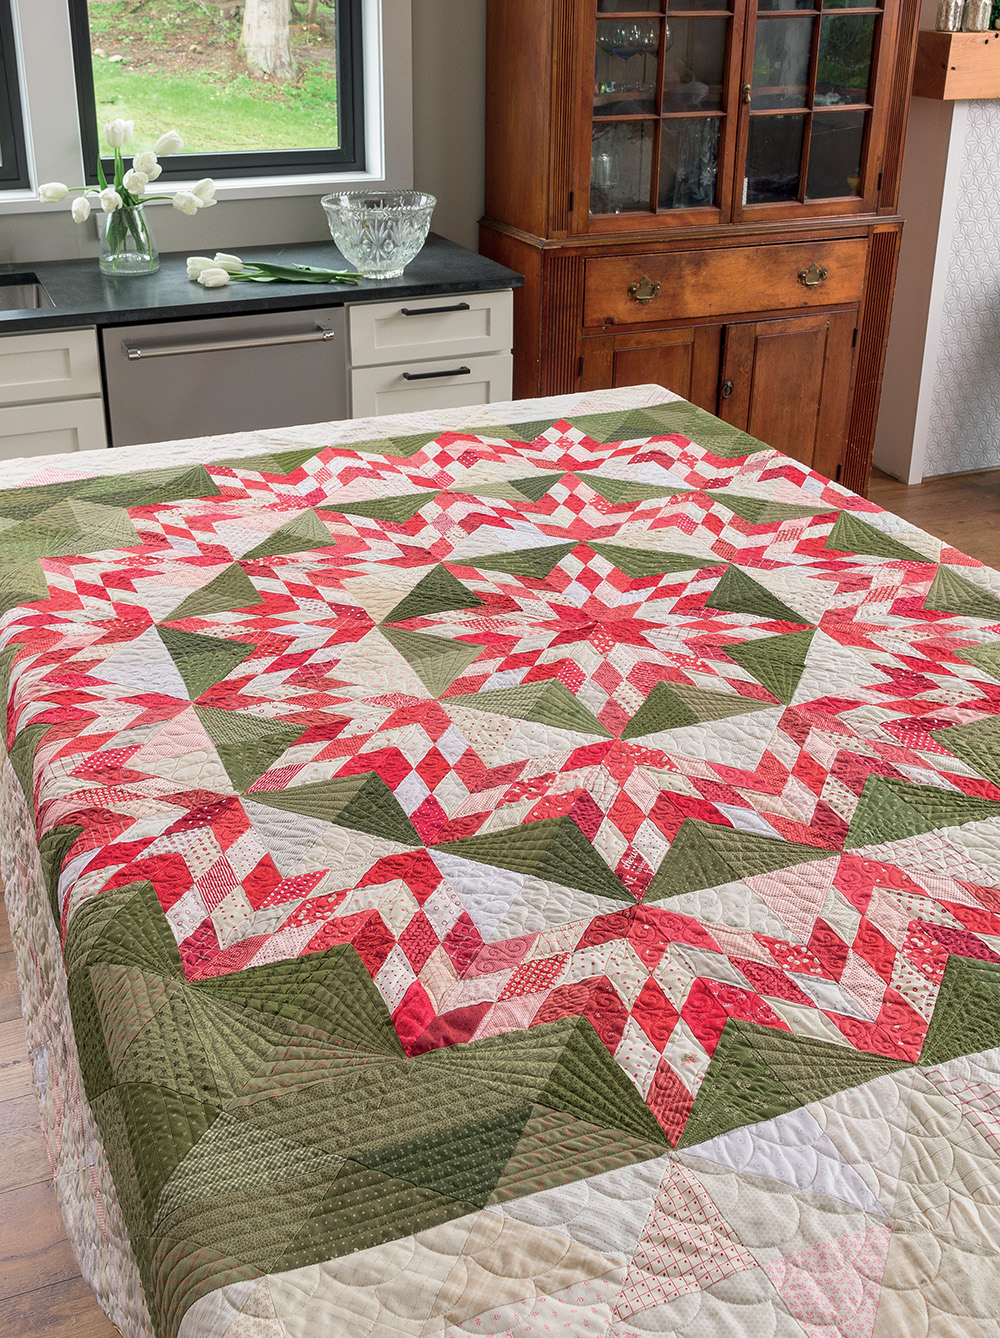
Remember we did not see each other’s quilts until far along in the process. Trapezoid shapes. Geez, what did I do to myself?
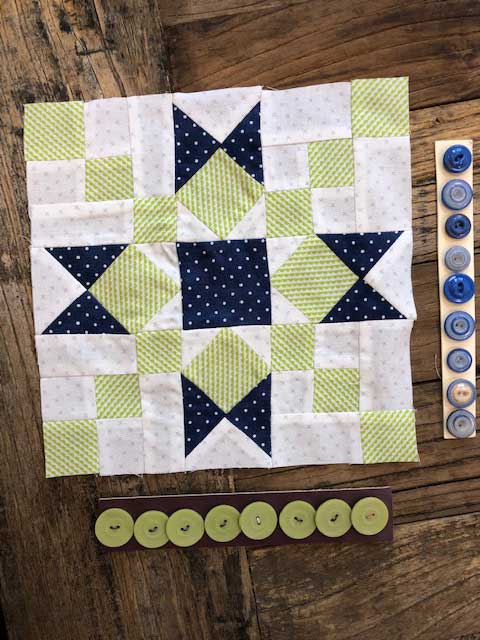
You can never have to many holiday quilt so I went with classic Christmas colors, but wanted to create a spinning effect by making the backgrounds between the stars half darks and half lights. Then I thought it would be a super cool bed quilt with
the star set on point so filled it with background fabrics to float.
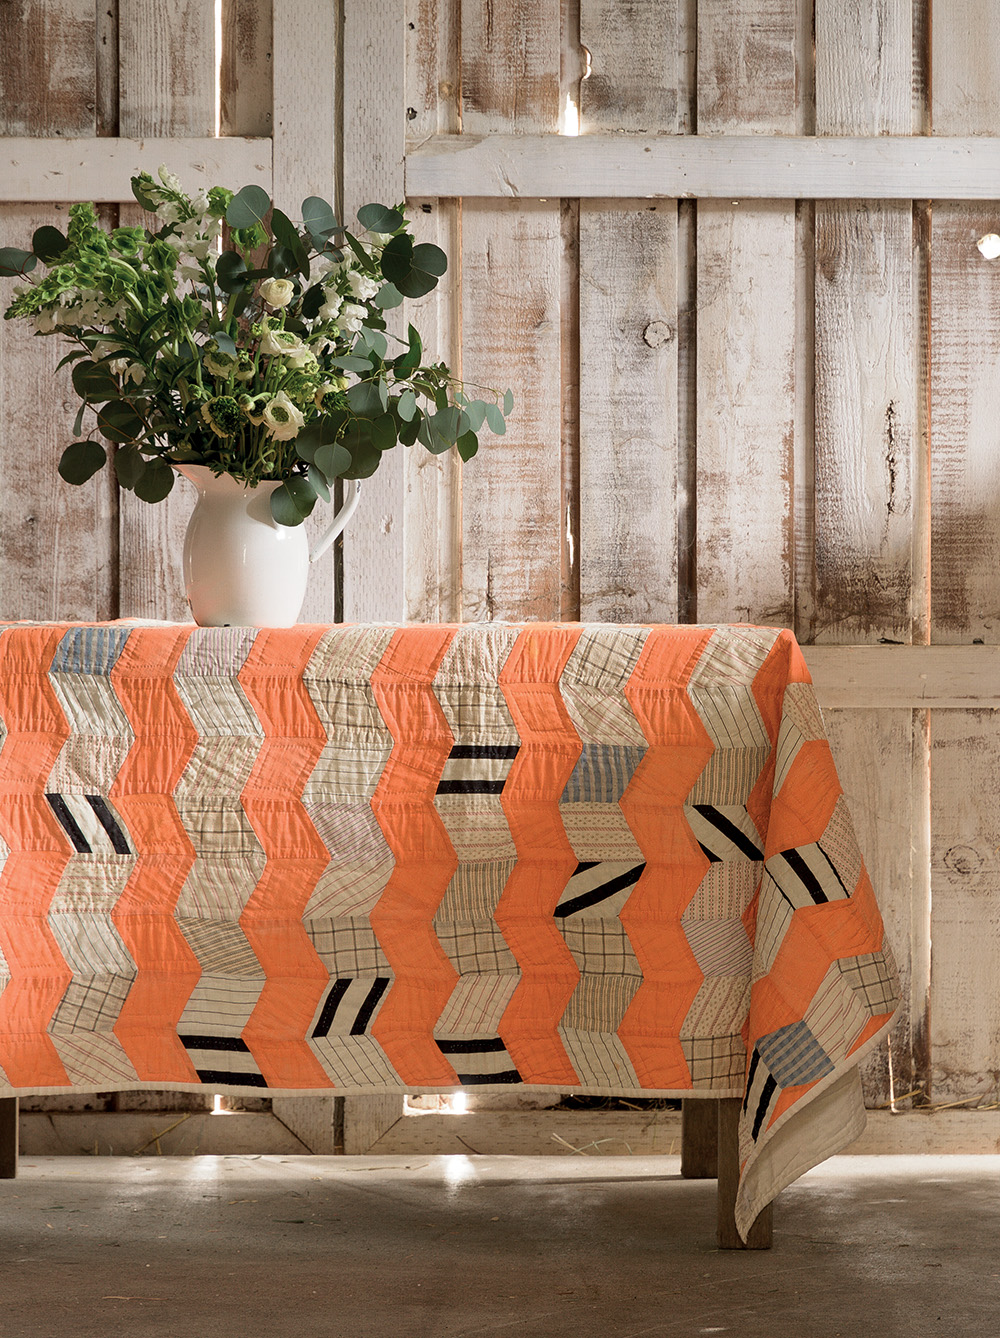
Barbara Brackman, the queen of quilting has graciously included one of her antique quilts in this book. Barbara and I did sisterhood quilts a little different. She sent me pictures of several antique quilts and I knew the Orange one was it. To tell you what a small world it is, I had saved a picture of this quilt and it was on my “to make in sometime life” list of quilts and had no idea
it was Barbara’s quilt.
Barbara reproduced her own quilt as a mini and yes the pattern is also in the book.
This quilt was probably the hardest to decide upon. Since I had seen Barbara’s quilt and it was on my must-make list, how could I think of anything else but the wonderfully faded orange and the black and white stripes and tickings? Seriously how can you mess with perfection? So I started with the graphic black and whites but went with dots instead of stripes, added tickings and vintage-inspired lights. Okay, half the fabric was decided upon. The other half of the quilt is Jen Kingwell’s Lollies fabrics. These fabrics are 8 fabrics in one so it was a breeze to get a scrappy look with a limited amount of fabrics. While not messing with the greatness of Barbara’s quilt, I think my Pot of Gold quilt gives lots of options when looking at color and fabric differently. I will still be making the Orange version. ( thanks to Sarah Huecthmann for piecing the top for me)
I am going to have some guest posts from some of the contributors over the next 2 weeks, and there will be prizes!! Books are in stores now. #sisterhoodofscraps
HAPPY BIRTHDAY GAMMY
I get my laugh, my humor,
my snark, my patience
and so much more from my mom.
I know she would love all the quilts and brag to everyone she met.
Happy Birthday Mom and thanks for nurturing and encouraging all things creative in me.
Enjoy,
Lissa
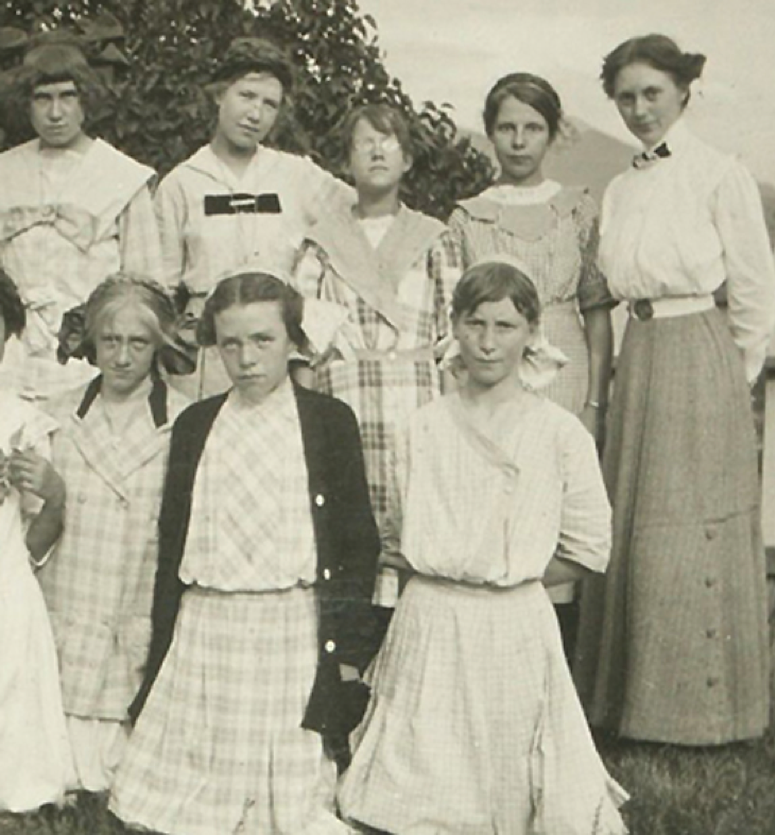 The light fabrics are shirting stripes and plaids, which were quite popular for everybody’s clothing in the teens. Even the giant black and white stripes were probably meant for a snappy men’s shirt, worn with a celluloid collar.
 Ad from 1910
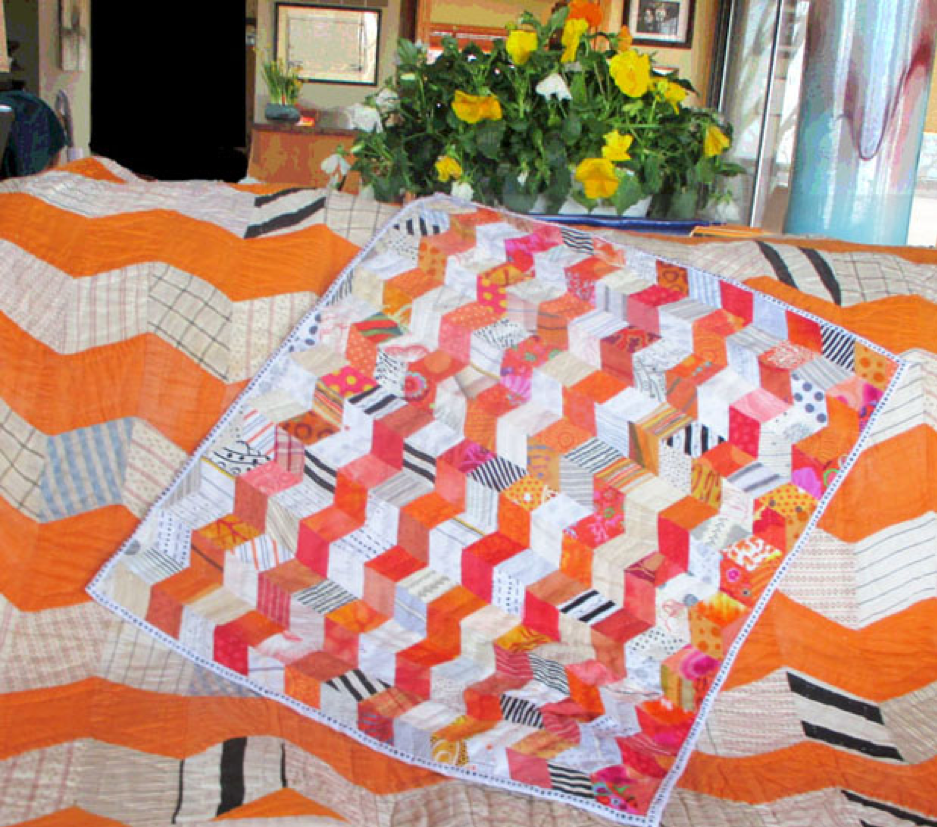
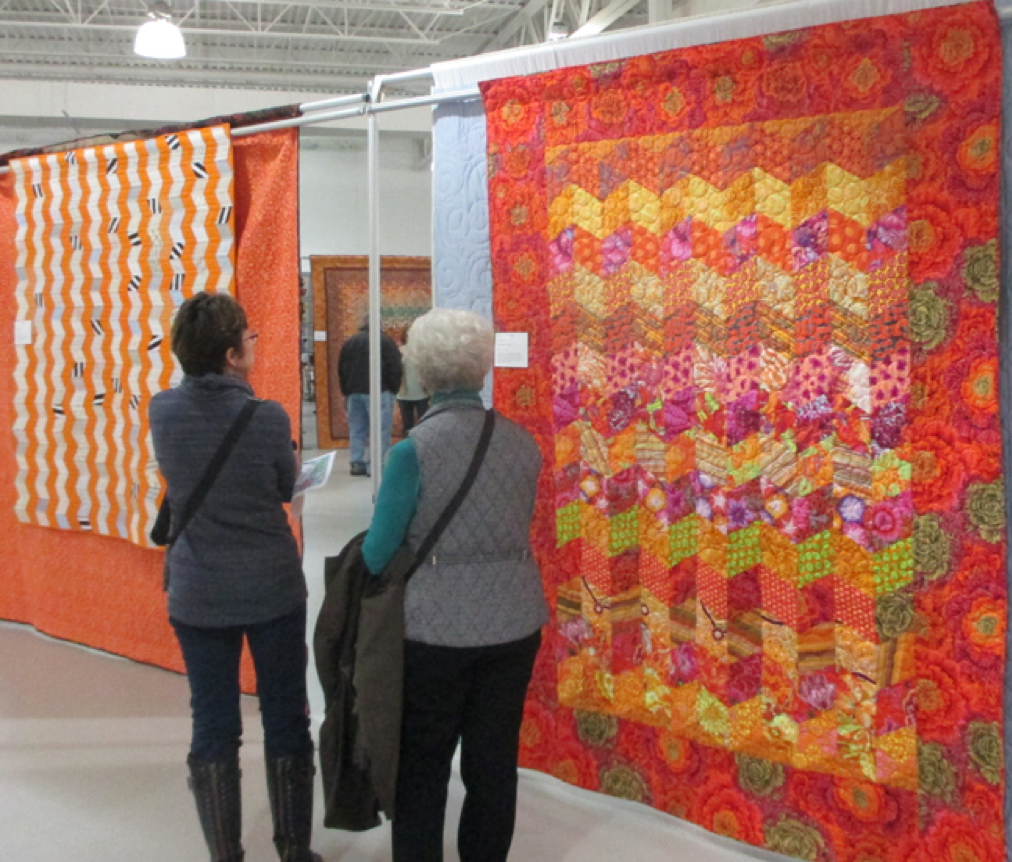 We had an orange-fest at our quilt show a few years ago. The quilt on the left is by Kathe Dougherty, a faithful copy. Karla Menaugh’s on the right was done in a Kaffe Fassett workshop.
 Kathe was really able to match the look of a century ago.
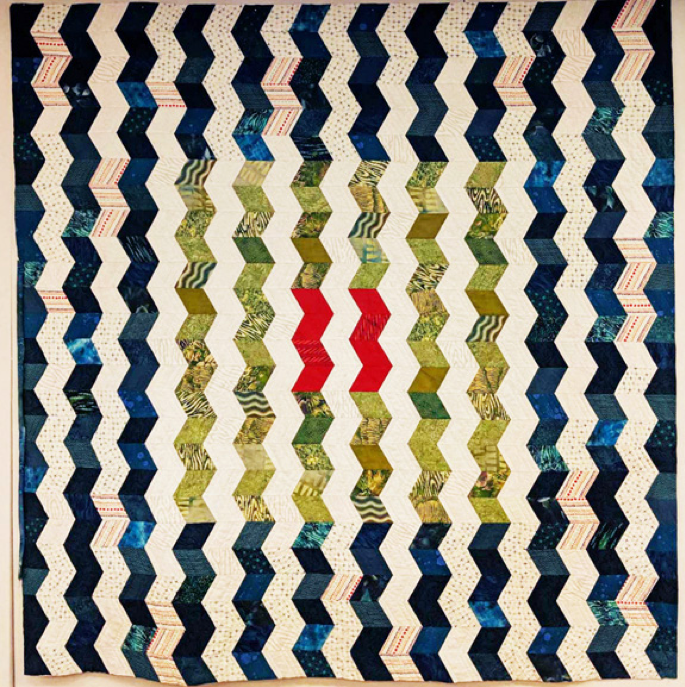 Orange Zig-Zag by Carol Gilham Jones (Not Orange)
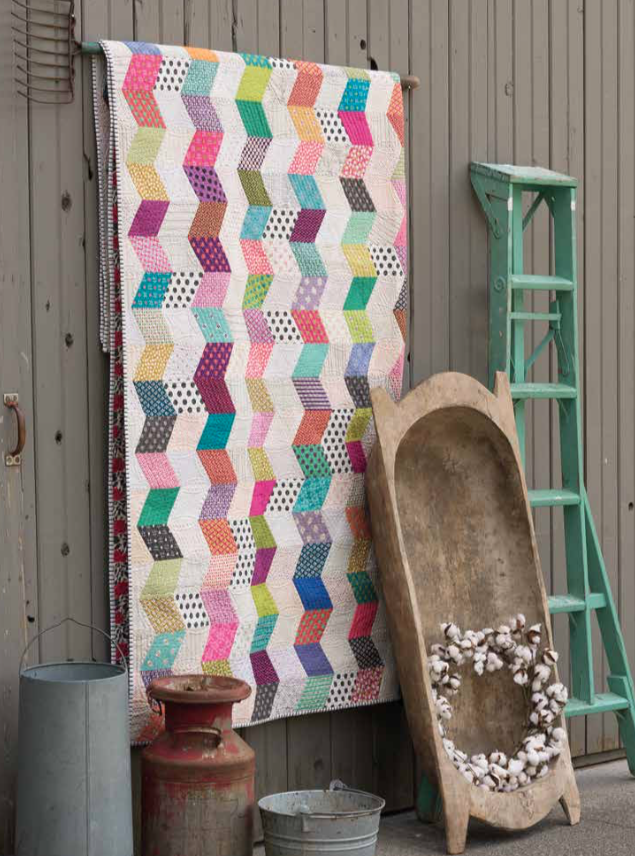 Please share your version by using the hashtags #sisterhoodofscraps.