Happy Halloween with Elizabeth Hartman & Moda’s Spotted Fabrics!
Hello, fellow quilting enthusiasts!
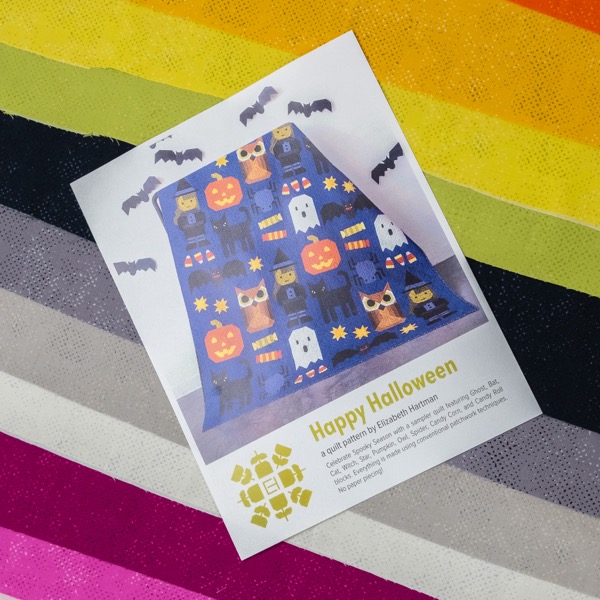
The spooky season is upon us, and I couldn’t resist diving into one of my favorite Halloween-themed projects. Today, I’m sharing the perfect combo for your October sewing lineup: Elizabeth Hartman’s Happy Halloween quilt pattern paired with the Spotted fabric collection by Moda Fabrics. Trust me—this project will have your sewing machine humming with excitement!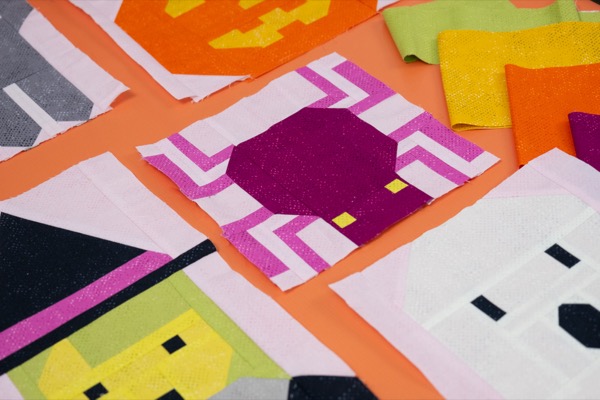
Why I Love the Happy Halloween Pattern
Elizabeth Hartman has a knack for bringing whimsy to quilting, and this pattern is no exception! Happy Halloween is a fun, spirited quilt featuring charmingly spooky characters like black cats, ghosts, jack-o’-lanterns, and more. The playful shapes and detailed instructions make it beginner-friendly while still offering enough variety for seasoned quilters to enjoy. I have always loved Elizabeth’s patterns but was a tad bit scared, I fell in love and a friend of mine highly encouraged me to dive in.
The Magic of Moda’s Spotted Fabrics
Now, let’s talk fabric! If you haven’t had a chance to play with Moda’s Spotted collection by Zen Chic, you’re in for a treat. These fabrics are subtle yet striking, featuring tonal spots that add texture without overpowering your design. The speckled look is perfect for Halloween quilts because it gives off a slightly eerie, mysterious vibe—without going full-on haunted house. Plus, with the wide range of colors available, you can get creative with the way you showcase each spooky character in the pattern.
For this quilt, I opted for a mix of deep purples, eerie oranges, ghostly whites, and midnight blacks from the Spotted line. These colors play off each other beautifully, adding dimension to the quilt and making each block pop. The texture of the fabric also gives the quilt a rich, layered look that you’ll love seeing unfold as you stitch.
Bringing the Characters to Life
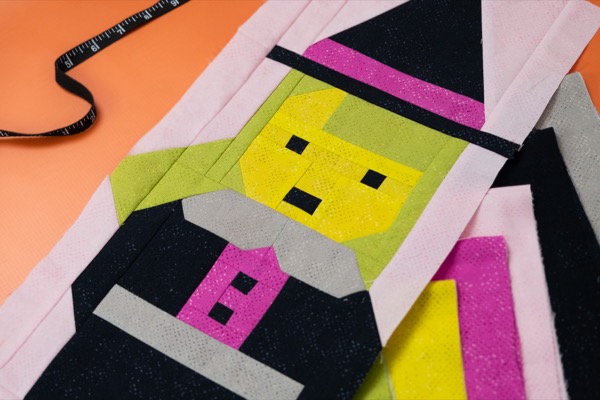
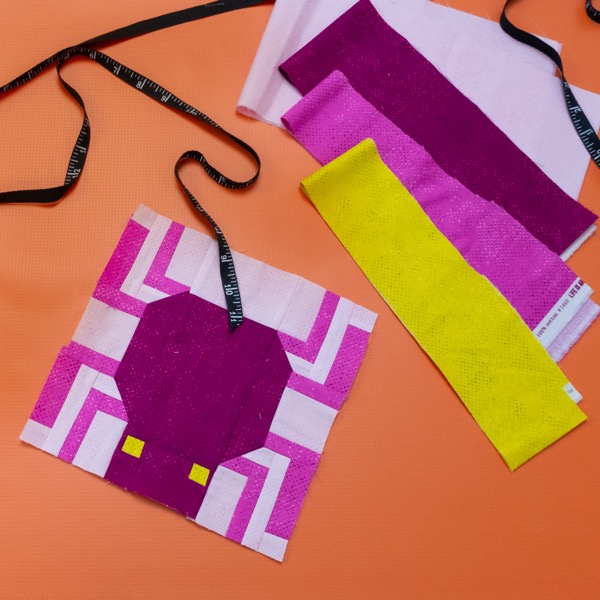
One of my favorite parts of this project was choosing which Spotted colors to pair with each character. Here are a few of my choices:.I was inspired by a color option offered by The Quilt Spot. They are offering a Ruby Star Society Speckled version with a pink background fitting my current obsession of anything pink and orange. I decided to dive in using Spotted as my fabric choice. With the wide range of colors I had plenty of choices to create this whimsical option.
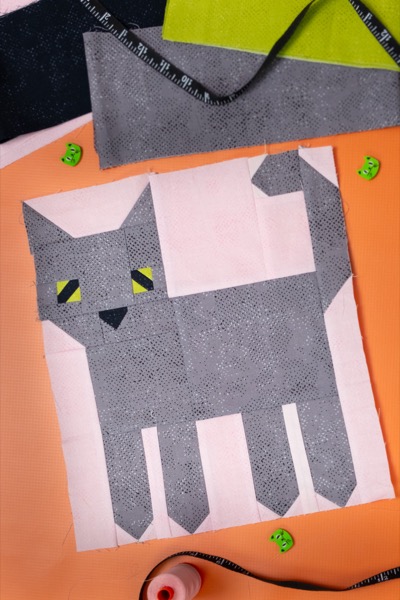
- The Black Cat Block: I went with a dark grey from Spotted, using a eerie green eyes, they make me so happy. The tonal spots add just the right amount of depth to the sleek, spooky cat.

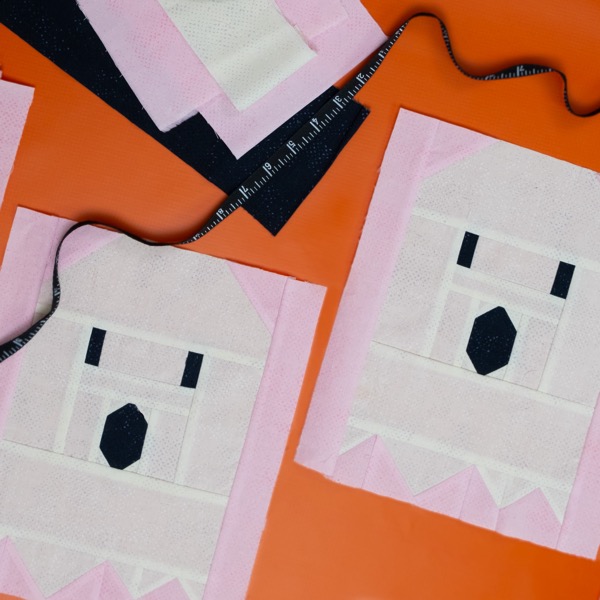
- The Ghost Block: For the ghost, I used a soft white Spotted fabric. The subtle texture of the spots brings a “misty” feel, giving the ghost a floating, ethereal quality popping of the soft pink background..

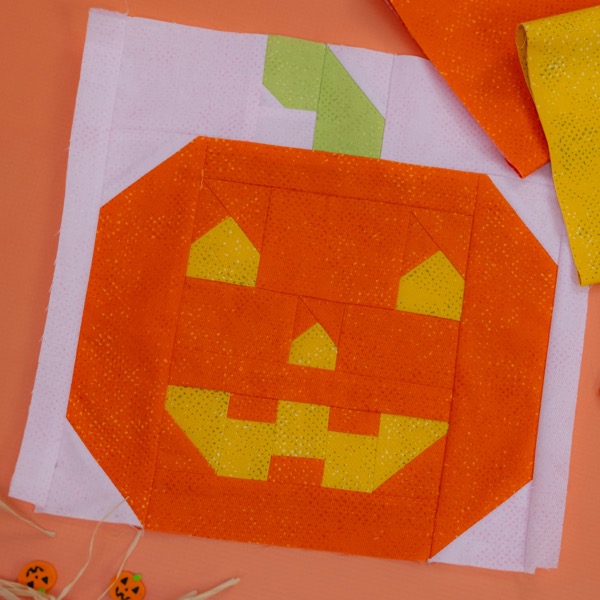
- The Jack-O’-Lantern Block: Of course, no Halloween quilt is complete without a pumpkin! I chose a vibrant Spotted orange for the pumpkin, which gave it a fun, quirky twist. The speckled effect really enhances the playful facial expression of the jack-o’-lantern.

- The Adorable Witch I was contemplating whether the skin was too green.,never!!

- Dont get me started on the Spider,. Elizabeth is brilliant on how this is constructed.
Tips for a Wickedly Fun Sew-Along
If you’re thinking of starting your own Happy Halloween quilt, here are a few tips to make the process even more fun:
- Mix and Match Your Spotted Fabrics: Don’t be afraid to play with contrast! The subtle tonal shifts in the Spotted collection give you plenty of room to experiment with light and dark pairings. I added a few extra colors than the pattern suggested so I could have options along the way.
- Take Your Time with the Cutting: Cutting one design at a time and labeling each piece is key.. It’s worth slowing down here to make sure your don’t miss any pieces. Elizabeth offers instructions to make one of each of the designs for a wall hanging or four of each for a big version. Can you guess which one I choose?
- Pace Yourself: This is the first time I have tackled an Elizabeth Hartman pattern. Yes, I have always been scared to tackle something like this. A friend of mine teaches her patterns at a local shop. I love every one she makes.. If you are making the big quilt, make one block first to fully understand the instructions. They are so well written and once you have tackled one, you will be so excited to make the next. There is a lot of sewing but so worth it.
Wrapping it Up!
If you’re looking for a project that combines charm, creativity, and just the right amount of spooky vibes, Elizabeth Hartman’s Happy Halloween pattern with Moda’s Spotted fabrics is the perfect pick. You’ll love the way the fabric’s texture brings the characters to life, and the pattern’s playful design will make you smile with every stitch.
Whether you’re quilting for yourself or preparing a handmade gift for a fellow Halloween-lover, this project is bound to become a seasonal favorite. Don’t forget to share your finished quilts on social media—I can’t wait to see your unique spins on this festive combo!
Until next time, happy quilting!
