Tag: Oh Scrap

Oh Scrap

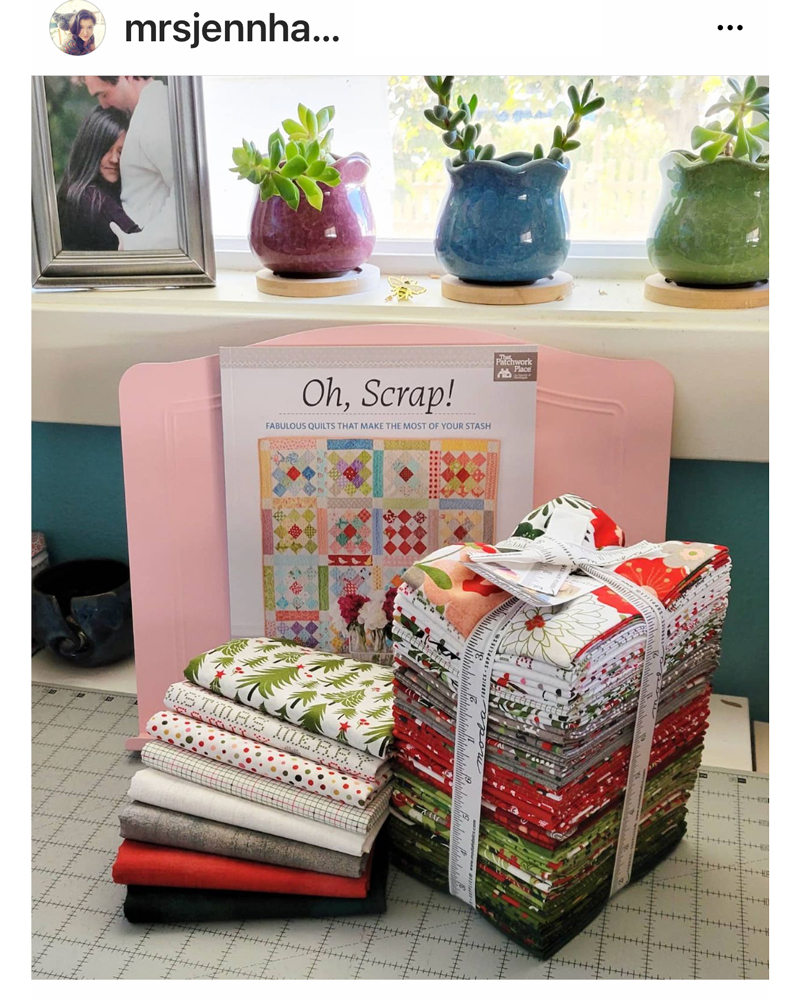
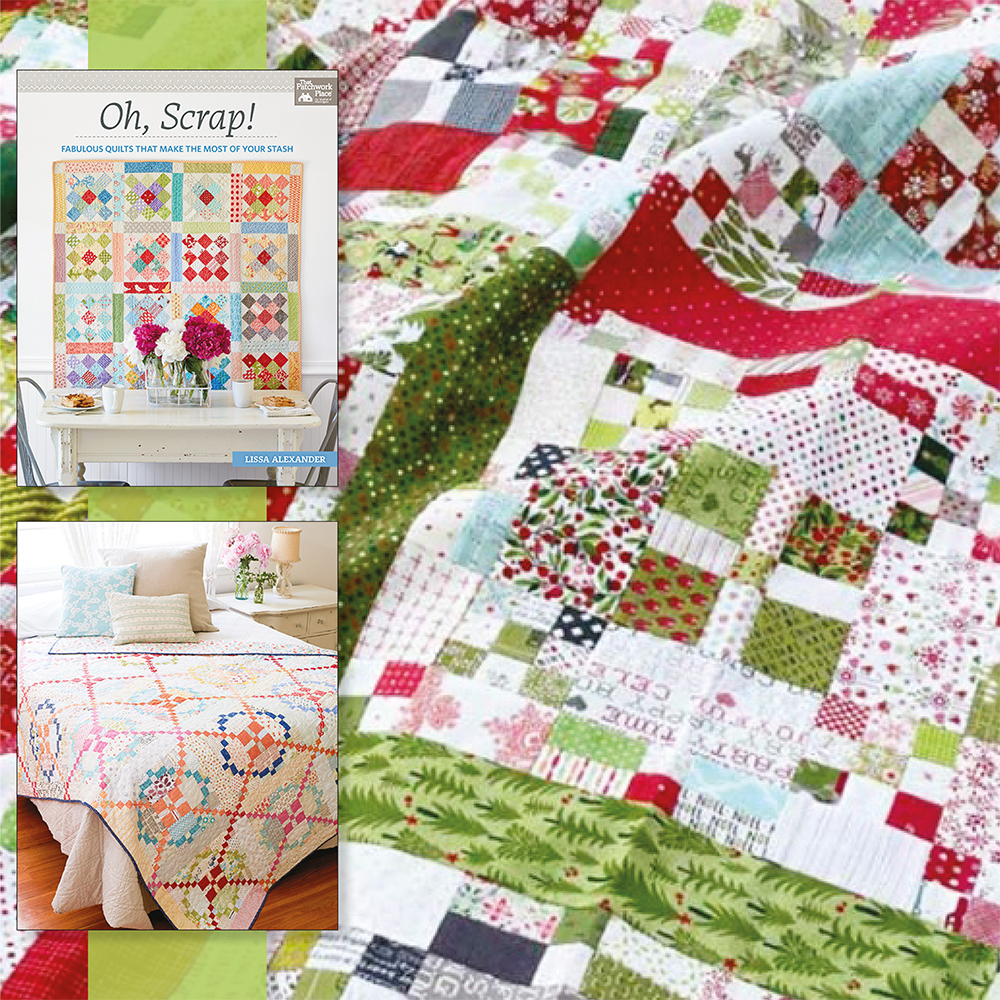
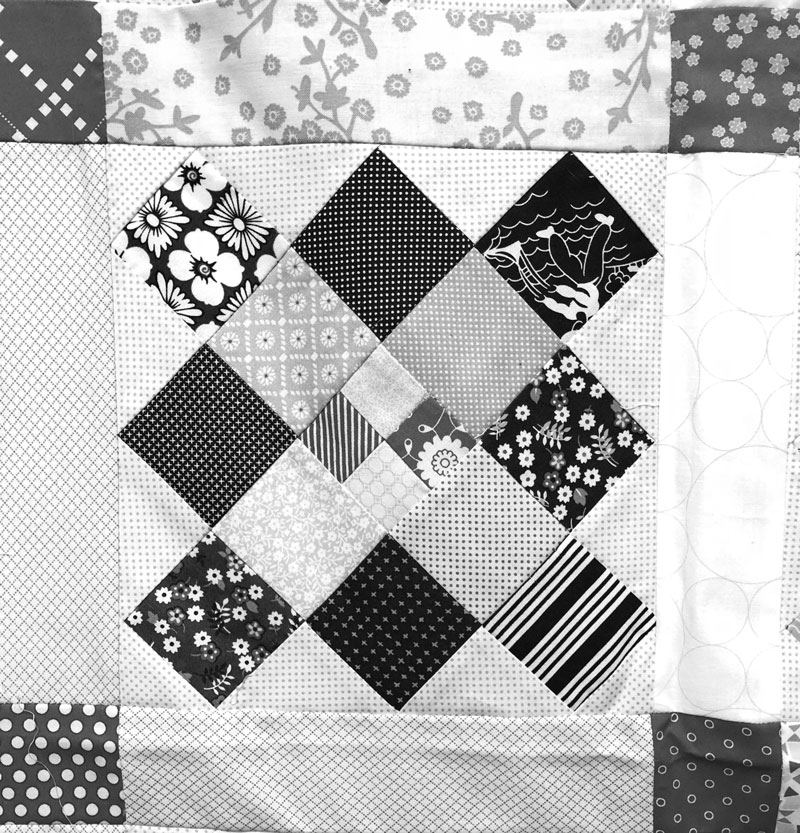
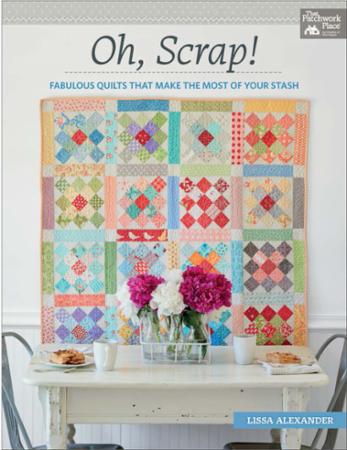
Oh Scrap was my first published book in 2018. It had never been my dream to write a quilt book, but I was intrigued at the process. I like to learn and I am always up for a challenge.

And a challenge this was. In 2016,  I was experiencing massive headaches, which eventually caused a seizure. While in the hospital, they discovered I had a subdural hematoma. I am getting to the part about the quilt book but need to fill you in on the back story. After many more seizures, the doctors got a handle on those and I went home. Headaches continued, back in the hospital and had a right craniotomy on March 16th, 2016.

Brain surgery – Egads!!

Because of the seizures I could not drive for several months, state law. I was just sure that my brilliant doctors had now created Izzy 2.0 and my brain was going to be bionic. I imagined myself as the bionic woman, I can do anything after all of this.

While off work during this time, I decided I could/would tackle a quilt book. So it began. I kept a file folder on my desk, titled Oh Crap.

Is anyone going to like this?

Why am I second guessing myself, after all I am the bionic woman.

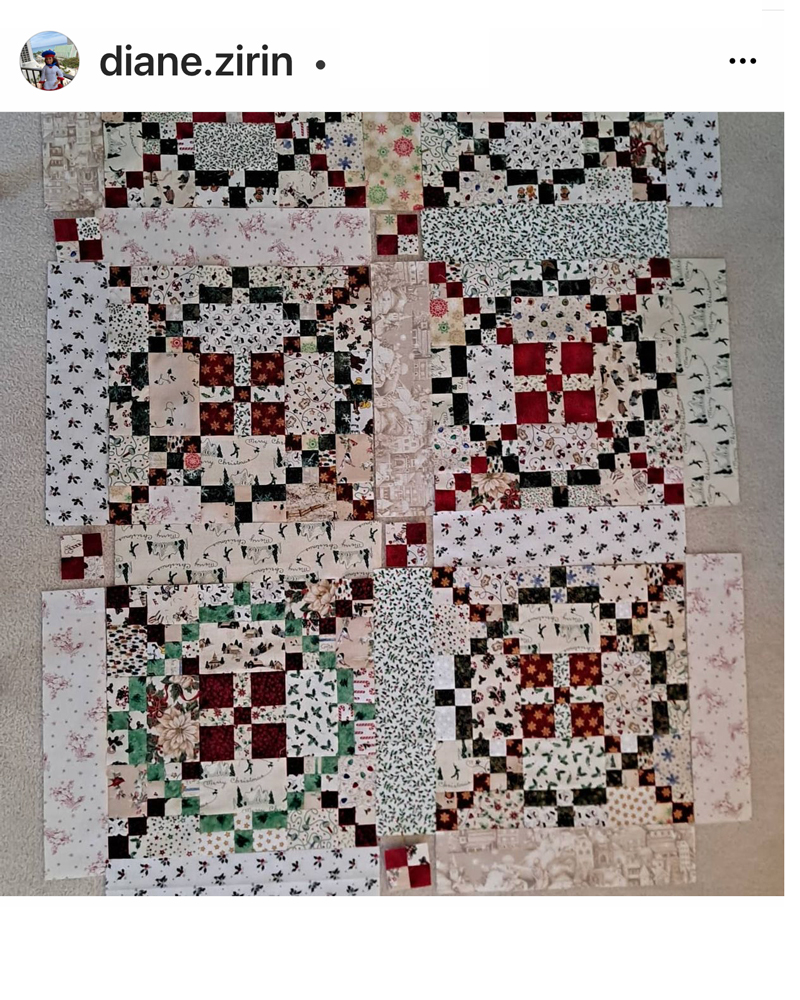
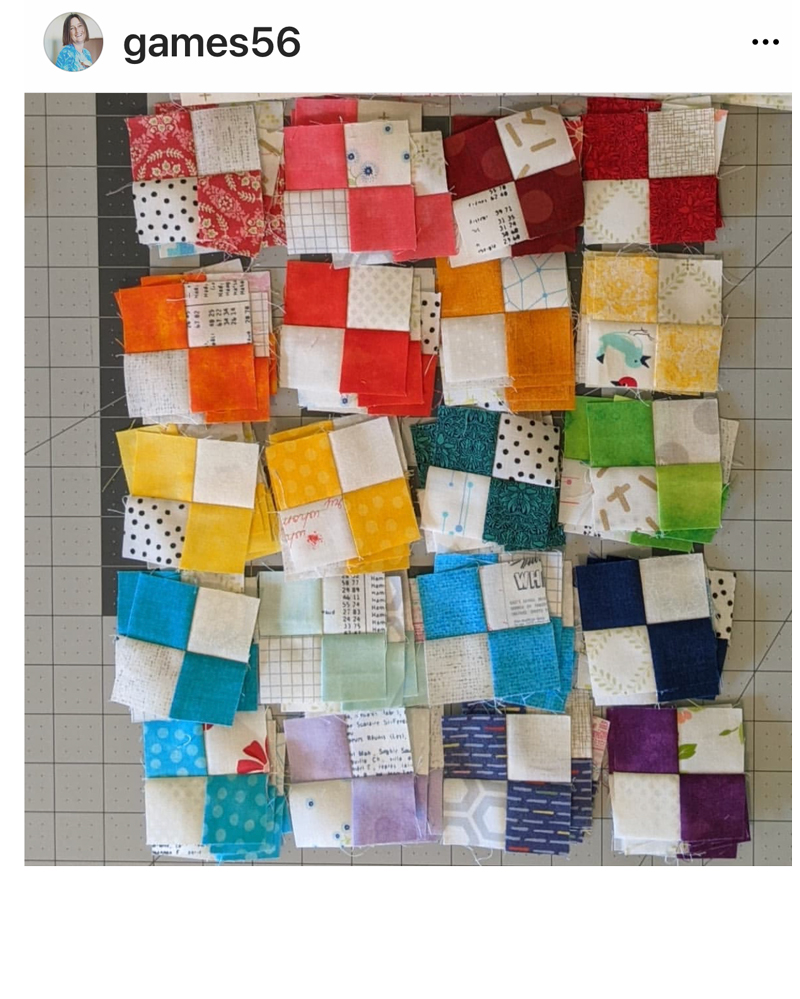
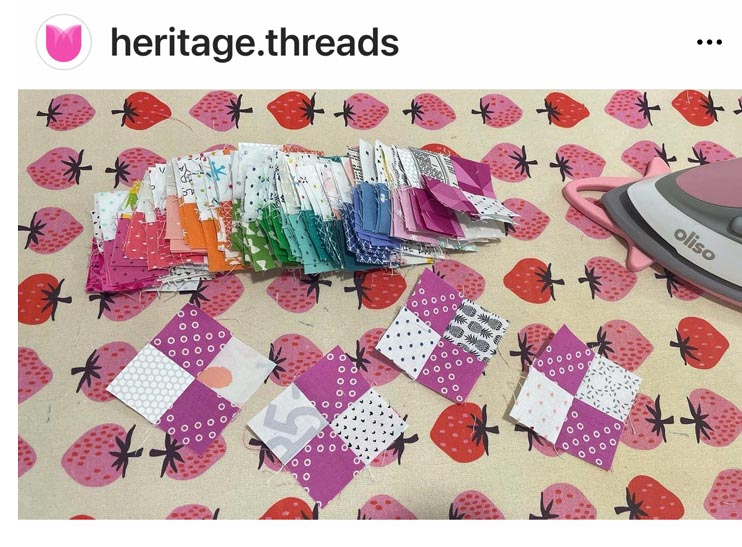
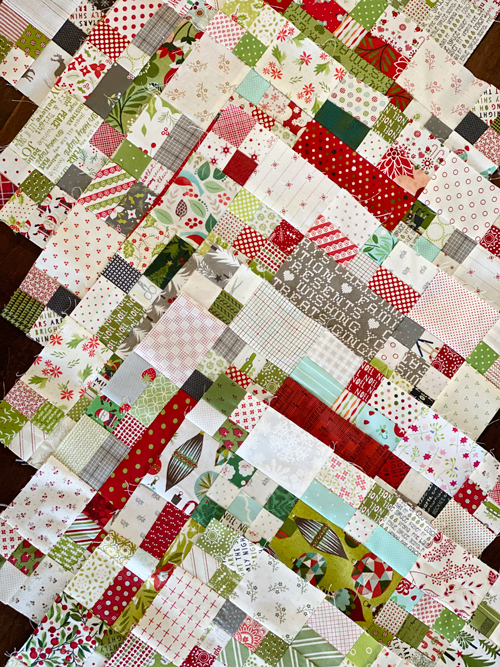
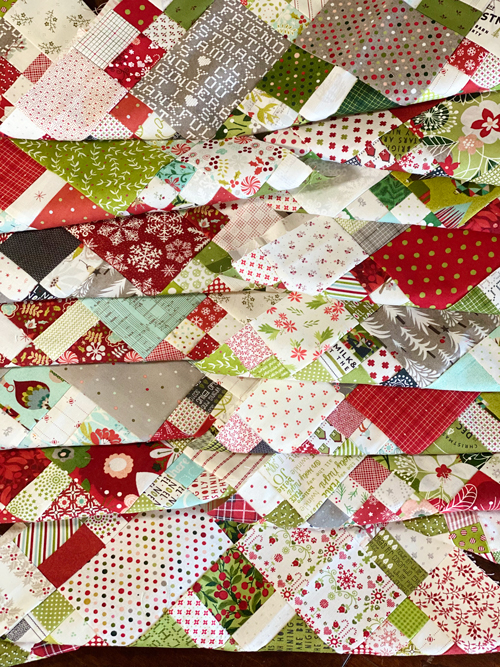
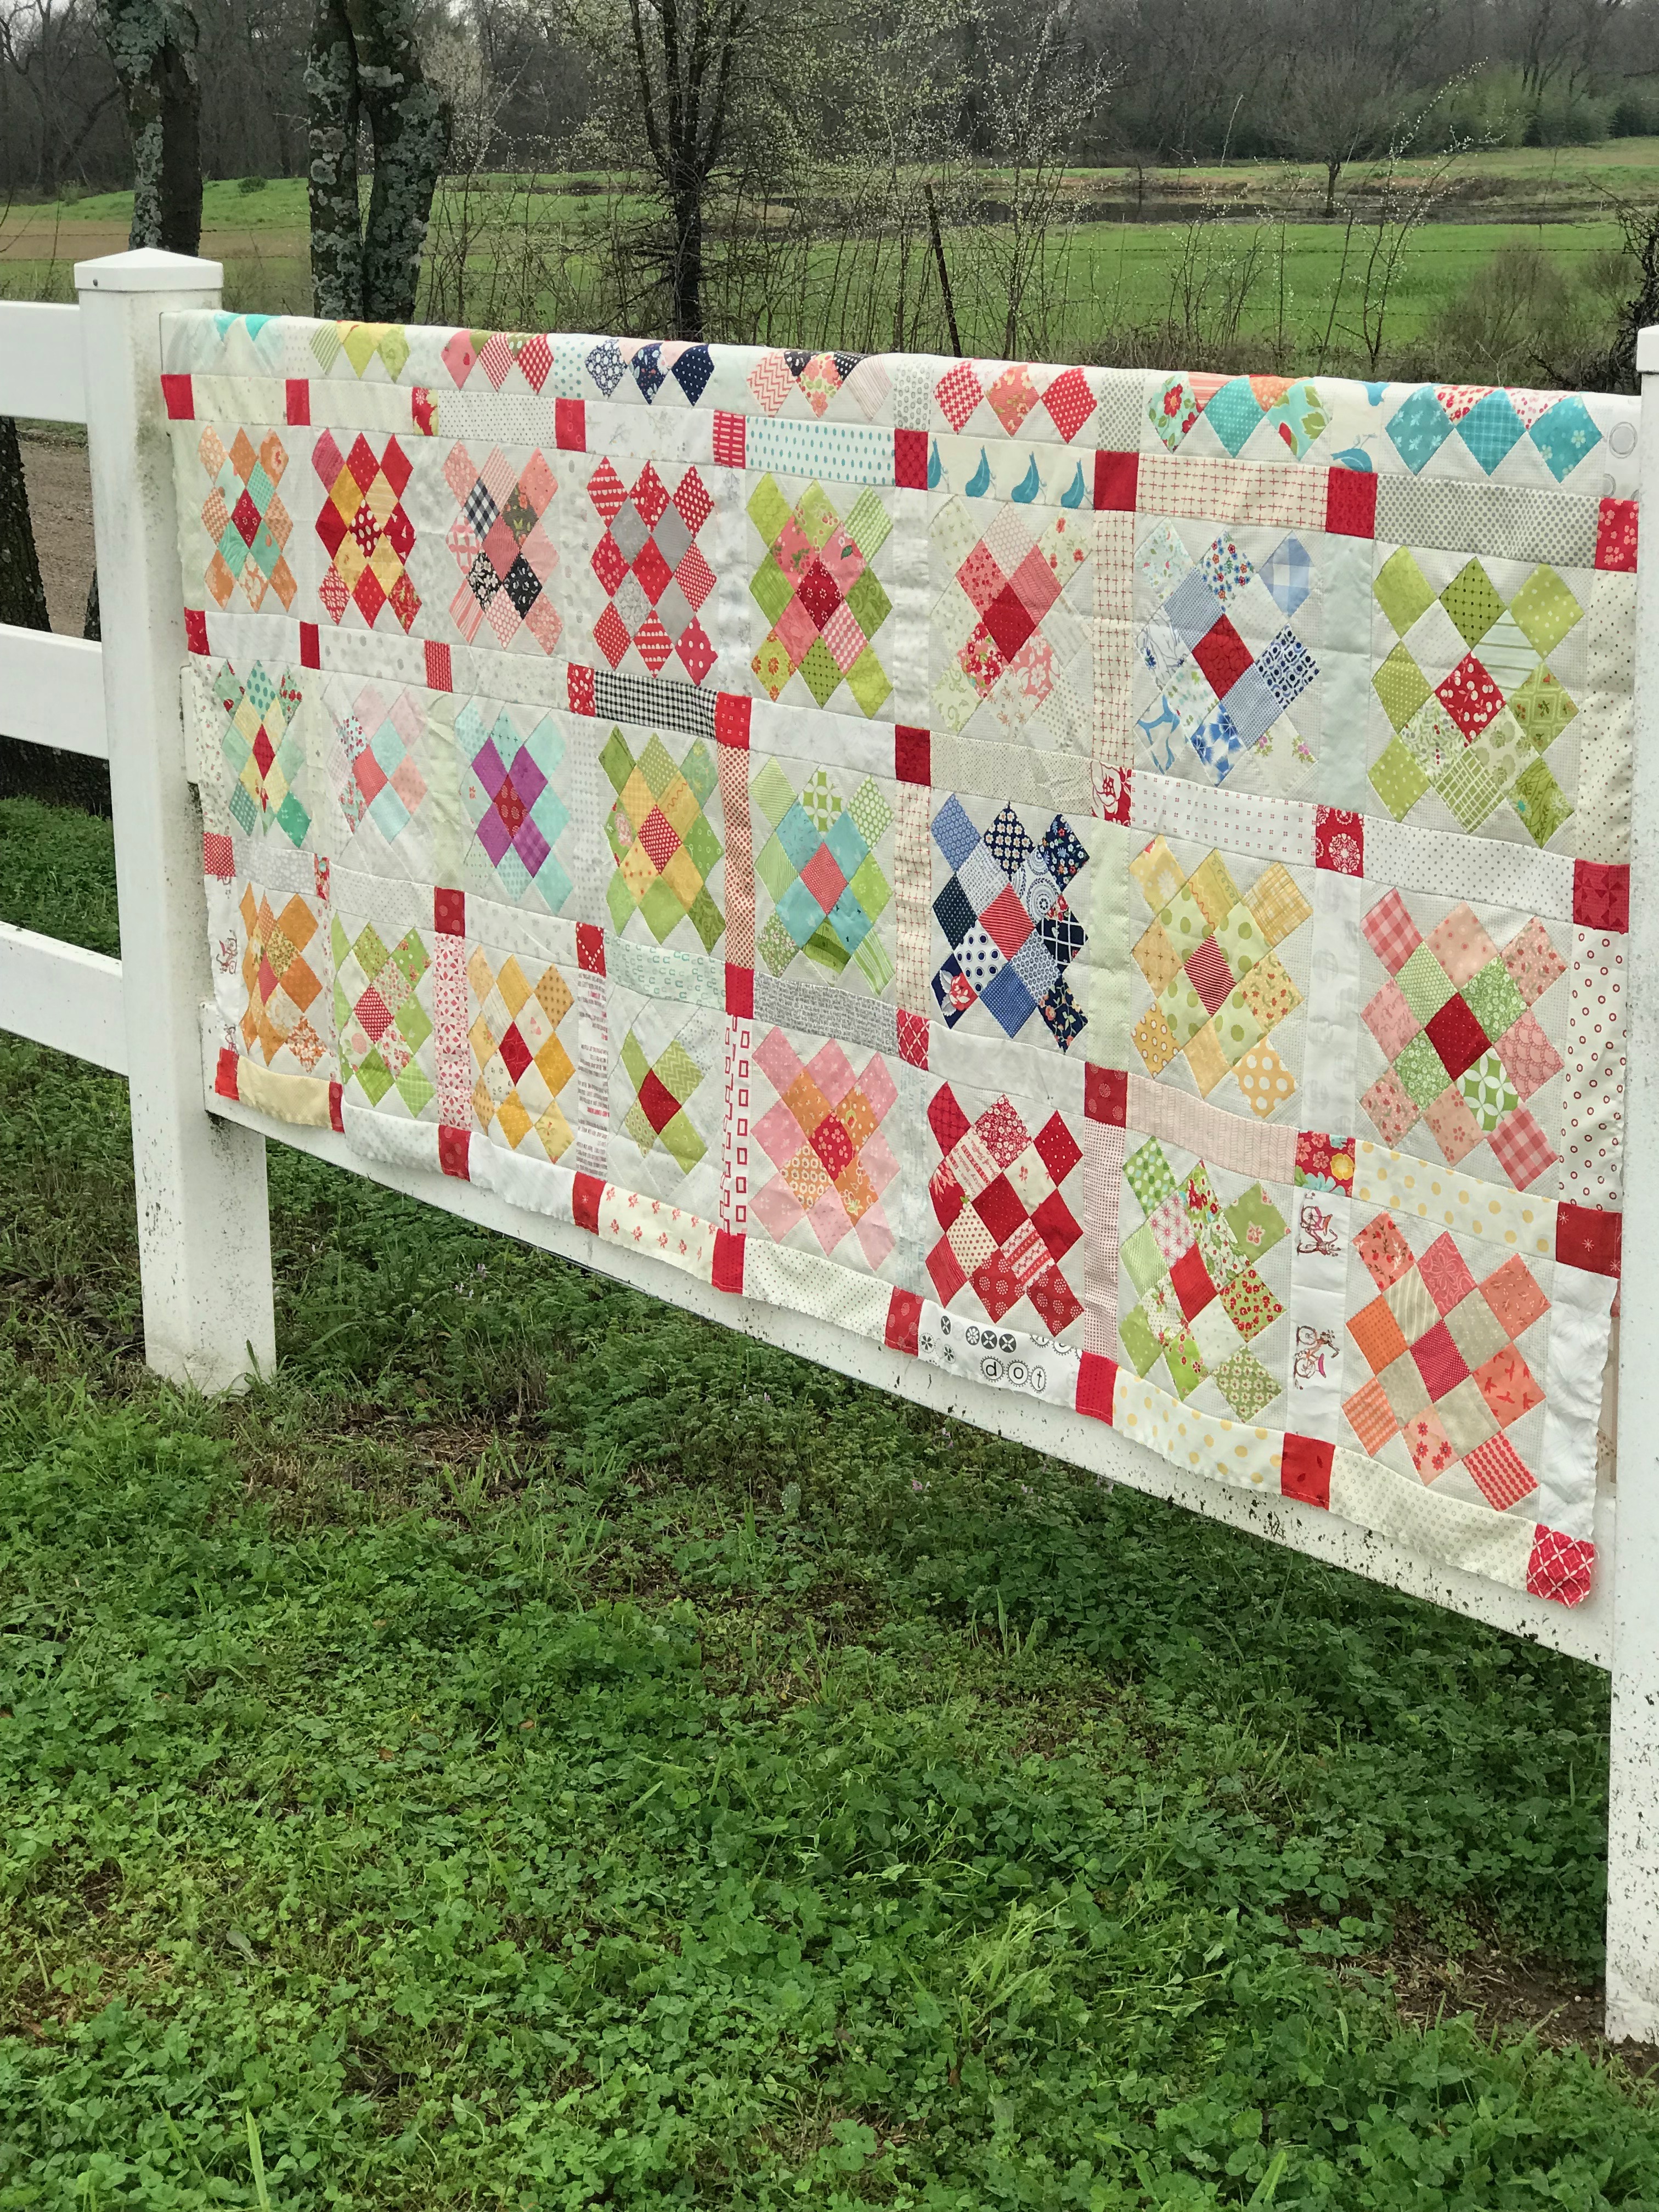
Once the quilts were completed and projects were sent in, I told me editor of my Oh Crap folder and that is actually where the name of the book came from, Oh Scrap.  This book was a solo book and then I went on to do 3 more books that were collaborative books with various Moda designers and other friends in the quilting industry. I have written about this book before, so for more details, pictures and more check here, here and here.

Writing a quilting book is no small feat. It begins with an idea, a spark of inspiration that blossoms into a collection of designs, patterns, and stories. Authors pour their hearts and souls into the creative process, testing and refining each pattern, selecting fabrics, and weaving narratives that resonate with fellow quilting enthusiasts. The journey involves countless hours of stitching, experimenting, and revising until the vision is realized on the pages of the book. I have such a great appreciation of my friends and fellow authors.

Oh Scrap

Fast forward a few years and I received a call from my editor about the future of Martingale Publishing.

Martingale Publishing, a renowned name in the quilting book industry, played a pivotal role in bringing quilting inspiration to homes worldwide. Known for its commitment to quality content and being an employee-owned company, Martingale fostered a sense of community and collaboration within its ranks. The decision to close its doors came as a surprise to many in the quilting world.

The closure of Martingale Publishing marked the end of an era for myself and quilting enthusiasts. As an employee-owned company, the decision to close must have been a difficult one. While the specifics of the closure may not be fully known, it serves as a reminder of the challenges faced by even well-established entities in the ever-evolving publishing landscape.

Writing a quilting book is a laborious yet fulfilling endeavor, culminating in a tangible representation of one’s passion for the craft. “Oh Scrap” and the closing of Martingale Publishing remind us of the ever-changing landscape of the quilting world. As the quilting community adapts to new opportunities and challenges, the legacy of creativity and camaraderie will continue to thrive, stitching together a vibrant tapestry of shared experiences.

Authors were given the opportunity to own all of their books and the assets included with that. This is a very important story to tell. It is a bit complex and while the quilt designs are my own, the text, photography and illustrations are not. Martingale could have very easily sold this off to the highest bidder with no regards to how the books would be stripped apart, reused and repurposed with no acknowledgement of the original creator.  Yes this has happened before with other publishers and it was not pretty.

I am proud to own all of the assets of my books. While I will always direct purchases to mom and pop quilt stores, many of my books are no longer available. I am in the process of creating individual patterns and as that is happening, I have partnered with Fat Quarter Shop to sell my books as downloads. To purchase Oh Scrap, click here.

This is very exciting especially for international quilters who often had to pay way to much for printed books.

I cannot thank my life-long friends from Martingale enough for believing in me and teaching me so much.

-modalissa

Oh Scrap QAL- Sashing and nine patches

hello, Hope you had a nice Thanksgiving break. I so enjoyed the break and can never have enough food or family time. Not all my crew was able to come home but we did have a houseful.

I re-arranged my sewing room and did some SECRET SEWING and vegged on the couch some, so it was a productive break.

The countdown to Christmas has begun both at home and at work. At work we are working on getting the rest of Holiday 2022 out to our salesteam. They will be making their rounds showing stores fabric lines shipping info next summer. seams so crazy to be living in Christmas 2021 and 2022 all at the same time. FUN ! FUN!

Today’s assignment on the #OHSCRAPCHRISTMASQAL is to add your sashing pieces. I cut my sashing pieces first since they are a bigger piece and I wanted to make use of some of the larger scale prints.

The corner squares are nine patches so you can use parts and pieces from your four patches or following the directions in OH SCRAP to assemble these.

This should come together fairly quickly. I have heard from several of you that have completed your quilt top already. I know when I am excited about a quilt project I am working on, I cannot stop sewing.

As a quilter, I am so highly influenced by color so seeing some of the combinations other people have put together always inspires me. That is the reason I had to make this Christmas version, inspired by @happinessinthemaking and the Hustle and Bustle fabrics by Basic Grey.

I wanted to share just a few of the pics I found on Instagram of some of the progress happening on the QAL as more color inspiration.

This is where it all started. A fat quarter bundle and some extras. I love how Jennifer has her book on a bookstand for easy reference.

i

Richy’s from Basic Grey ‘s version is dreamy, using the greens where I used lights.


Kim Walus  of @bittybitsandpieces has finished her quilt top and I love it. It is always amazing to me how scrappy versions can be so different and intriguing to zoom in to see all the different fabrics.

I can’t wait to see Candee complete this one. It is going to be a classic for sure!


Love the romantic feel of Dianes’ progress.

This one just makes my heart happy. I love anything rainbow and this fun colorful set of four patches from Gina of @Games56 is a ton of fun! Gina is a long armer so I bet the quilting will be fun to see as well.

I fell in love with Jen’s 4 patches. Don’t they look like boxes of trusty fruity or mike and Ike’s? I was drawn in to the background fabric also but realized that is her Ruby Star ironing board cover.


Thanks so much for following along on this little quilting journey. Check back next week for my final post about the quilting  and maybe a few other surprises.


Enjoy,


-modalissa


Surrounded QAL- Blocks

I have had so much fun sewing with you on this QAL.   I have enjoyed the pictures you have shared and so proud of those of you that have already completed your quilt top. Kuddos to you!!

This stack of completed quilt blocks looks like a hot mess but will turn into a wonderful keepsake. What is your favorite part of the quilt making process? I love picking out the fabrics, planning what the project is going to be and making a test block. Then I am very inpatient after that. I just can’t wait to  see each part of the quilt develop.

Quilting is my job and my hobby but mainly it is my therapy. The hum of the sewing machine and watching bits and pieces of fabric put me in a mediative zone of some sort.  I sew and sew and sew until the quilt top is complete, then  I get to the point of second guessing some of my choices, kind of a lull in the process.

I send 99% of my quilt tops to be machine quilted. Once I get the quilt back from the quilter, it is like I receive a special package of magic that has made my quilt come to life. Not that the quilt is full of sparkles, glitter and neon thread, but there is just something so special about the artistry and texture that the quilter adds to my project. More on this in a future post.

I don’t have too many tips on how to assemble your blocks other than just do it and enjoy the process. Each block is a creation all it’s own when working scrappy.

What fabric is going to be the prom queen?

What fabric has a bit of the clash factor?

Squint at the blocks and see what fabric choices worked and some not so much.

Don’t dare rip anything out if you don’t like it, just learn from it.

I recently was on a photo shoot where some of my quilts were being photographed. Through the lens of the camera I saw things that were like, Oh Wow! that probably was not the best fabric placement choice.  This is where I get the saying, not all the fabrics can be the prom queen and only my over critical eye of my own work would have ever even noticed.

We are taking a break for the Thanksgiving Holidays and will be back to talk a little about sashing, corner squares, pieced backs, quilting and binding.

Enjoy your family, friends and health and I am praying for moving closer to some degree of normal. (fingers crossed)

Use the hashtag #OhScrapChristmasQAL so I can follow along.

SIDE NOTE! The global supply chain has been tough this past year and has created an overall upheaval in deliveries. This is tough especially for the  independent quilt retailers.  Be sure and support your favorite quilt or specialty retailers  during this holiday season. If you don’t have a quilter on your shopping list, then buy yourself a quilty present, wrap it, put it under the tree, act surprised when you open it and thank “whoever” bought it for you because they knew just what you wanted. (ask me how I know?)

Break for Thanksgiving
-Wednesday, Dec. 1st – Sashing
-Wednesday Dec. 8th – Assemble Quilt top

Enjoy,

-modalissa

Surrounded QAL- Week 5- Side Bars

Side Bars- That is kind of a funny name for the pieces we are going to be working on this week, but I had to name them something.

These little side pieces are interval in making the design happen. Thought I would share a little history about this quilt design and my inspiration for this color option.

The geometric pattern of this quilt–commonly known as Burgoyne Surrenders or Burgoyne Surrounded–is said to refer to one of the most pivotal events in the American Revolution. In 1777, the British failed in their attempt to take control of the strategic Hudson River, and in the end British General Burgoyne with nearly six thousand of his men were surrounded by American troops and forced to surrender near Albany, New York. Burgoyne’s army is represented by the squares at the center of the blocks, encircled by the American troops. This design design could have also been inspired by the simple, grid-like patterns seen in handwoven linens and woolen coverlets of the first half of the nineteenth century.

When my book, Oh Scrap launched there were several quilt alongs using this design, but I fell in love with Haley Anderson of @happinessinthemaking Christmas version of 2019. I knew I needed to make it just like that! Does that happen to you?

Katrina Thennis you are the winner of my book, SCRAP SCHOOL.

Next week we will start assembling blocks together. Several of you are already doing this and it is so great to see your progress. Be sure and use #ohscrapchristmasqal when you share your blocks so I can follow along.

Each  post will go live at 6:00 pm central.
-Wednesday, Nov. 10th – Assemble Blocks
Break for Thanksgiving
-Wednesday, Dec. 1st – Sashing
-Wednesday Dec. 8th – Assemble Quilt top


Surrounded QAL-Week 4- Center Blocks


I sew any chance I get. I quite often get up early so I can sew a little before work or stay up late to work on any project I am obsessed by. To be able to work on items in short little burst of time, I have a few processes to help keep me on task. Today I am going to share how I pieced the center section of the block together. The is somewhat a mindless, therapeutic method that lets me stop and start without loosing my place.

I shared with you that the main focus fabrics for this quilt were from Hustle and BustIe by Basic Grey and that I also added some of Christmas Morning by Lella Boutique. The fabrics above are from Christmas Morning and Red Barn Christmas by Sweetwater. Those of you that follow me often know that I am obsessed by dots. Everything I make has some dot fabric in it. I would buy an entire bolt of the red and green dot shown above. It is just that good!

I stack all my pieces on one design board and chain sew  working vertically down each section.  This helps me keep all my pieces in order. (shown above is just 1 layer, normally I would have layers for all the blocks needed for my quilt.) 

Shown above – all my center 9 patches chain pieced and ready to join into blocks.

I do not clip the threads so this keeps the sections in order and eliminates pinning. it is hard to see in the picture but there is a few stitches from chain sewing that hold these sections together. As I sew, I flip the seam allowance towards the dark and they nest together beautifully.  If you like to press your seams open, not cutting the threads can be problematic. You will need to trim the threads once you have sewn the pieces together to press open.  I press my seams to the dark side so don’t have to worry about that. (remember mindless, therapeutic sewing!)


Here you can see how one side of the block is sewn together and the other side is just “hanging on by a thread” waiting to be joined.

Last week I shared how I make some of my own design boards, so if you missed that post, click here.

Week 3 of this QAL is a perfect time to include a GIVEAWAY for one of my other books, SCRAP SCHOOL.  This book has a fantastic line up of designers like Kim Diehl,
Amanda Jean Nyberg of Crazy Mom Quilts, Connie and Mary of Country Threads, Lisa Bongean, Susan Ache, Amy Smart, Sarah Huechteman, Gudrun Erla and Sherri L. McConnell.

Leave a comment and check back here next Wednesday to see who is the winner of their own copy of Scrap School. Also giving away a copy on my instagram so , visit @modalissa for another chance to win.

Join me back here, Wednesday Nov. 3rd  to make side bar section of the block. We are almost done with the sections!

Each  post will go live at 6:00 pm central.

Wednesday, Nov. 10th – Assemble Blocks
Break for Thanksgiving
-Wednesday, Dec. 1st – Sashing
-Wednesday Dec. 8th – Assemble Quilt top

I hope each of you have a fun Halloween and enjoy something sweet. What is your favorite Halloween candy?

#ohscrapchristmasqal

-modalissa


Surrounded QAL- Week 3- 9-patches

How did you do on your four patches? Did you get them all done? I know it is a crazy time of year to try and tackle one more project, right? Just do what you can each week.

What is a 9-Patch?
9 squares joined together to make one block or section of a block.

For this quilt, we will be making
2 different sizes
and
styles of 9- patches.

This week is a simple basic 9-patch where all the squares are the same size. Next week will be a combination of different sizes.

If you have time and want to keep sewing, go ahead and put together your 4-patches and 9- patches into units as shown in the picture. You will need 4 per block.

I don’t have any tips on making the 9-patches but wanted to share the design boards that I use all the time. (shown above)

These design boards come ready-made in variety of sizes but I use a ton of these so I make my own from left over batting. They aren’t as pretty but they work just the same.

Shown above a variety of boards I use. The black one is the back side of one of my boards. The 2 with trim are ones I have bought.

Foam core board is available at most craft/art stores in assorted sizes. I also use the boards that are sold for science experiments which is easily assessable at many stores. Cut the foam board to your desired size and using spray adhesive, coat the batting and board  following directions on the label. I wait to trim the batting to size until after I have glued it to the board. Flip over the board with batting on the bottom and using a rotary cutter you can trim the batting to the exact size of the board. 14″ is a good size for me. It fits nicely in the sewing space I have and works well with any 12″ block.

These come in so handy to stack up pieces to sew together.I don’t use a board for each block but instead use one board and stack the sections to chain sew. Plus I can put them away quickly without disrupting the pieces if I need to work on something else or the grandkids want to sew.

I can’t wait to see your progress.

Be sure and share using #ohscrapchristmasqal.

See you next week- Wednesday October 27- Center Blocks

-Modalissa

Each  post will go live at 6:00 pm central.
-Wednesday Nov. 3rd – Side bars
-Wednesday, Nov. 10th – Assemble Blocks
Break for Thanksgiving
-Wednesday, Dec. 1st – Sashing
-Wednesday Dec. 8th – Assemble Quilt top


Surrounded QAL- Week 2- 4- patches

WEEK 2 of  #OhScrapChristmasQAL

Wednesday, October 13th- 4 patches

Whew! that was a lot of cutting, right?

Last week when I mentioned cutting the biggest pieces for the quilt out first, we are going to do the opposite when it comes to sewing. Begin strip piecing lights and darks together. Sew, Sew, Sew. This is somewhat mindless sewing while binge watching your favorite show or listening to an audible book. This part seems like it will never end but just keep sewing.

GENERAL TIP: I like setting my seams by pressing the strips right after I sew them. This seems to help keep everything nice and straight before pressing the seams to the dark side. The picture below is charm packs, cut and chain pieced together. Use you favorite way to press, but for this project I pressed everything to the dark side to make the seams nest nicely. I put together a few videos to explain these tips.


I stacked up sections right sides together with darks opposing and sub cut into the size needed for 4 patches. This gave me sets to sew, already paired up and could chain sew them. The combinations can be as scrappy as you choose.


-Save any leftovers of strips or 4 patch sections for possible use later.

-Wednesday, October 20th- 9 patches
-Wednesday, October 27th – Center Blocks
-Wednesday Nov. 3rd – Side bars
-Wednesday, Nov. 10th – Assemble Blocks
Break for Thanksgiving
-Wednesday, Dec. 1st – Sashing
-Wednesday Dec. 8th – Assemble Quilt top

Use the hashtag #OhScrapChristmasQAL so I can follow along.

Enjoy!! ( sorry my videos are sideways!)

Izzy Squared- baby quilt


The fun of making scrap quilts is that I sew bits and pieces together and let the plan develop as I go. I always ask my quilting friends, “Do you cut out the entire quilt before you get started, or do you cut some pieces and test your color choices before you cut the entire quilt?”

I think I have always done the latter and maybe that is because of my love of scraps quilts.

And because of this I often have some leftovers in quilting, not in cooking. I added more squares and had enough pieces from my Izzy Squared quilt (large version) to make a baby quilt.


Thought this would be a good time to talk value which is basically one word for light, medium or dark. If you haven’t read Oh Scrap yet, the book is full of color coordinated quilts that push the envelope a little bit in the study of value and fabric placement.

Don’t get me wrong, I love everything about all of these blocks, they are scraps so by definition anything is acceptable. So i am going to share some value tips from some of the blocks. The best way to study color is to look at things in black and white. Crazy, right?

In the above picture, look at the grayscale block. What do you see? Look how strong the royal blue block stands out. It is definitely considered a dark. The fabric has very little design in it so also reads as a solid. The other fabric in this example is the red corner square in the bottom right corner. Dark and reads as a solid so it is a strong selection.

When I mentioned leftovers sometimes start my quilts, sometimes they help me finish. I was about out of reds for the centers and came across this tiny 4 patch that I trimmed to just the right size for my center square. I love the quirky little block.


These two pictures are not side by side so  you may have to scroll back and forth to see the differences. I have shown the grayscale version above. Look at the bottom middle block, notice how the square in the left hand corner disappears?

Here is the color version of the sweet little aqua fabric that is just perfect for this block. It also reads as a solid but would be considered a light. When studying value, you also have to take into consideration the background fabric. This little aqua square is close in value but different enough in color to work.

Shown here is a larger section of the quilt showing the difference in the values of lights and darks makes you eye explore all the colors. I love the block that is just the 5 red squares.

When asked if I have a favorite version of these blocks, it is like asking if I have a favorite child. I love them all for different reasons! I am always surprised how each block turns out!! Love, love, love.


Then once your quilt top is complete, the quilting is always the icing on top. Maggi Honeyman quilted this quilt for me with an all over design. When studying color, pattern and values keep in mind that quilting does add another layer of art by defining or minimizing some of your fabric choices.

I used one of Bonnie and Camille’s 108″ wide quilt backs from Moda. (leftovers from another quilt back). The backing is so soft and almost silky feeling which will be yummy once it is washed and wrapped around a little one.

Shown below is the larger version of this color way of Izzy Squared quilt. To read more about it, go here.

Ask for Oh Scrap book at your favorite quilt or specialty store for patterns and more color tips.

Enjoy!

-modalissa