Tag: Ruler

Bloggers girls quilt along

Happy New Year! 
I am happy to be starting the new year with a few friends.
Time to start on a 6 month BOM.
Are you ready?
On the first of each month, 
 we will be posting our “color options” as we participate with
 Monique from 
Open Gate Quilt’s  on her first quilt along. 

 Block 1- color version 1
 Block 1- color version 2
Look how different two of the same blocks can be just by fabric and color placement.
 The fun thing about this project is that it is all about color options
as well as fantastic precision piecing with the use of Monique’s rulers. 
It is 2013  so first thing you should do is 
go out and treat yourself 
to the
 FIT TO BE QUARTER 6.5 & companion ruler.
It changed my life and I am not being over dramatic. 
Accuracy and precision are a breeze with this. I always thought
 I was a pretty good “piecer”, 
but now I am a fantastic piecer!
 My signature piece of fabric is a piece from Edyta Sitar’s Paint Box Collection.  
Stock # 42101-13 color Coco. 
I will be using this as my
border and will also sprinkle it throughout some of my quilt blocks.
I seriously love this print!
This is a fabric that has so many wonderful colors that I could use it for almost any 
project. The possibilities of beautiful colors to coordinate are endless. 
Edyta has a way of doing this with each of her collections. 
I keep a swatch of this fabric pinned to my design wall so I can audition
 fabrics as I make each of the blocks.
For  yardage information, click here.  
Instructions for each block with be posted at Open Gate.
Make a cup of tea and visit each of the Blogger Girls on 
the BLOCK OF THE MONTH LINEUP:
Monique From Open Gate Quilts – opengatequilts.blogspot.com/
Sherri from A Quilting Life – aquiltinglife.blogspot.com
Thelma from Cupcakes ‘n Daisies ~ cupcakesndaisies.blogspot.com
Lissa from Moda  Lissa  ~ ModaLissa.blogspot.com
Denise from Quilter’s  Window ~ Quilterswindow.com/blog/
Nicole from Sister’s Choice  ~  sisterschoice.typepad.com
Lisa from Stashmaster ~ The-Stashmaster.blogspot.com
Follow each of us to see all the color options on the first of each month .
 I will also be posting some of the ways this ruler can help your day to day sewing.

 I hope you enjoy this project as much as  I have already enjoyed being a part of it.
Upload your block pictures on the Blogger Girls Flickr site.
I look forward to seeing your block progress.
 

Thanks Monique for inviting me!

Berenstain Bears star quilt

Bear Country School
 Are you looking for something fun and quick to make?
All you need is
 1 charm pack, 
3/4 yd background fabric,
1/3 yd inner border,
 1 1/2 yds for border and binding
The entire pattern is listed below but the following pics are some 
step by steps so you can see how easy this ruler makes sewing “off” corners. 
Blocks like snowballs etc are perfect to use this technique
 and there is no marking involved.
Quilt measures 48″ x 48″
Folded Corner Clipper, Stock #502
Prairie Sky Quilting

 With fabrics right side together, place the ruler on the fabric and trim. 
(the EXTRA trimmed triangles can be sewn together and used for another project.)
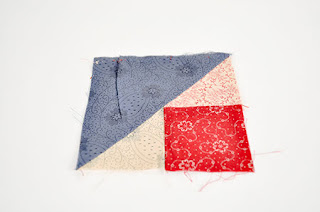
see how the ruler lines up at the point and includes the seam allowance
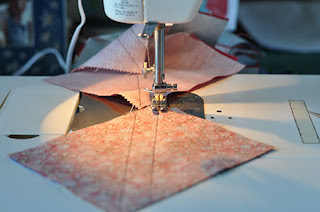
sew 1/4″
this method can also be done on pieces that are already sewn together such as the two squares above.
add the bella solid square
trim
sew
I also sewed all my “extra” triangles together as shown in the background.
To download the pattern to make this quilt, click HERE.
charm pack star12_5
Welcome to Bear Country
by Berenstain Bears is in stores now.
charm pack star12_11
 This is a great pattern to make using any charm pack!!

Have fun.
-modalissa

KISMET

I looked up Kismet in Wikipedia.
Fate or Destiny in Turkish and Urdu, a predetermined course of events.
It really is kismet to do this blog post.
In the OLD days before the Internet, yes I was quilting back then!, there were friendship groups and block swaps.The only difference is that your “friends” had to live in your area because you actually met with them to exchange blocks, ideas, techniques and inspiration. Recently I unearthed some blocks from a friendship exchange in the mid 1980’s. These blocks brought back memories of the people that made them and the fun we had meeting once a month in each others homes. Where did I find these blocks? Of course I had stashed these in a super secret spot knowing I would want to finish them someday. Well I had them stashed away in the box of videos of the kids special events. So super secret that I didn’t even know they were there. Have you ever done that? Hidden things so well that you were surprised when you came across them again. I had been petting these blocks and going through my stash of fabrics when a new ruler hit the market.

I had been hooked on Monique’s geese rulers while making Miss Rosie’s charm flying geese., so I knew that I had to try her newest ruler, Fit to be Quarter. (check out Monique’s blog– she has a blog hop going on now)

Imagine my delight when I saw on the instruction page the information to make my “found blocks” from my exchange 20 years before. KISMET!
20 years ago I thought I was pretty smart to figure out how to strip piece this block. My dad was so proud thinking I had his engineer brain. I think it was more the fact that I had a bunch of kids and not much time to sew.
Here are a few pieces that I unearthed that showed my process.


So i jumped right in and started making more blocks

 using red, white, blue or black layer cakes so I could mix a big variety of fabrics.

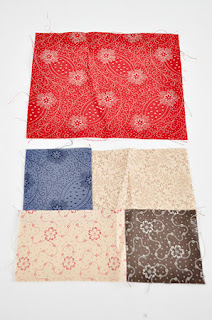
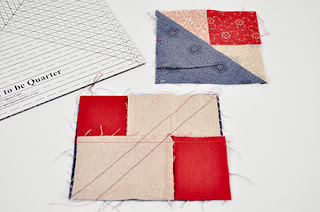
You make a simple unit similar to a four patch. Add a rectangle right sides together.

Using the ruler, mark your sewing lines. 20 years ago I did not have this ruler and it is not as simple as marking down the middle and sewing 1/4″ on both sides. Trust me!

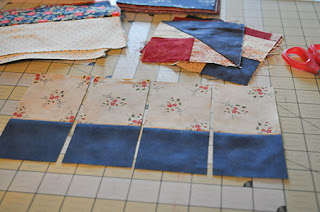
Cut 1/4″ away from sewn line on each side and you will get 2 units as shown above. (finishing up some of my old pieces-can’t you tell from all the extra fringe along the edges)

This is the layout I choose for my block swap. I lay out the squares and then chain piece them into sections vertically without clipping the threads. Then I add block 3 to the block 1 & 2 section. This helps me chain piece and keep everything in the correct order. Here is an illustration. I also wait to press until the block is pieced so I can make sure the seams are pressed in the direction I have sewn them.

You have sewn the sections together working vertically. Now add the 3 row without clipping the threads. The threads will act as pins.

Once this block is sewn it can be pieced in several different layout options. It has almost as many options as a log cabin block does. Play with the options.

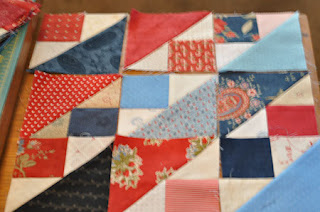
Here are just a few of the layout options I am playing with. Off to make a few more blocks.

sorry for the blurry phone pics

Check out Monique’s website for measurements, videos and more on how to use her rulers.