We as quilters like to celebrate any holiday that relates to our hobbies. Today is just one of those days. While National Log Cabin Day is to commemorate the wooden kind of Log Cabins. I am celebrating Fabric Log Cabins by sharing some of my favorite log cabins and some interesting historical facts.
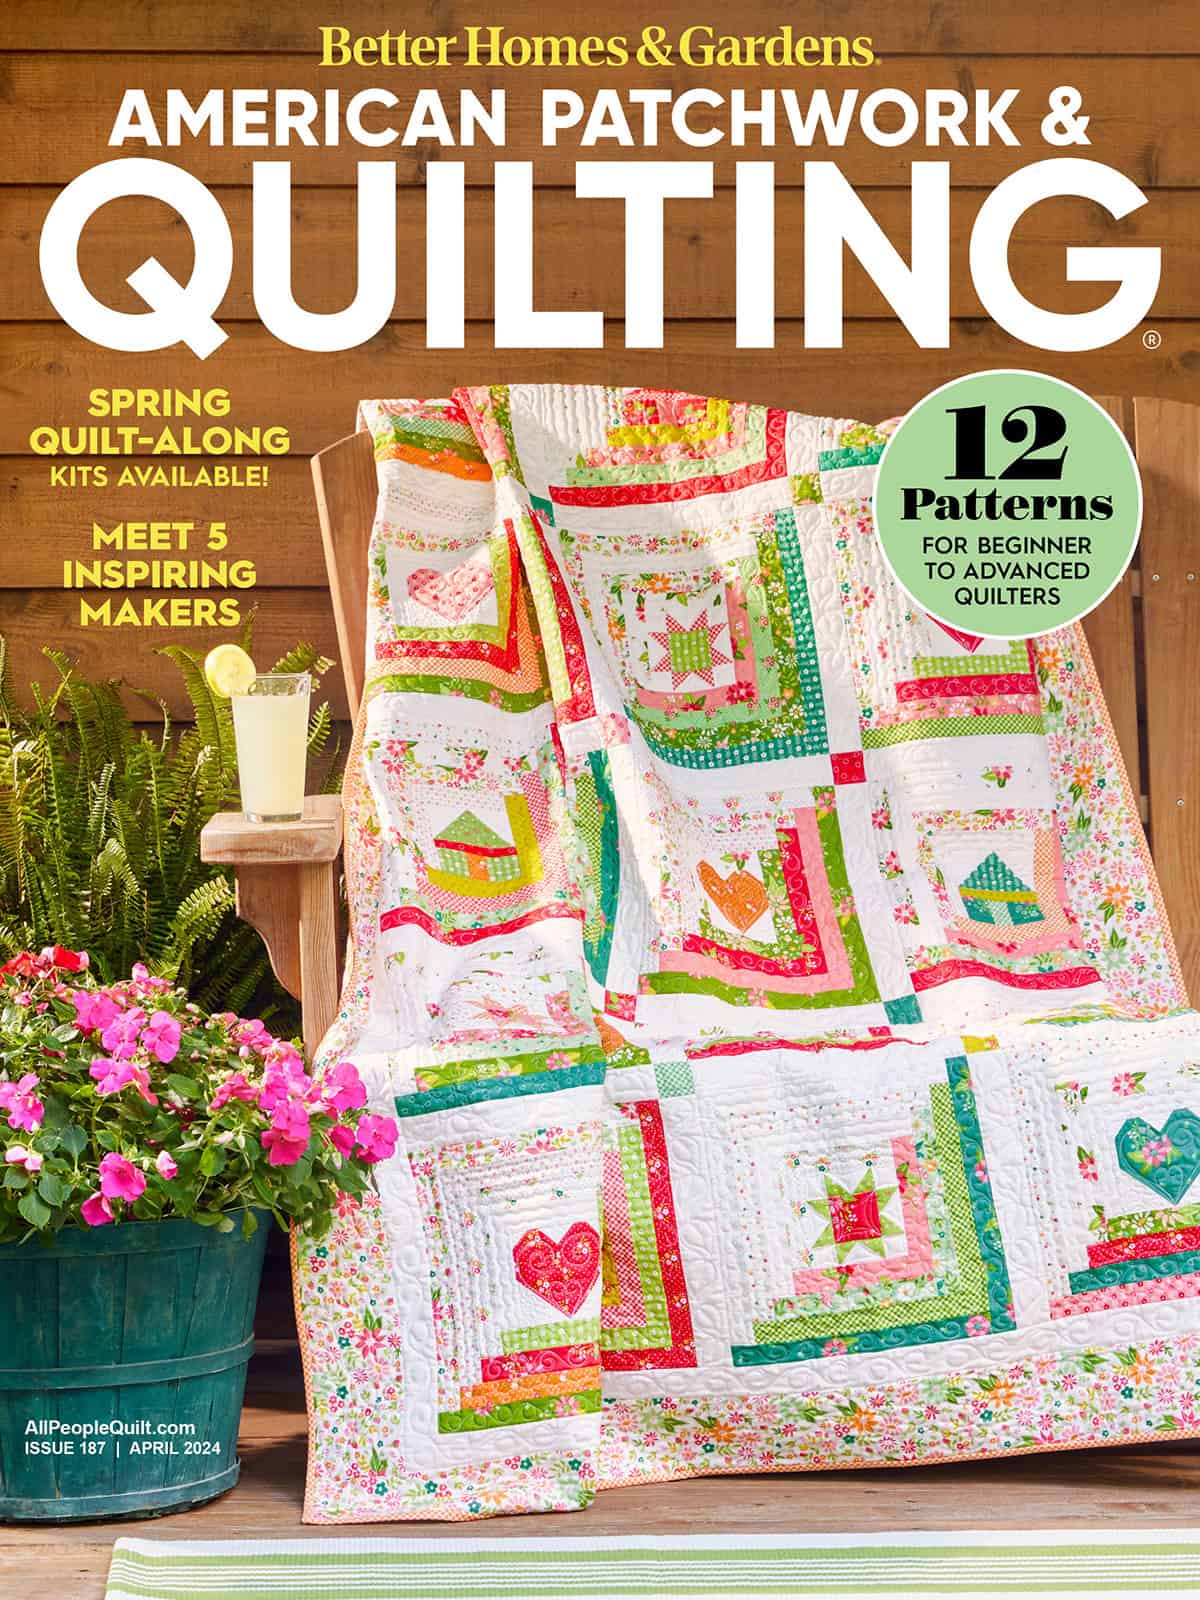
I love this log Cabin that is on the cover of American Patchwork and Quilting. Made by Sherri McConnell.
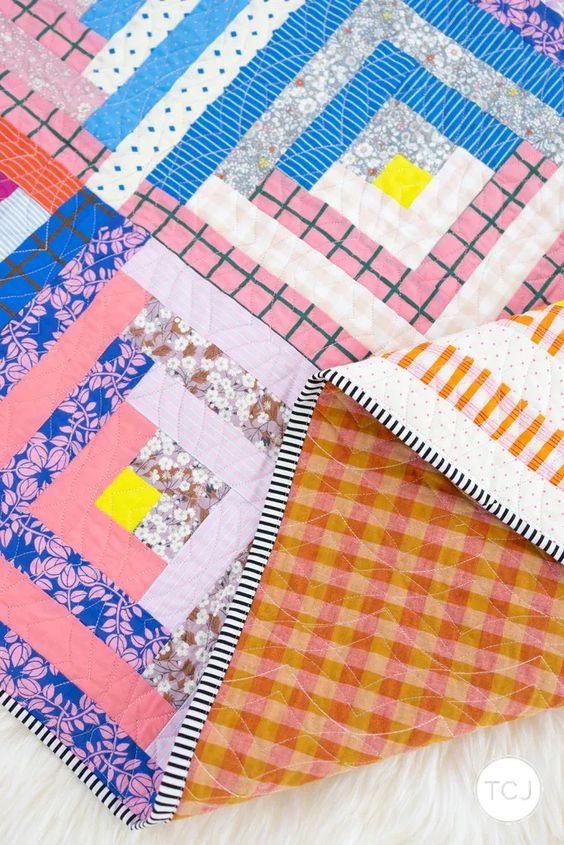
Liberty Log Cabin Quilt made by Meghan of www.thencamejune.com. So fun and fresh and who doesn’t love a striped binding and a plaid backing. I love plaids!!!
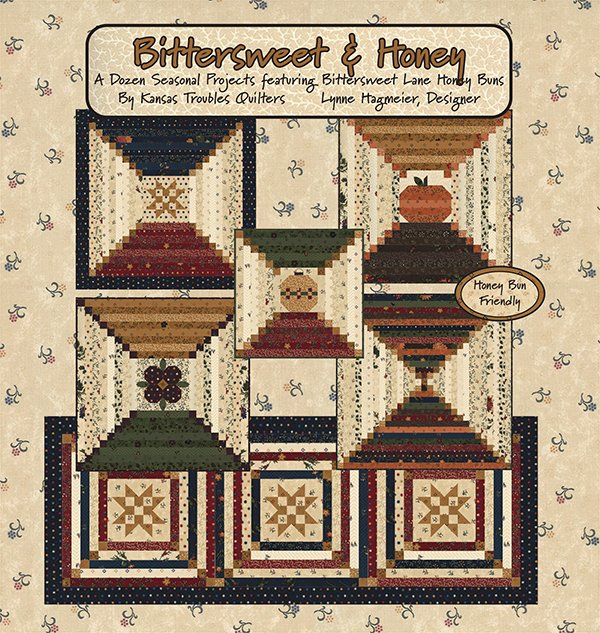
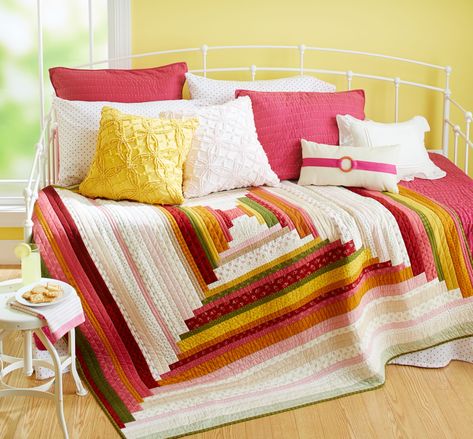
A log cabin pattern using Moda’s Honey Buns by Kansas Troubles. Perfect for a Christmas quilt.
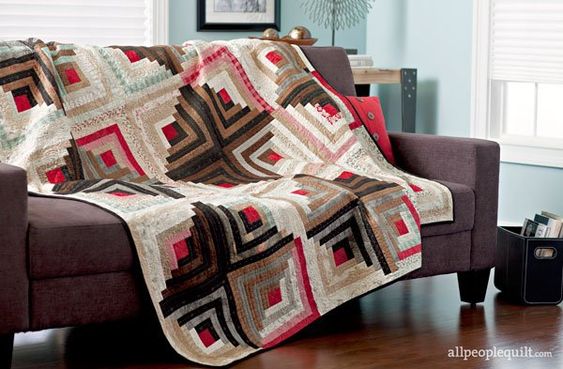
This is one of my quilts that was in American Patchwork & Quilting. I named it When Harry met Sally after the famous movie. The name seamed fitting with the mixture of designers and the fact their styles are complete opposites, Primitive Gatherings and 3 Sisters. (reference why I used the red centers in the history section below.)
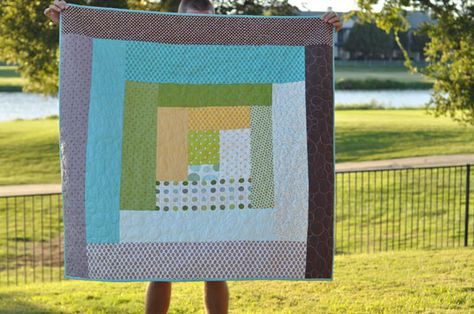
How fun is this great big single log cabin block? Perfect for a baby quilt.
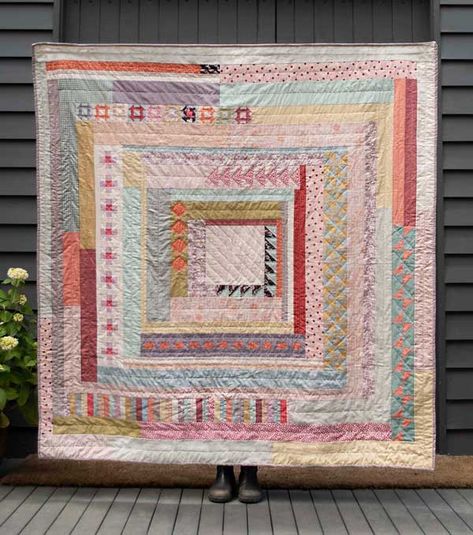
An oversized log cabin rotating darks and lights and a variety of sizes of strips.
This quilt is on my bucket list to make. It is a modern take on a log cabin quilt designed by Jen Kingwell.
Here are some interesting facts about its history:
Origins and Name: The Log Cabin quilt block is thought to have originated in the mid-19th century, around the time of the American Civil War. Its name is derived from the log cabins built by early American settlers. The block’s design, with its central square and surrounding strips, resembles the way logs are stacked to build a cabin. See the reason why I can celebrate the quilts on this day?
Symbolism: The central square, often made from a red fabric, traditionally symbolizes the hearth or the fireplace, which was the heart of the home. In some variations, a yellow center represents a welcoming light in the window.
Popular During the Civil War: The Log Cabin quilt gained popularity during the American Civil War. It was used not only as a practical item but also as a symbol of support for the Union. Quilts made with a black center square were said to indicate support for the Underground Railroad. There are stories telling stories of quilts hanging outside giving clues to what direction the soldiers were coming from.
Versatile Design: The Log Cabin block can be arranged in numerous ways to create different patterns. Common layouts include Barn Raising, Straight Furrow, and Courthouse Steps and so many more options. This versatility made it a favorite among quilters who could achieve various visual effects with the same basic block.
Pioneer Tradition: For many pioneers moving westward in America, quilts were an essential part of household goods. Log Cabin quilts, in particular, were practical because they could be made from small scraps of fabric, making them an efficient way to use up remnants.
Cultural Significance: The design of the Log Cabin quilt block also has roots in various cultures. Similar patterns have been found in ancient Egyptian textiles, and the concept of a central motif surrounded by incremental design elements appears in many folk art traditions around the world.What is your favorite version of a log cabin quilt?
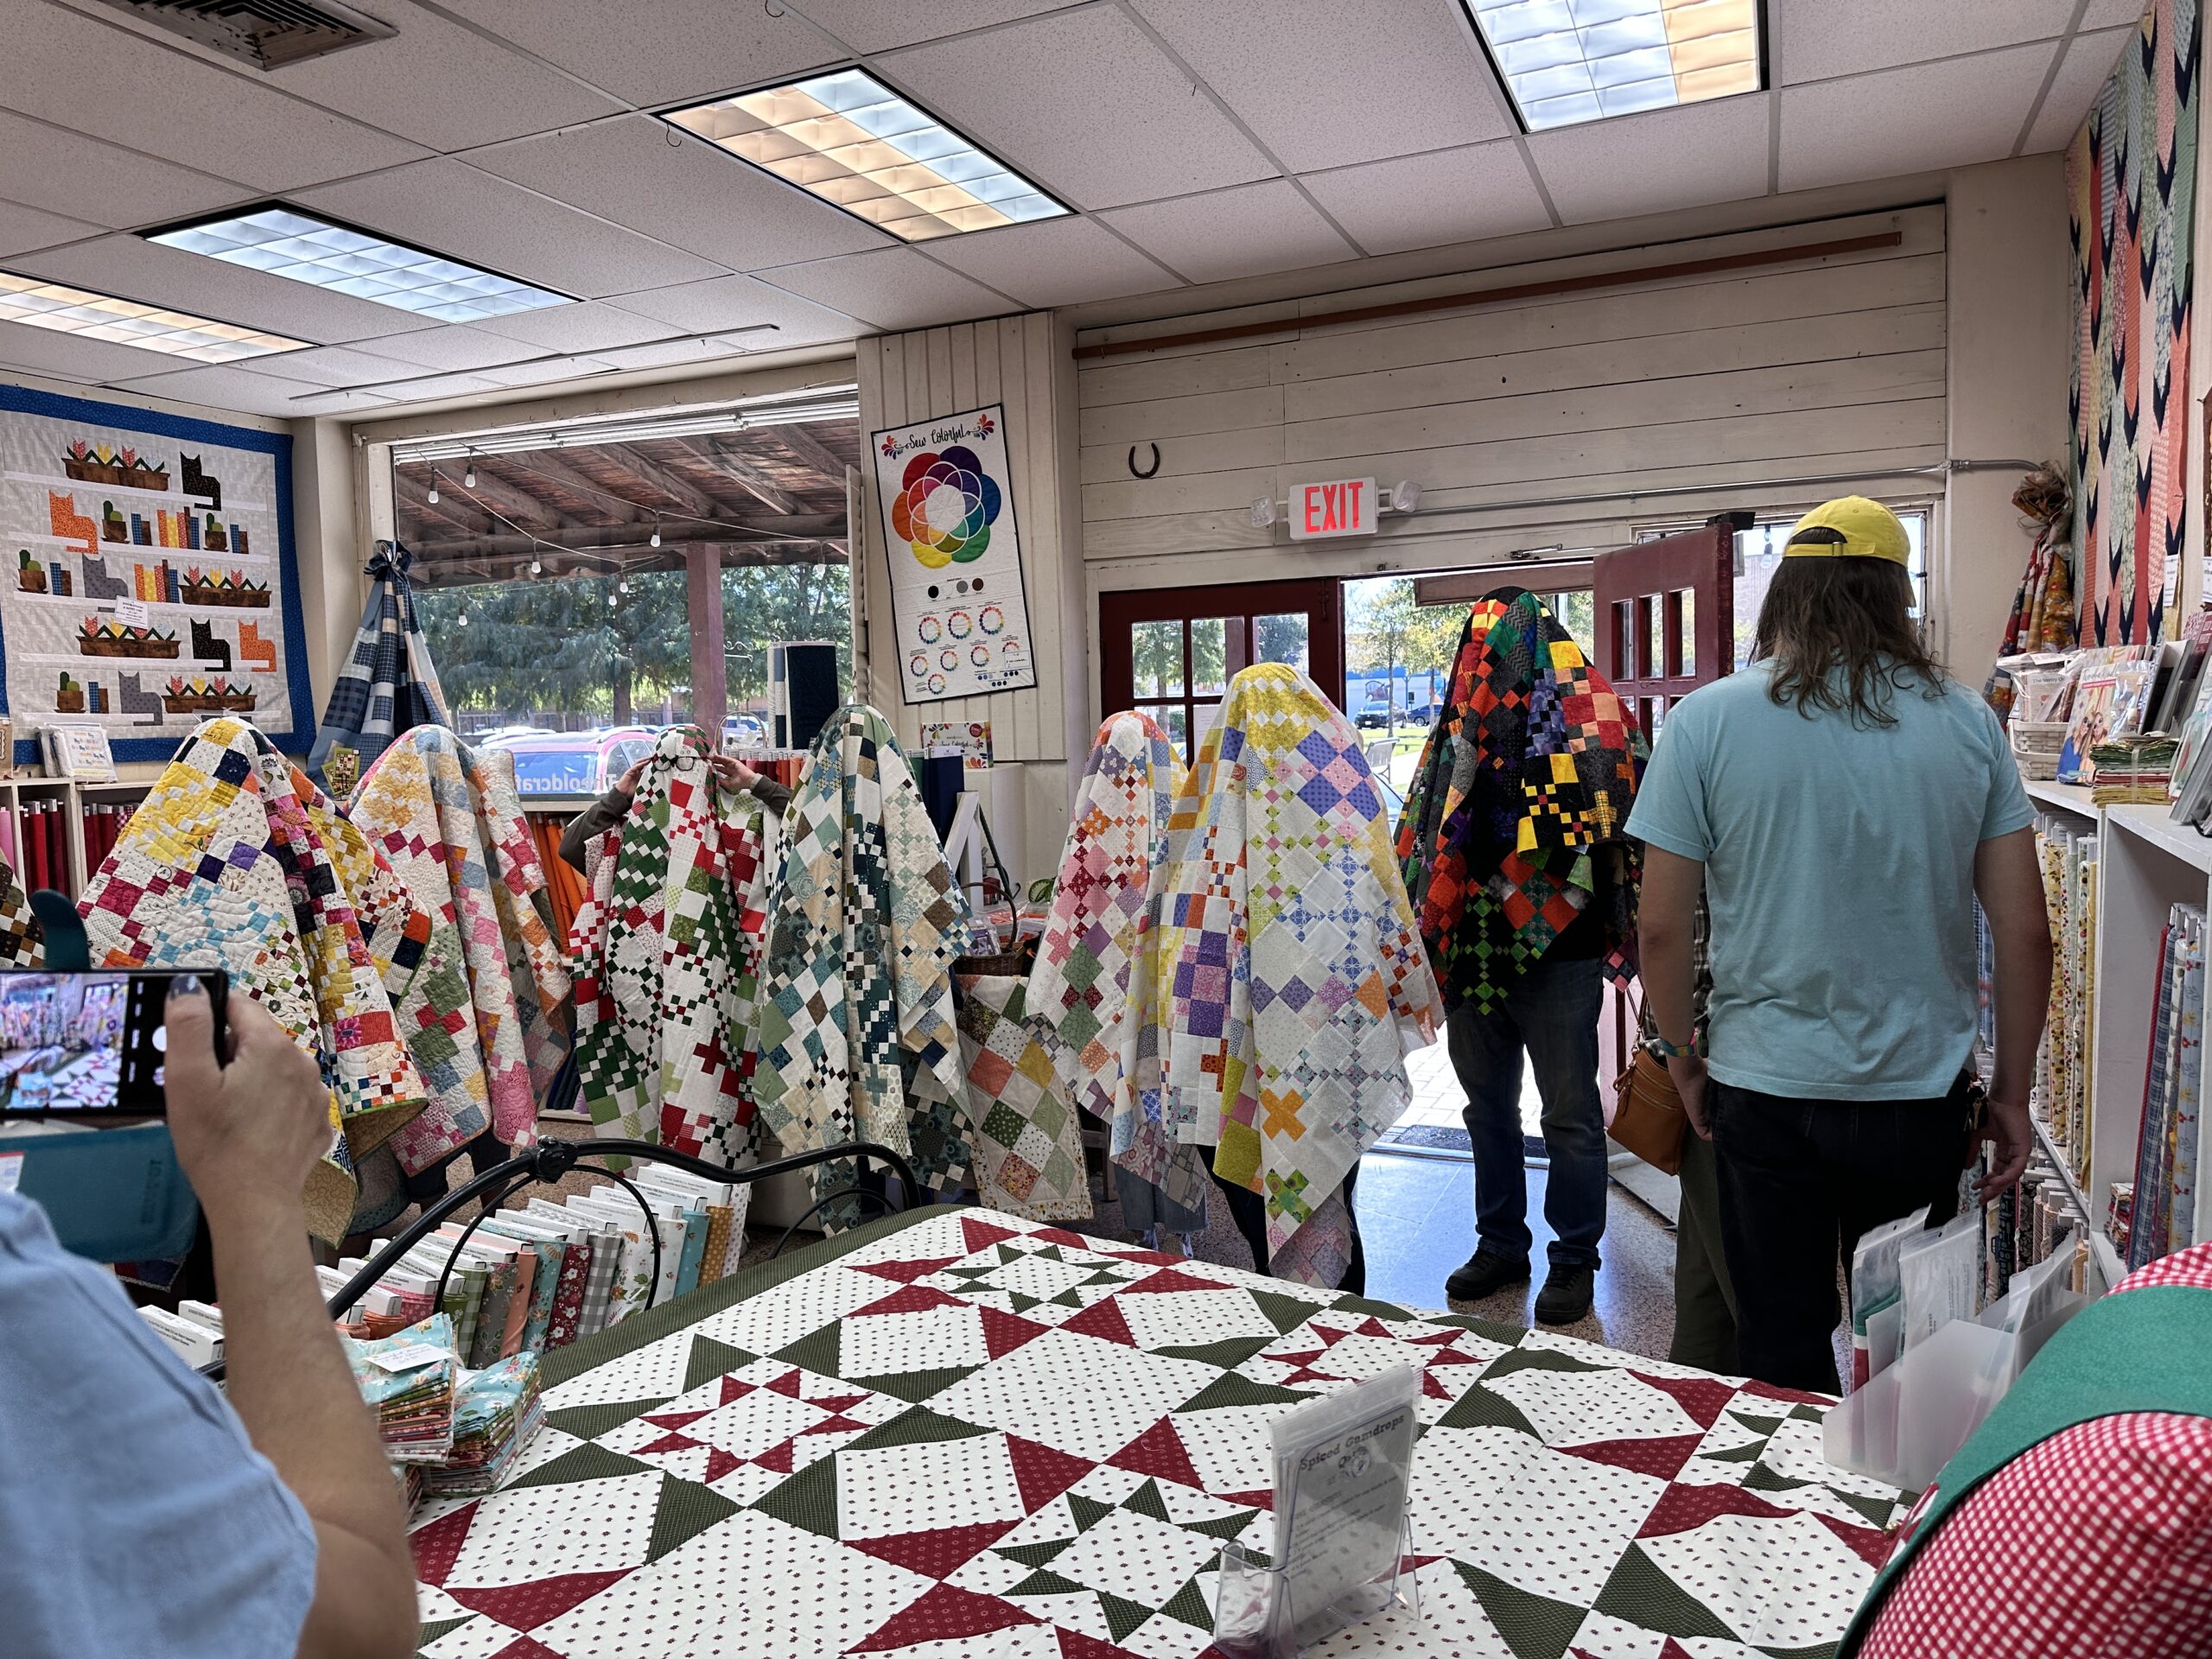
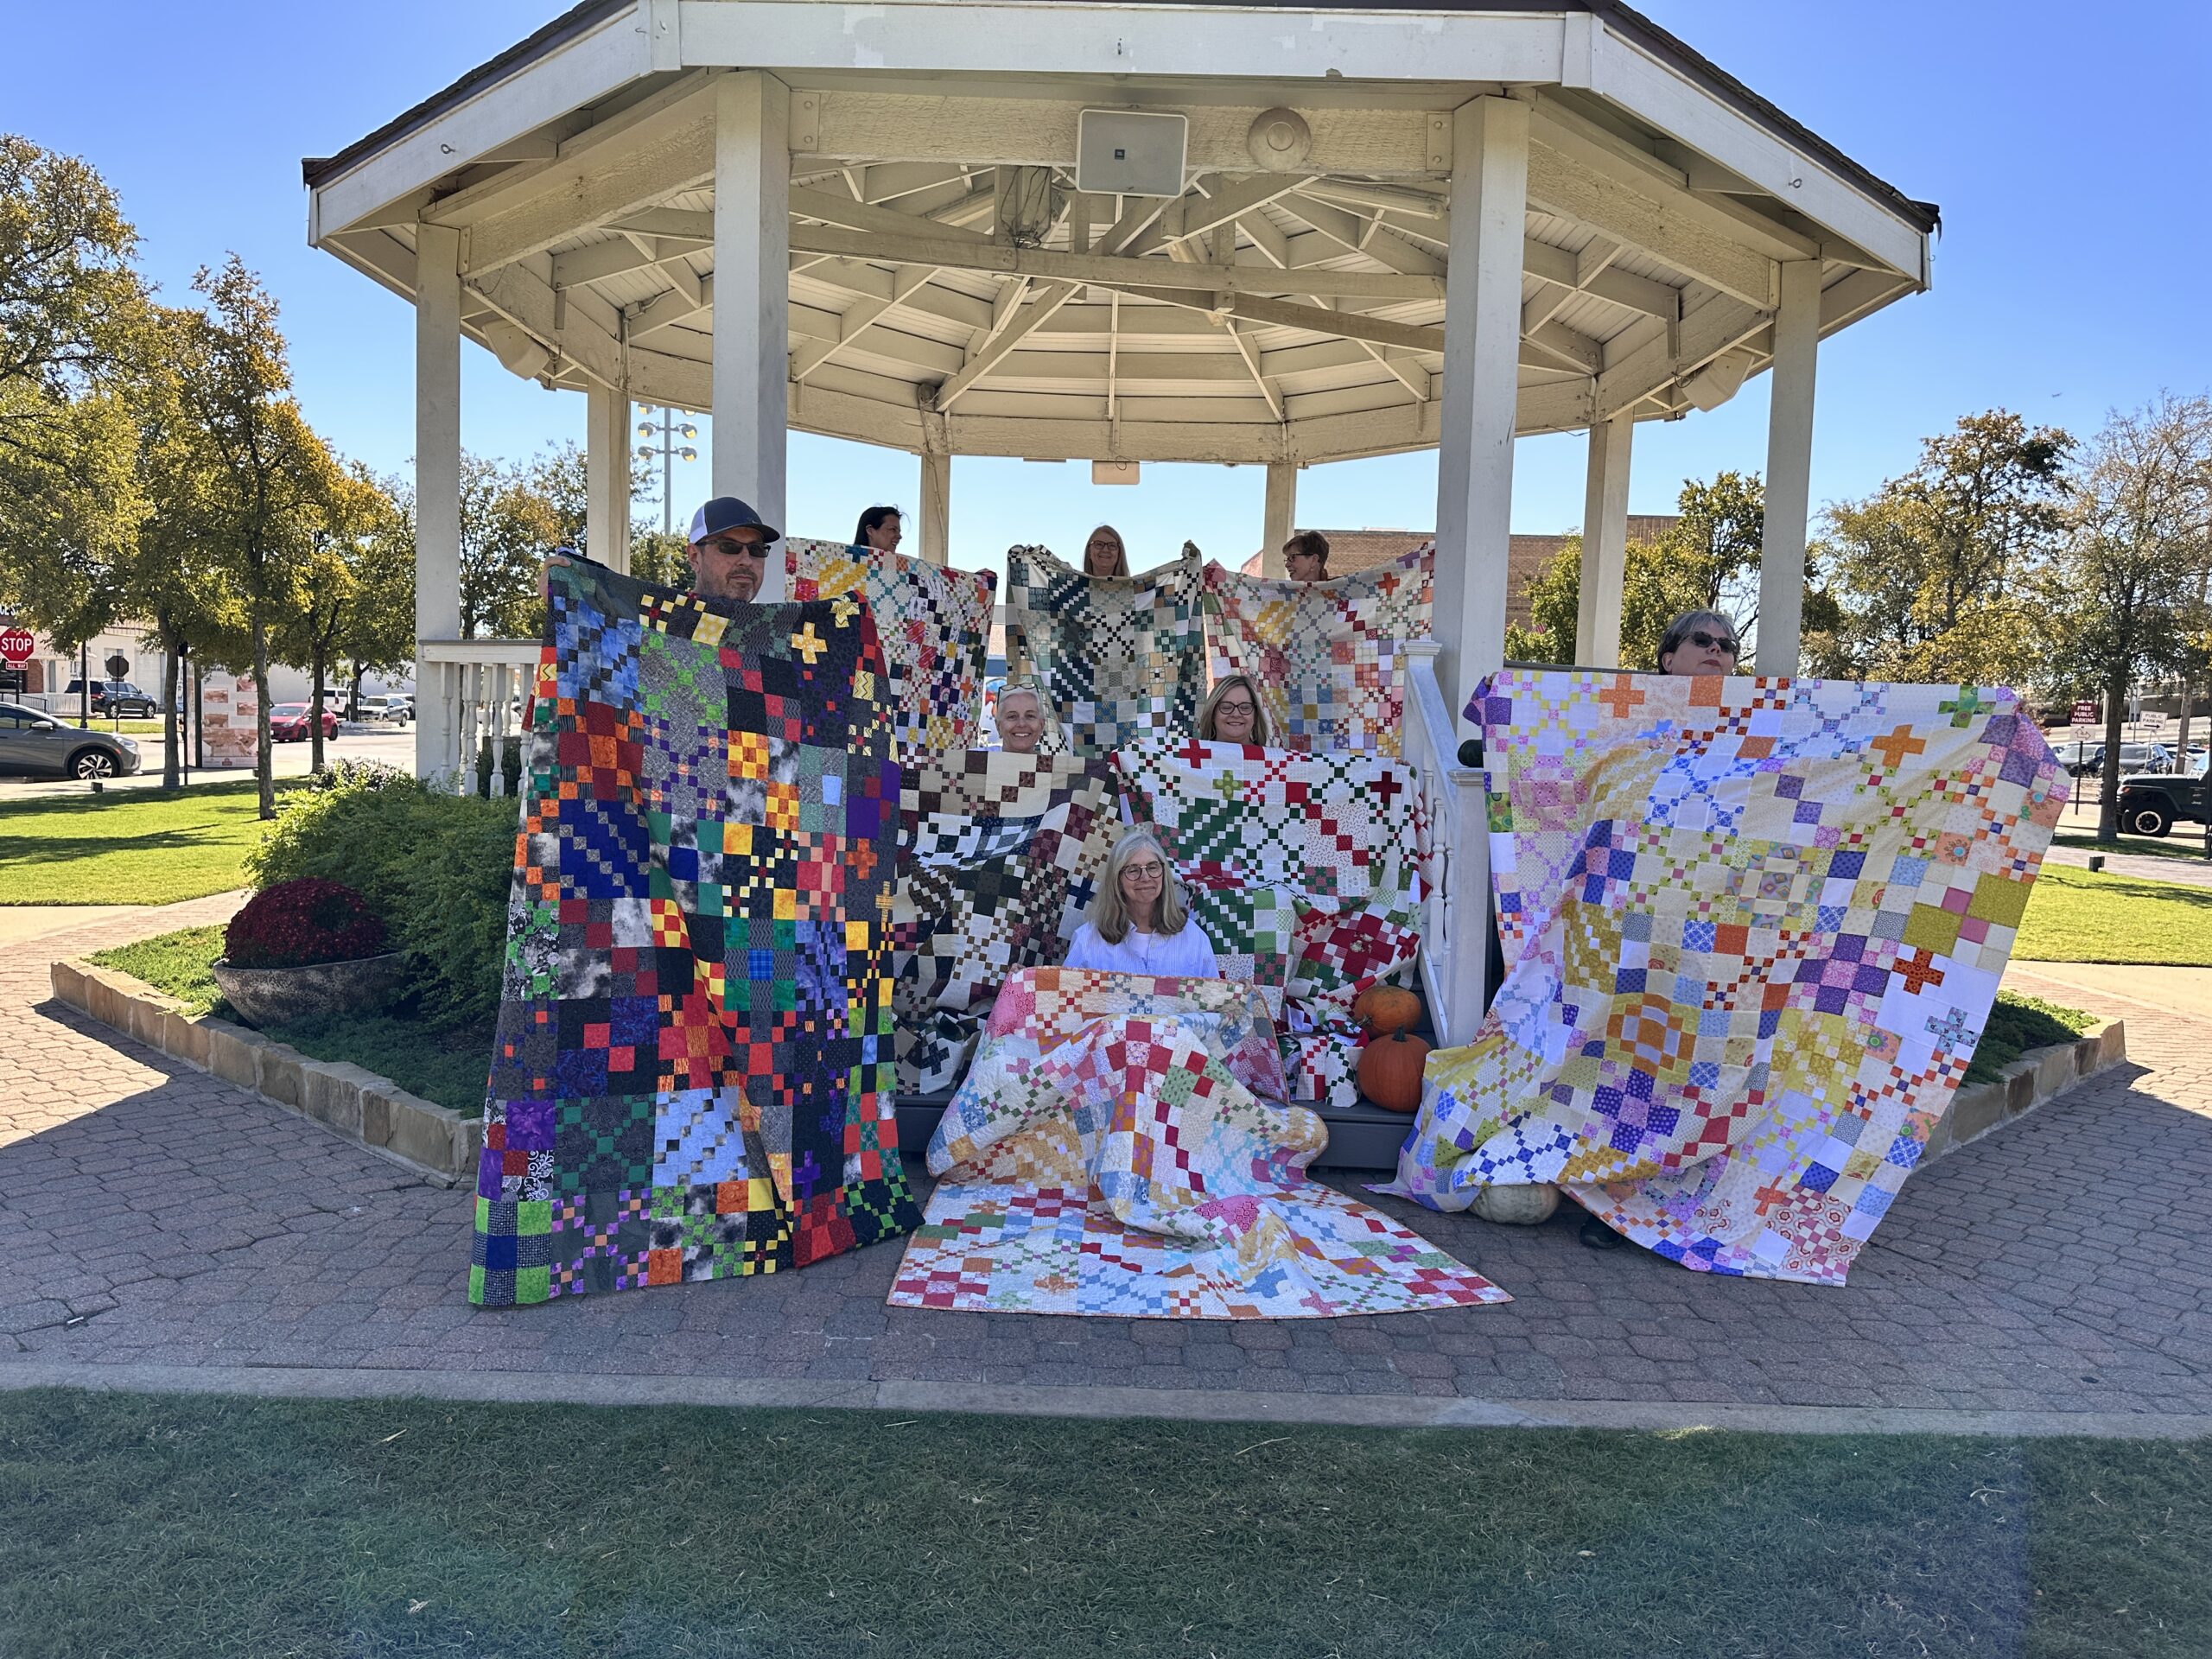
One of the good things that came from Covid is the Quiltalong which kept us busy once we had finished making masks. We could hop online and join like minded quilters quilting along and sharing our project online. Recently some of the customers at the Old Craft Store joined me in an IN PERSON QUILTALONG. It was fun and of course we had them parade their quilt tops out along the downtown square.
TIME FOR ANOTHER QUILT ALONG
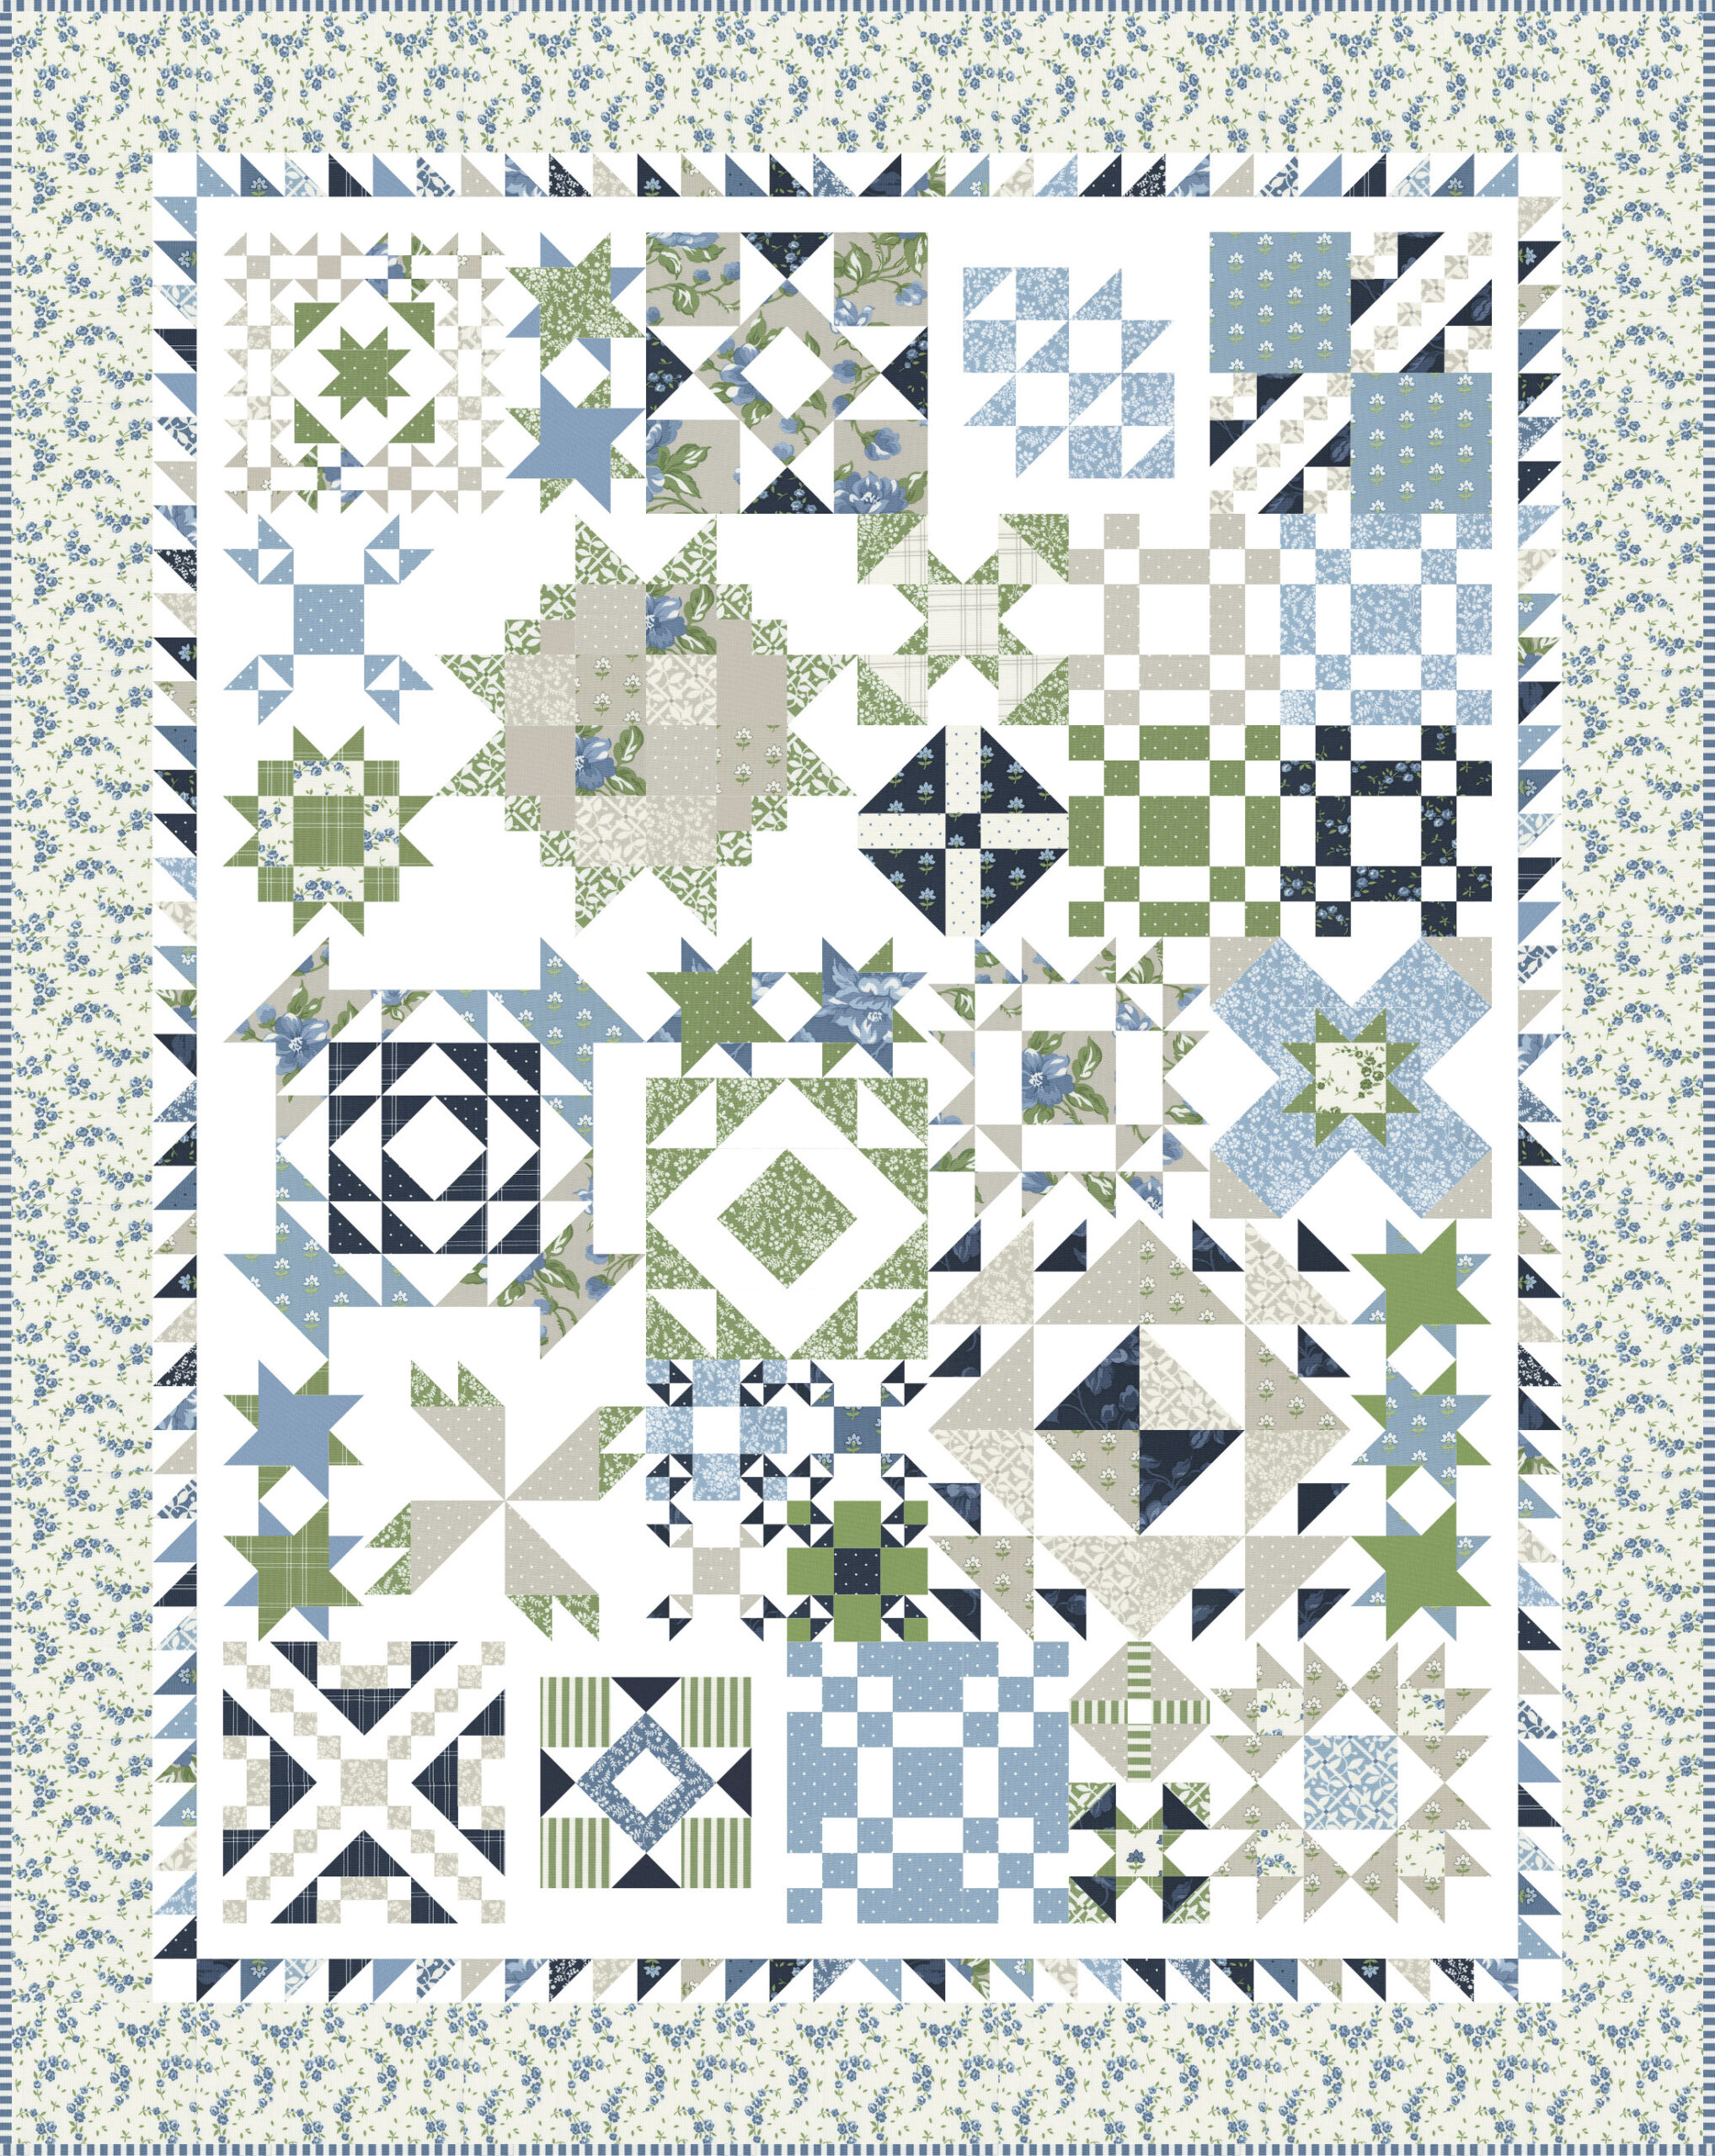
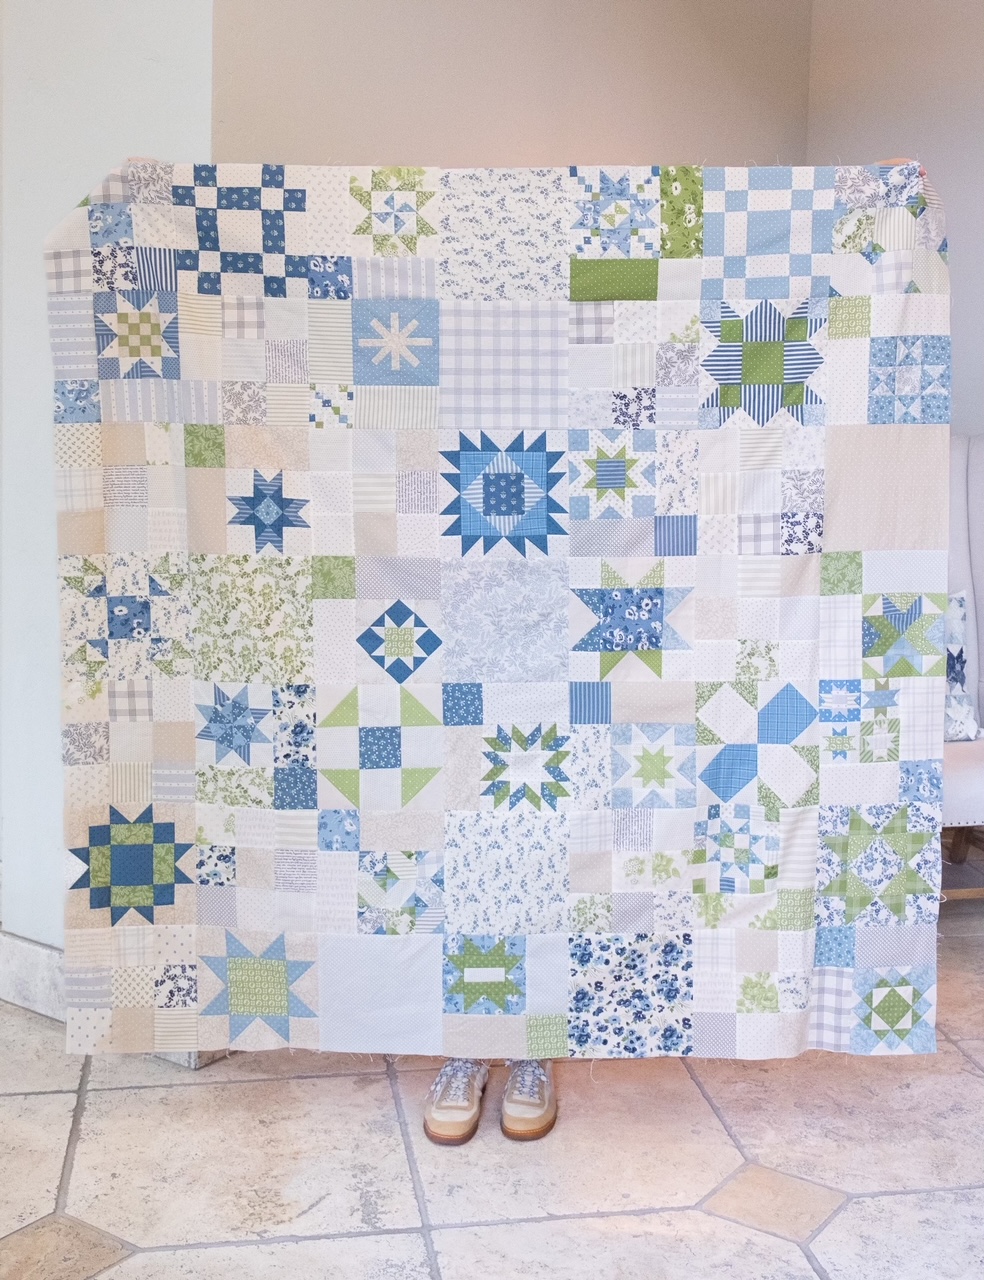
The “Little Light of Mine” quilt was on display at The Old Craft Store in Carrollton, Texas and some of the gals there wanted to do another quilt along, they decided this quilt needed to be the one.. This quilt is perfect for both beginners and experienced quilters. The pattern features a series of blocks that come together to form an interesting quilt that is much easier than it looks. I am not saying this is a quick project but I will share some cutting and sewing tips along the way that make this a mindless, therapeutic project.
Why Participate?
Participating in a Quiltalong is a wonderful way to improve your quilting skills, meet new friends, and create something beautiful. The structured timeline helps keep you on track, and the supportive community ensures you’ll have help whenever you need it. Plus, seeing the diverse interpretations of the same pattern is incredibly inspiring!
Join our kick-off party on Saturday, June 29 @ 10:00am. in store. Sign up for the workshop here.
We’ve broken down the quilt construction into manageable weekly segments. Each week, we’ll focus on a different part of the quilt, from cutting and piecing to assembly and finishing touches. Here’s a quick overview:
Week 1: June 29 10 am- 11:30 Talk fabric, my favorite subject!. Plus I am going to play a little fabric color game. Don’t miss it!
Week 2: July 13 1-4:00pm Cutting and organizing your strips for fast and efficient sewing and the use of a design board. Each week of the workshop their will be a bonus project or creative exercise involved.
Week 3: July 27, 10a-2:00 pm Squaring up blocks, Show n tell and charts of various sizes for more log cabins fun.
Week 4: August 24, 10a-2:00pm Setting and corner triangles and quilting options.
$40.00 for all 4 dates
I am working on a red, white and blue option, but this quilt will be great in any combination. OCS has some fat quarter bundles ready if you have a hard time choosing.
The Old Craft store will also have their classroom open and available for additional sewing times the following dates separate from my classes. Their staff will be available for help during the Monday sessions.
Monday, July 15, 10a-2:00pm
Monday, July 22, 10a-2:00pm
Monday, July 29, 10a-2:00pm
Monday, August 5, 10a-2:00pm
Monday, August 12, 10a-2:00pm
Monday, August 19, 10a-2:00pm
Monday, August 26, 10a-2:00pm
Saturday, August 31, 10a-2:00pm
How to Join
Joining the Quiltalong is simple:
Purchase the Pattern: Get your copy of the “Little Light of Mine” quilt pattern from The Old Craft Store or as a download here..
Gather Your Supplies: Make sure you have all the necessary fabrics and tools.
Sign Up: Register for the Quiltalong by calling the Old Craft Store, 214-242-9911
Mark Your Calendar: Be ready to start quilting with us on June 29th
If you can’t join us in person, leave me a comment and I will see about doing an online QAL soon!
Are you a fan of the vintage aesthetic? Do you find yourself drawn to the soft, worn-in look of aged fabrics? If so, you’re in luck! Achieving that perfect faded vintage look is easier than you might think. With a few simple techniques, you can transform modern fabrics into timeless treasures. This blog post will guide you through the processes of overdyeing and bleaching to create beautifully faded fabrics. The examples shown in this blog post only cover the bleaching process. Depending on the results and what the final outcome I would then overdye so I have included all the steps.
DISCLAMIER: this was just an experiment and I never know the final result. This is the fun art of this experiment.
What is Overdyeing and Bleaching?
**Overdyeing** involves adding a new layer of dye over an existing color. This technique can create rich, complex hues and can help tone down overly bright colors. When combined with bleaching, it can give fabrics a beautifully worn and aged look.
**Bleaching**, on the other hand, involves removing some of the original color from the fabric. This can create a variety of effects, from subtle fading to dramatic contrasts, depending on the technique and amount of bleach used.
Materials You’ll Need
– Fabric (natural fibers like cotton, linen, and wool work best. I used 100% cotton Moda- Layer Cakes)
– Fabric dye (your color of choice)
– Bleach (liquid bleach or bleach pens)
– Plastic containers or a sink for dyeing and bleaching
– Rubber gloves
– Protective clothing or apron
– Plastic sheet or old newspapers (to protect your work surface)
– Measuring cups and spoons
– Stirring sticks or spoons
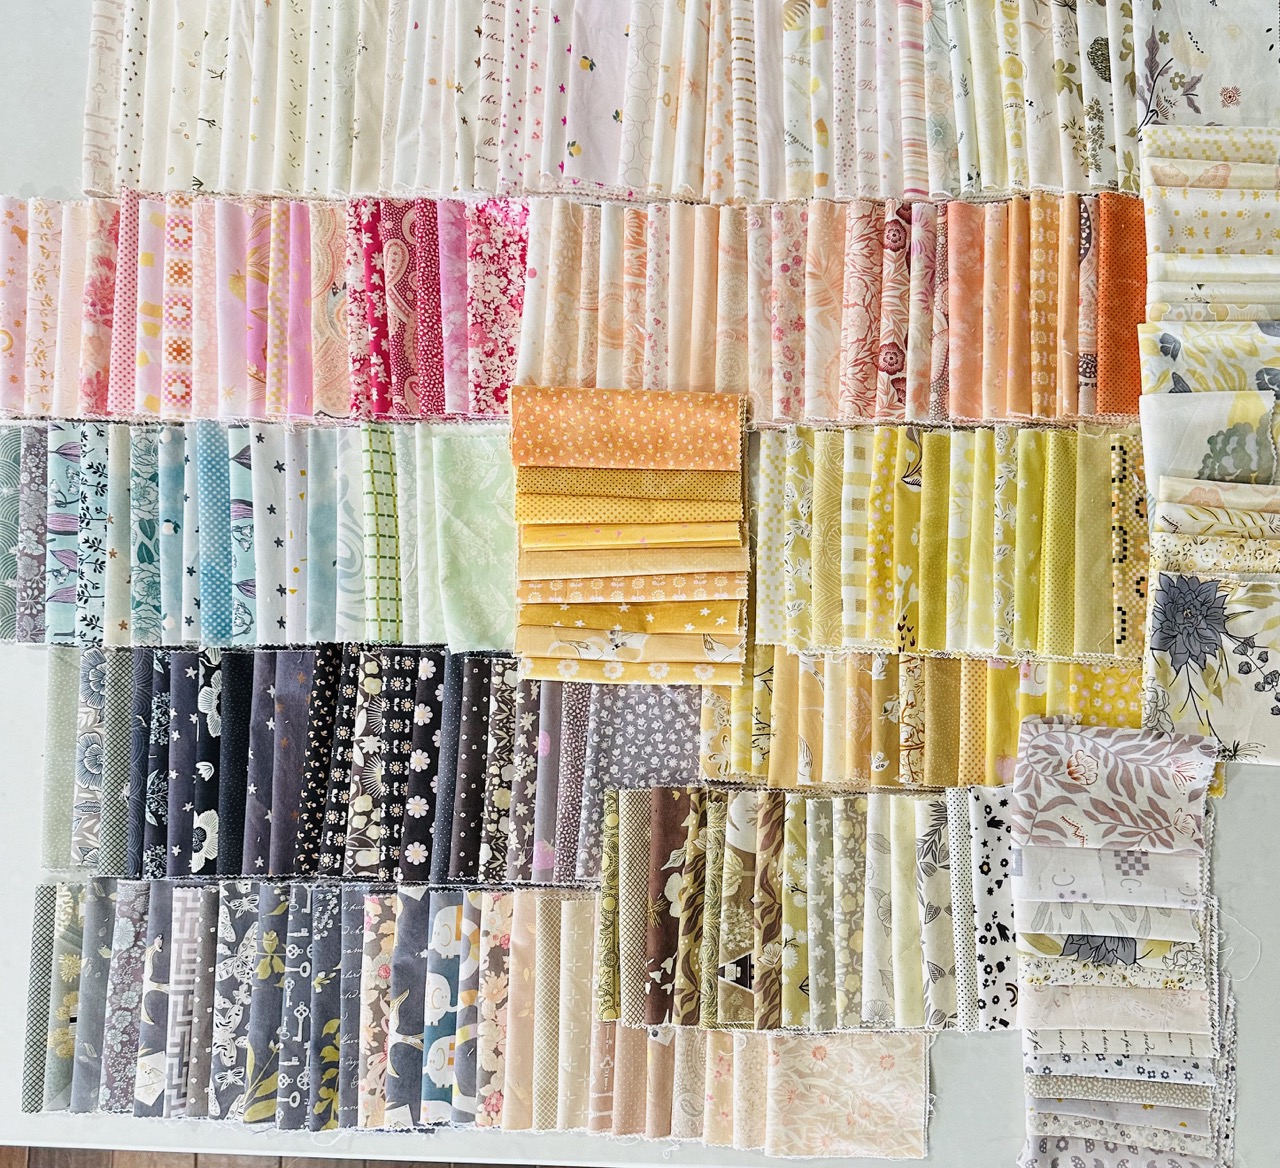
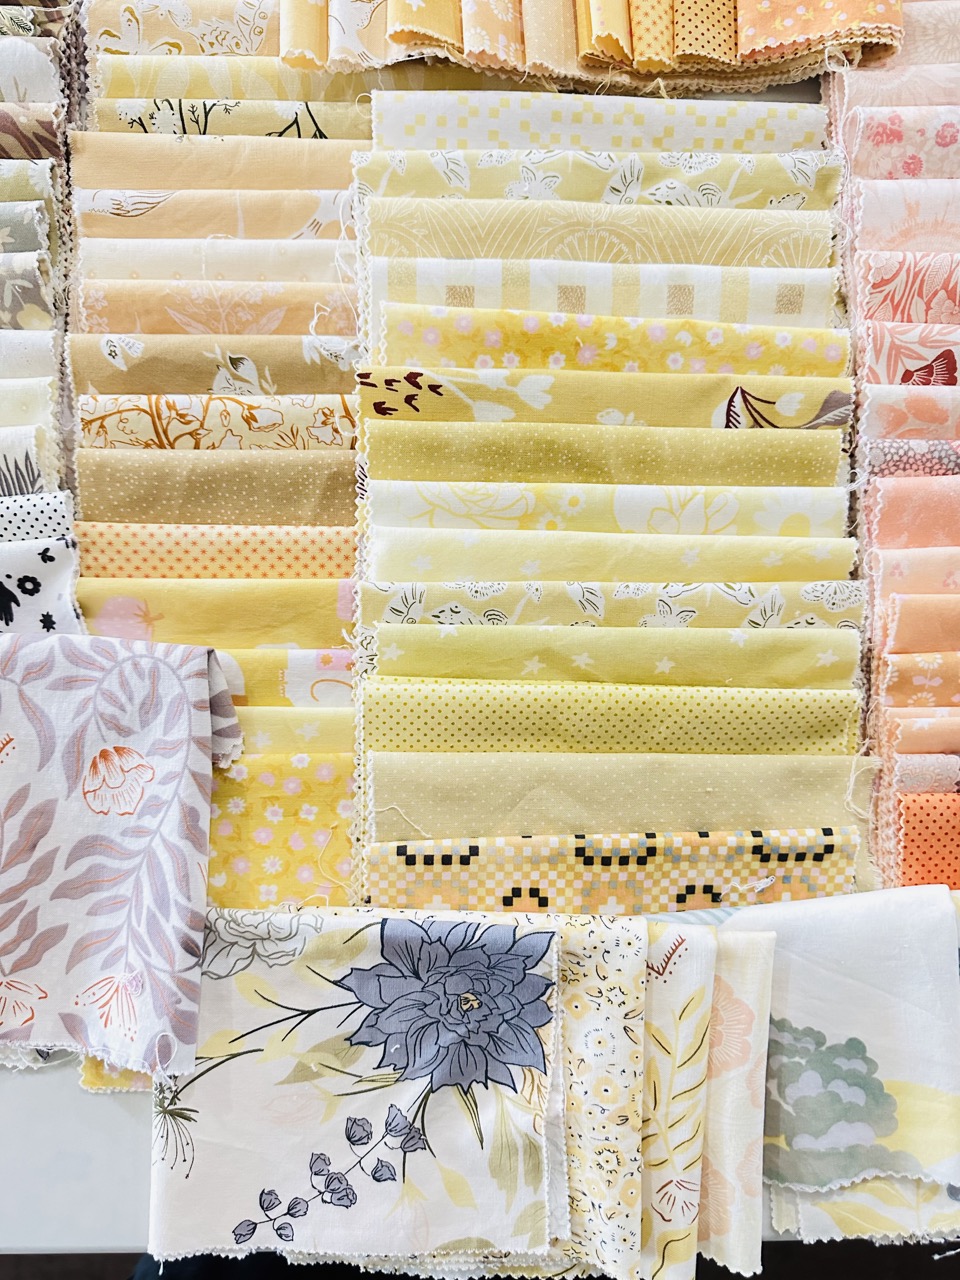
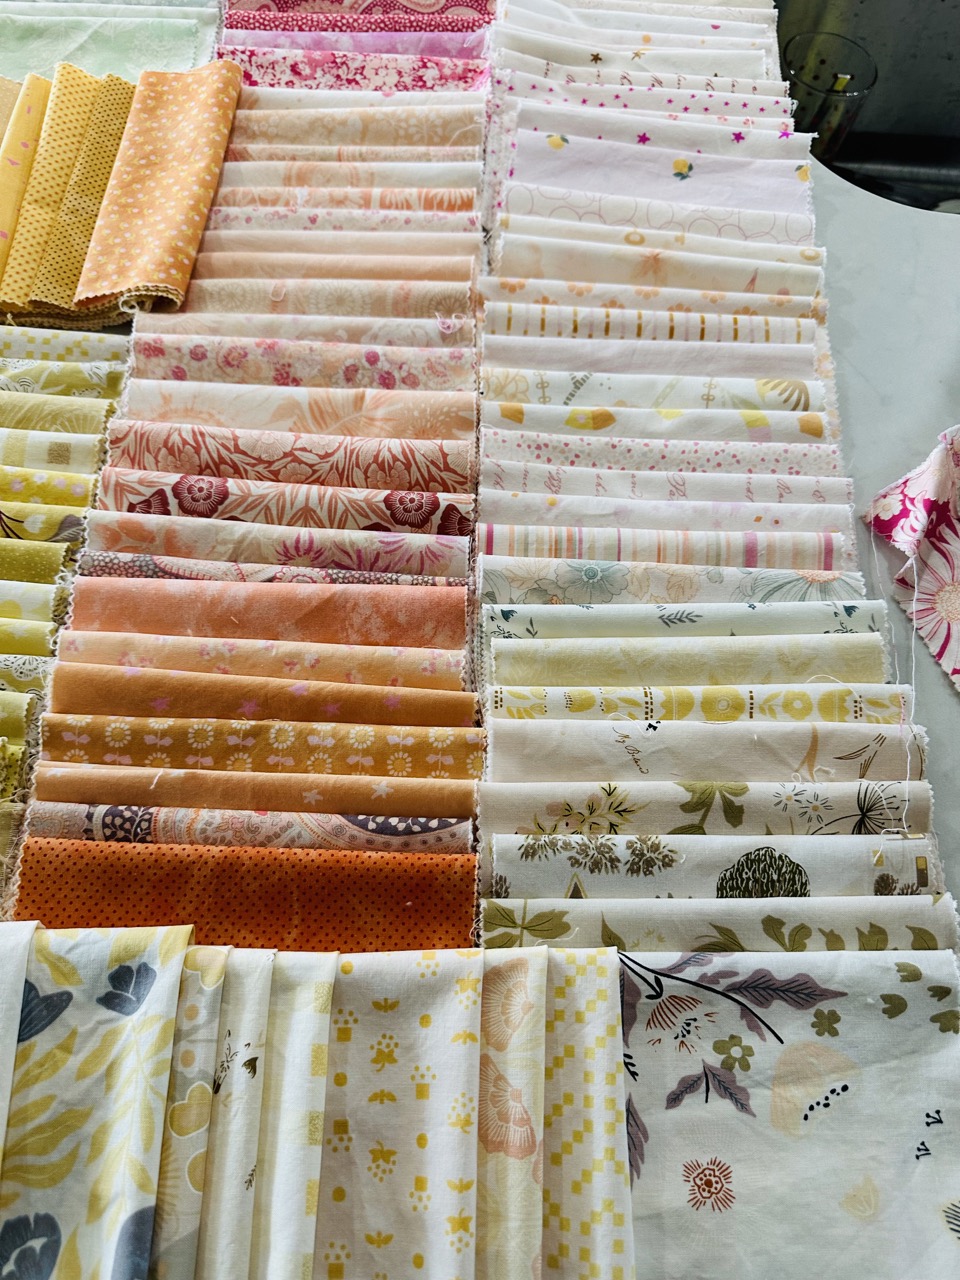
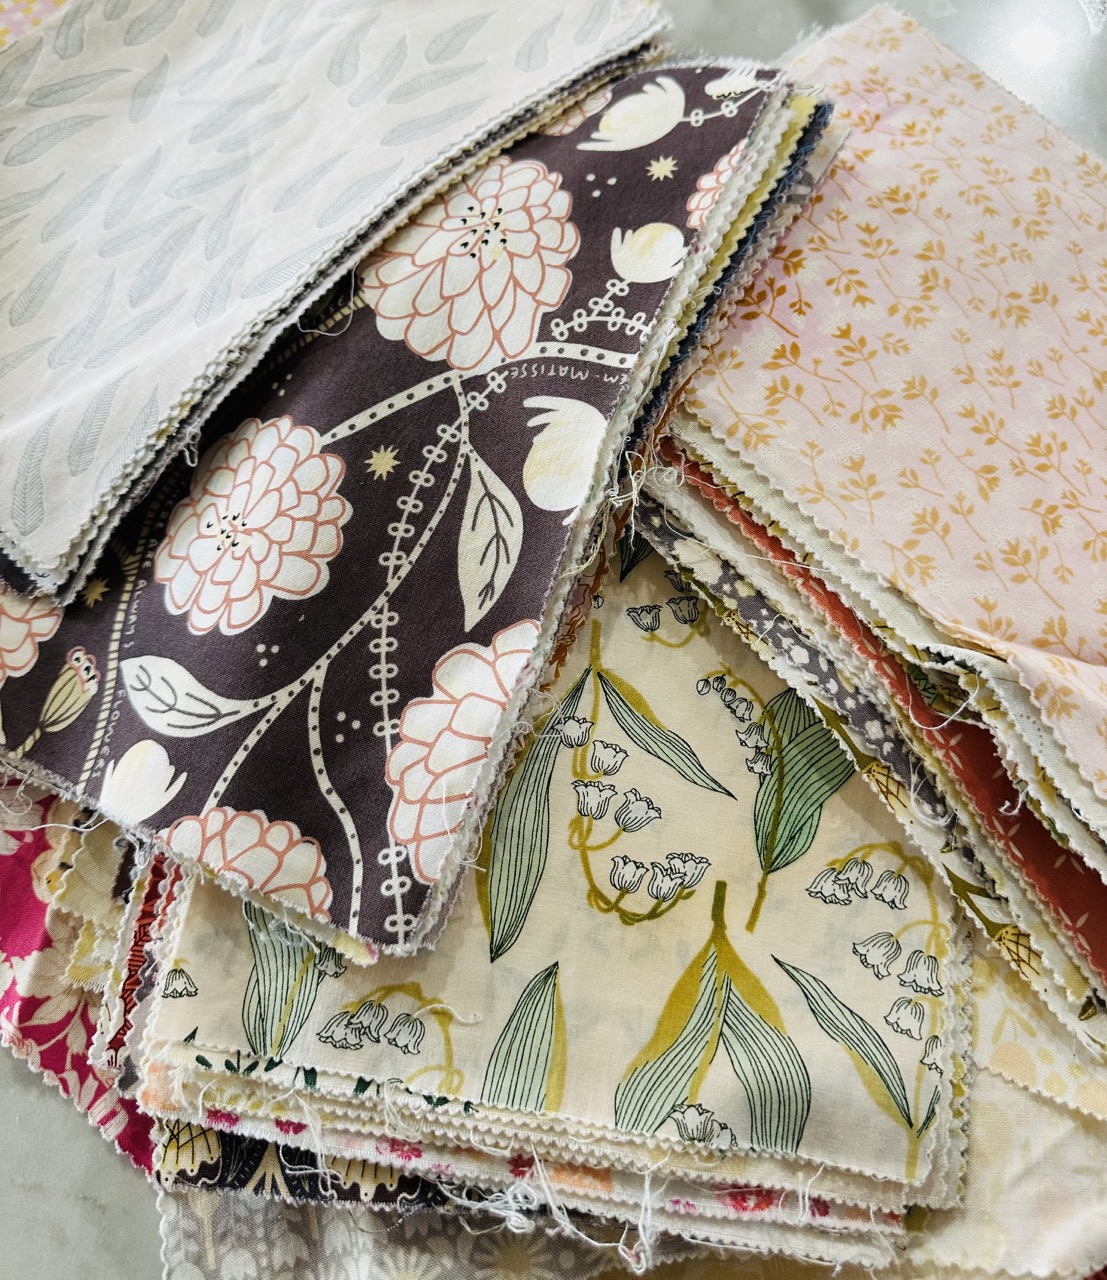
Some of the Bleached fabrics
Step-by-Step Guide
1. Preparing Your Fabric
Before you begin, it’s essential to prepare your fabric. Wash it to remove any sizing or finishes that might interfere with the dyeing process. Do not use fabric softener as it can prevent the dye from penetrating the fabric evenly.
2. Overdyeing the Fabric
Overdyeing is a great way to create a base layer of color.
– **Choose Your Dye:** Select a dye that complements the existing color of your fabric. If you’re aiming for a vintage look, consider using muted or earthy tones. I use Ritz Dye and combine tan and taupe. Always start light and you can make darker as needed.
– **Prepare the Dye Bath:** Follow the instructions on the dye package to create your dye bath. Typically, this involves mixing the dye with hot water and a fixative like salt or vinegar.
– **Dye the Fabric:** Submerge your fabric in the dye bath and stir continuously to ensure even coverage. Leave the fabric in the dye bath for the recommended amount of time, then rinse until the water runs clear.
– **Dry the Fabric:** Allow the fabric to air dry completely.
3. Bleaching the Fabric
Once your fabric is dyed and dried, it’s time to create that faded, vintage look with bleach.
– **Prepare Your Work Area:** Lay down a plastic sheet or old newspapers to protect your work surface. Make sure the area is well-ventilated.
– **Dilute the Bleach:** Mix bleach with water to create a diluted solution. A 1:10 ratio of bleach to water is a good starting point, but you can adjust this depending on how much color you want to remove.
– **Apply the Bleach:** There are several techniques you can use:
– **Full Submersion:** Submerge the fabric in the bleach solution and monitor it closely. Remove the fabric once it has reached the desired level of fading. The majority of the fabrics during this experiment I left in the bleach solution a tad bit too long. They came out out lighter than I was hoping for.
– **Rinse Thoroughly:** Once the fabric has lightened to your satisfaction, rinse it thoroughly in cold water to stop the bleaching process. Keep in mind that the wet fabric will be appear darker than the final dried version. Wash the fabric with a mild detergent to remove any remaining bleach. You can also through the fabric into hydrogen peroxide to stop the bleaching process.
4. Finishing Touches
After bleaching, you might want to overdye the fabric again to add depth to the color. Repeat the overdyeing process as needed until you achieve the desired look. Once you’re satisfied, wash and dry the fabric one final time.
Tips and Tricks
– **Test First:** Always test your dye and bleach on a small swatch of fabric before applying to the entire piece. This will help you gauge how the fabric will react.
– **Use Natural Fibers:** Natural fibers like cotton, linen, and wool absorb dye better and react more predictably to bleach.
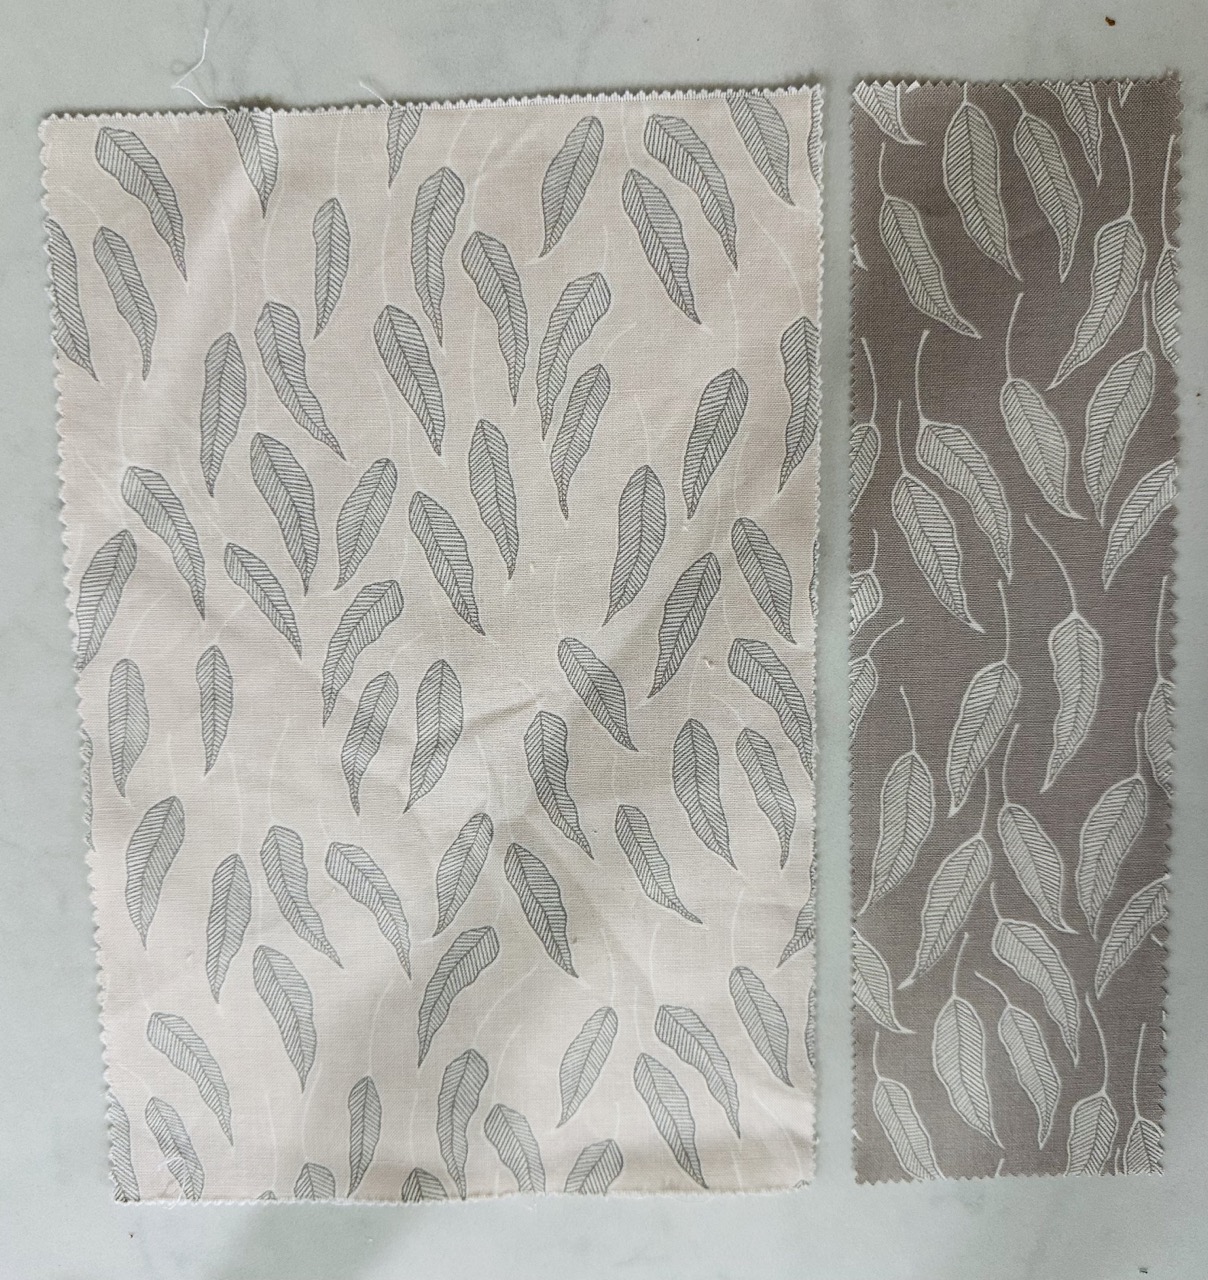
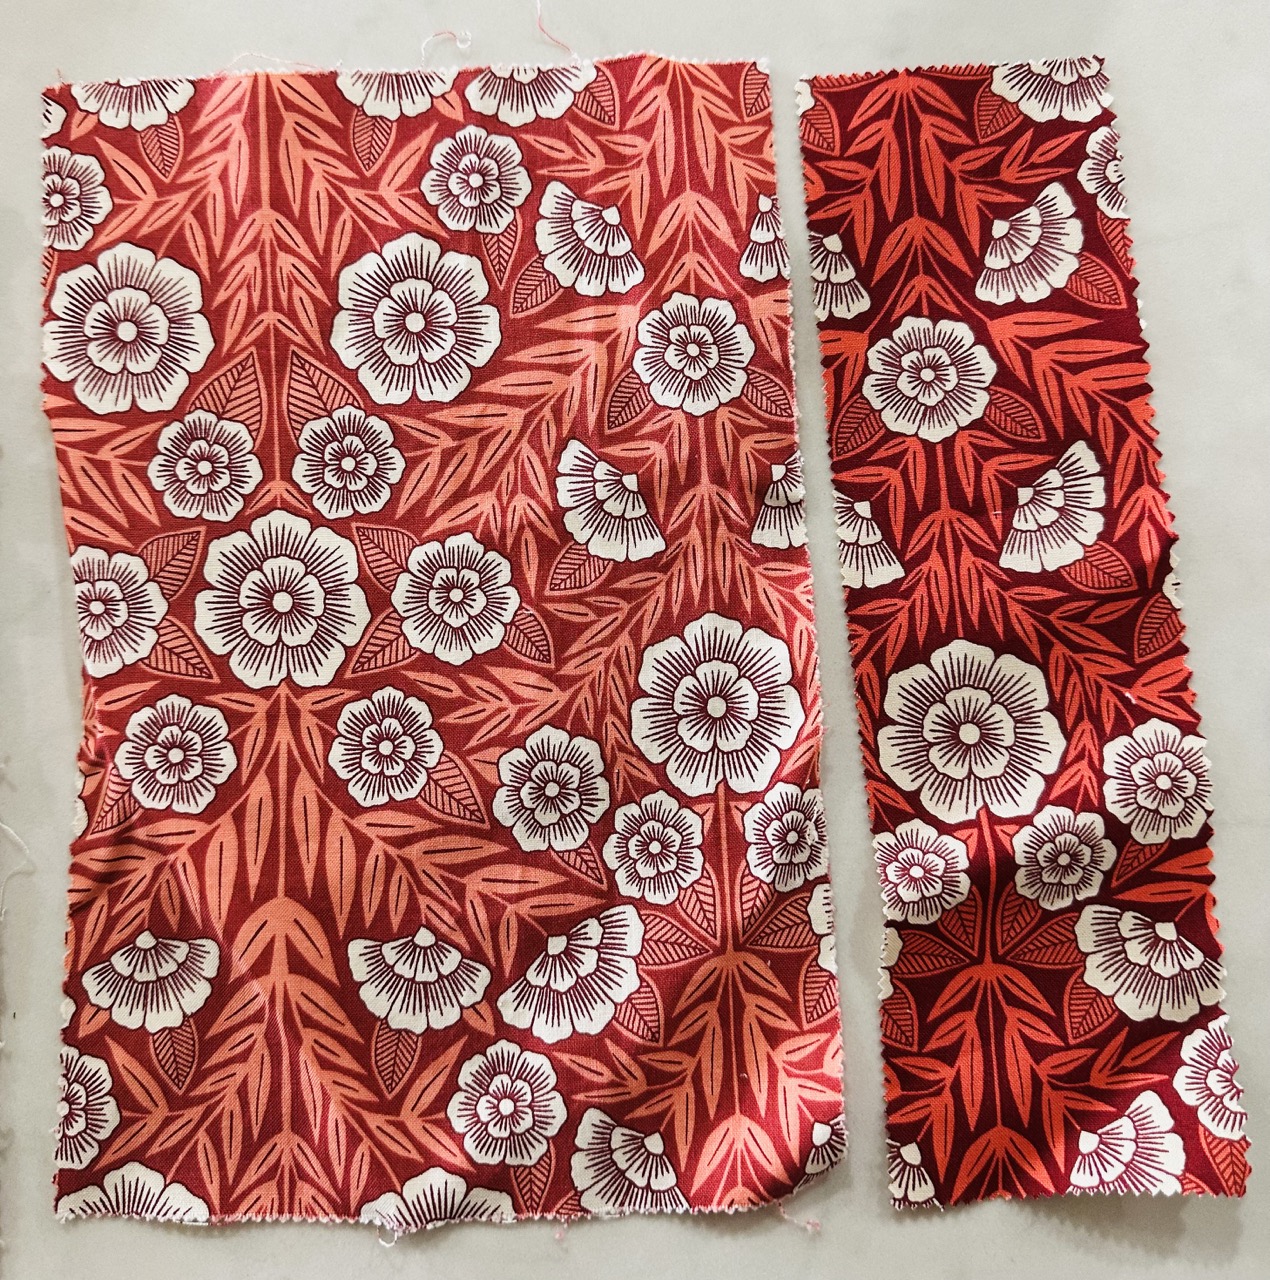
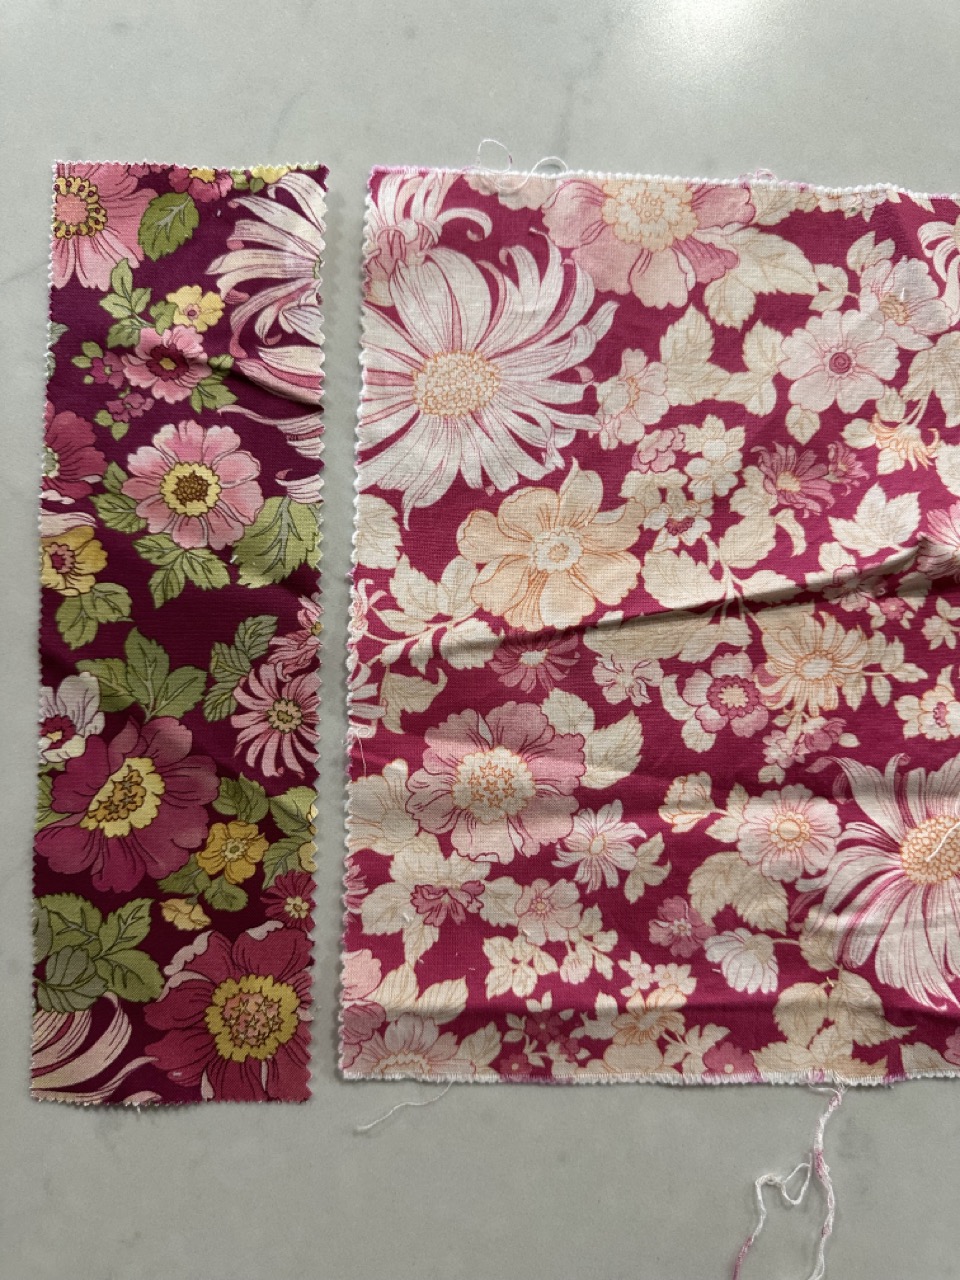
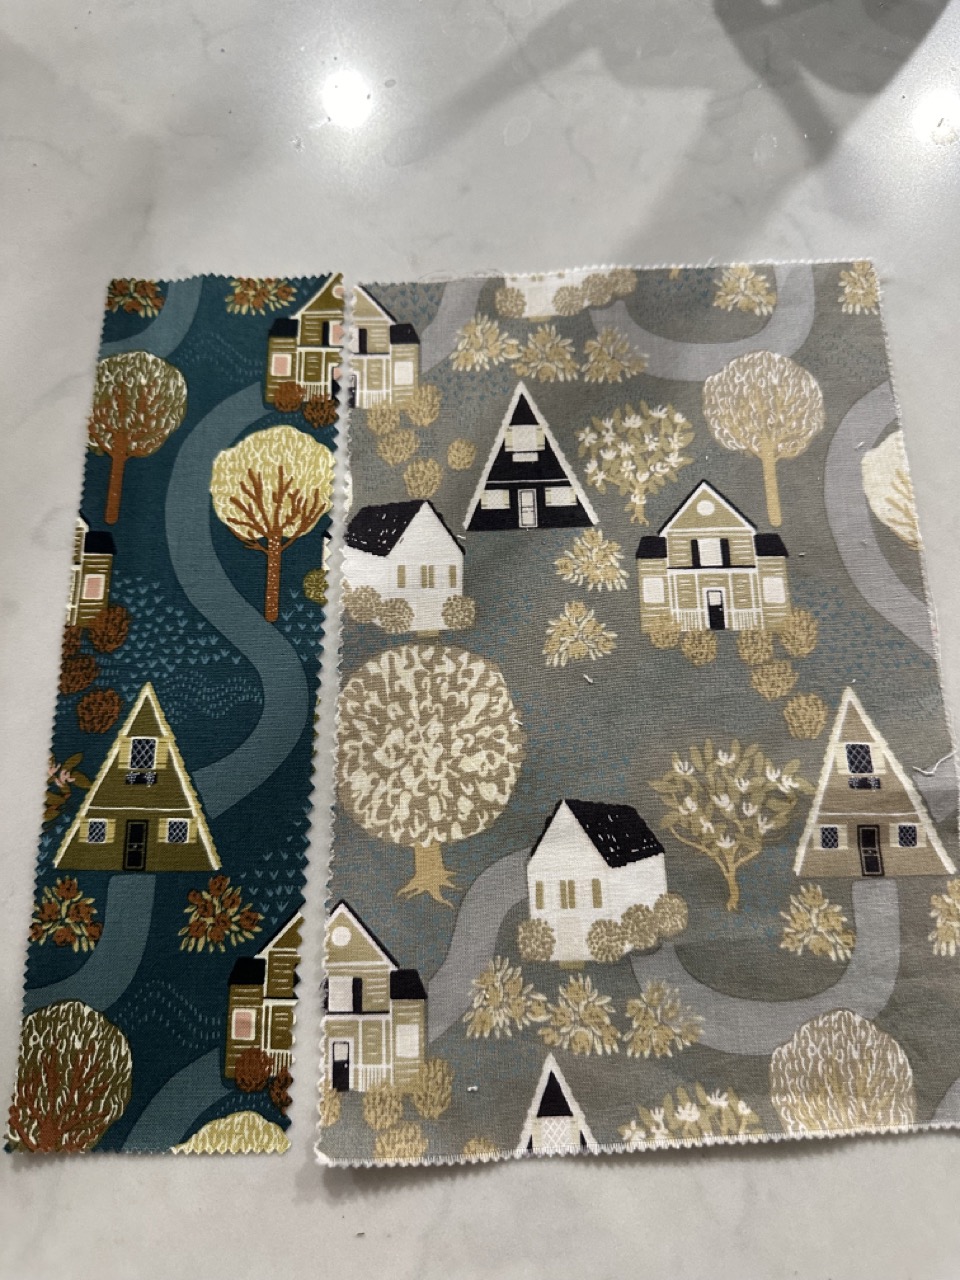
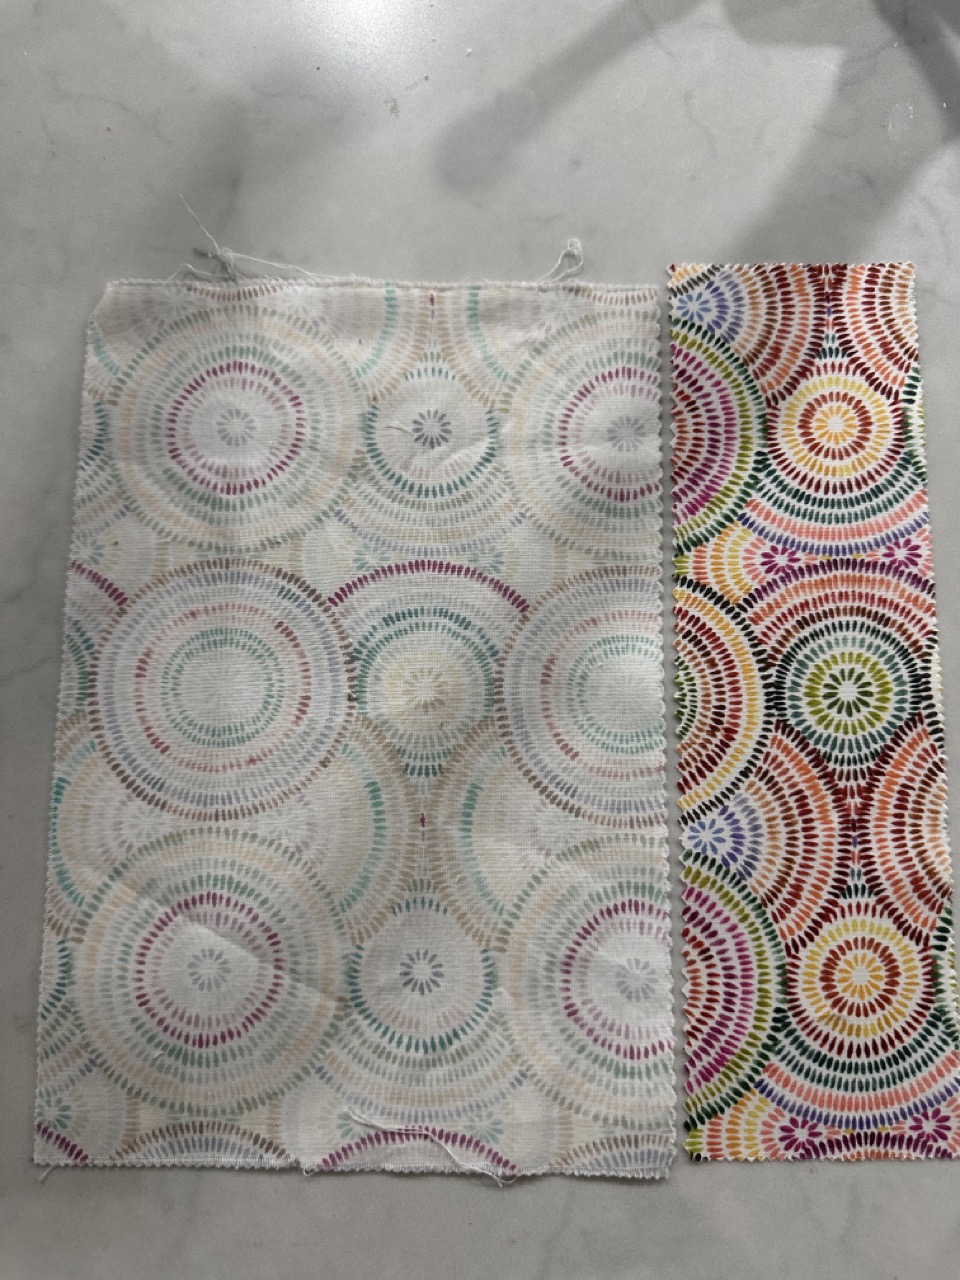
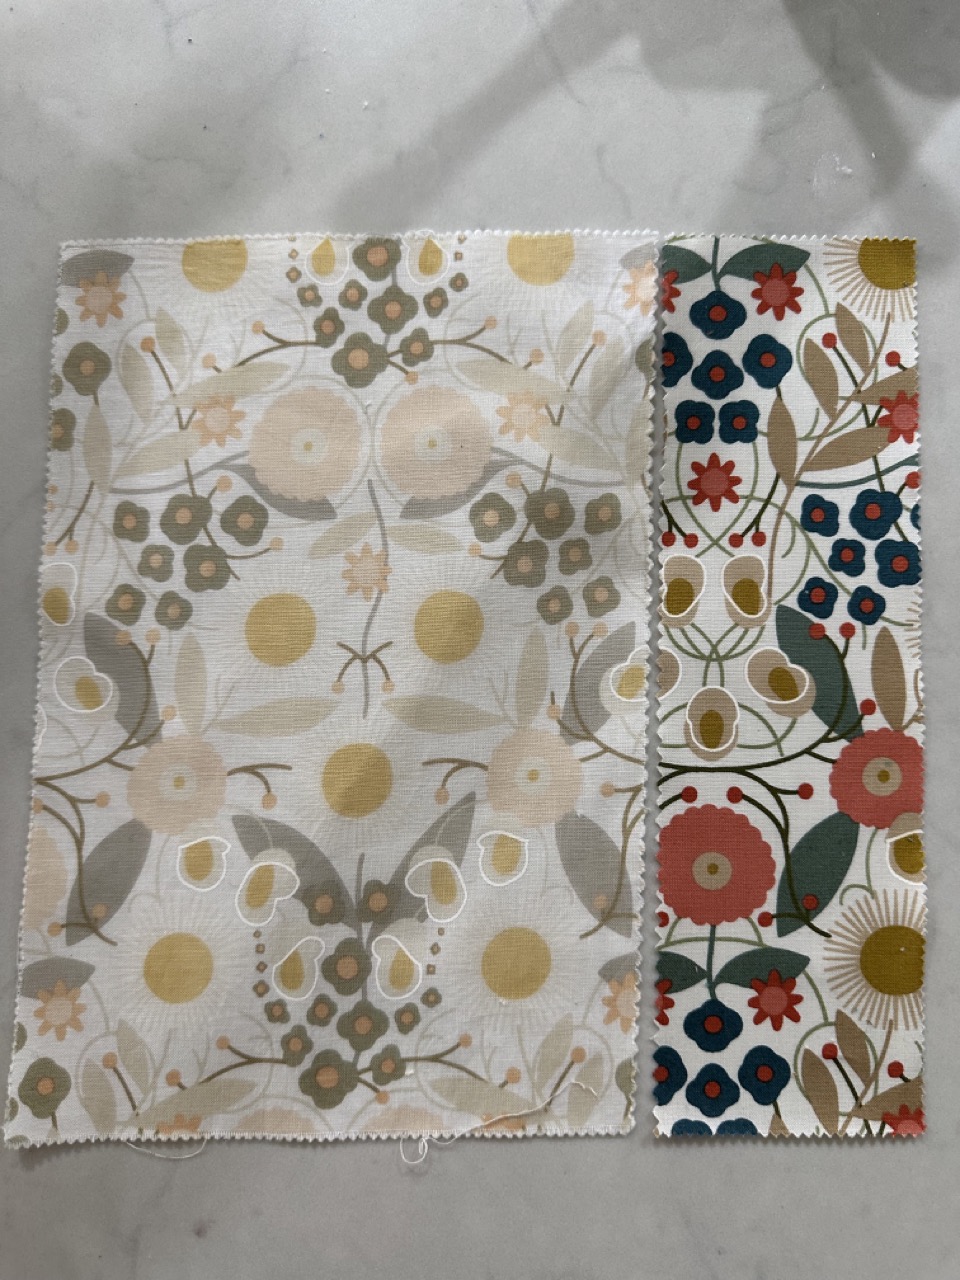
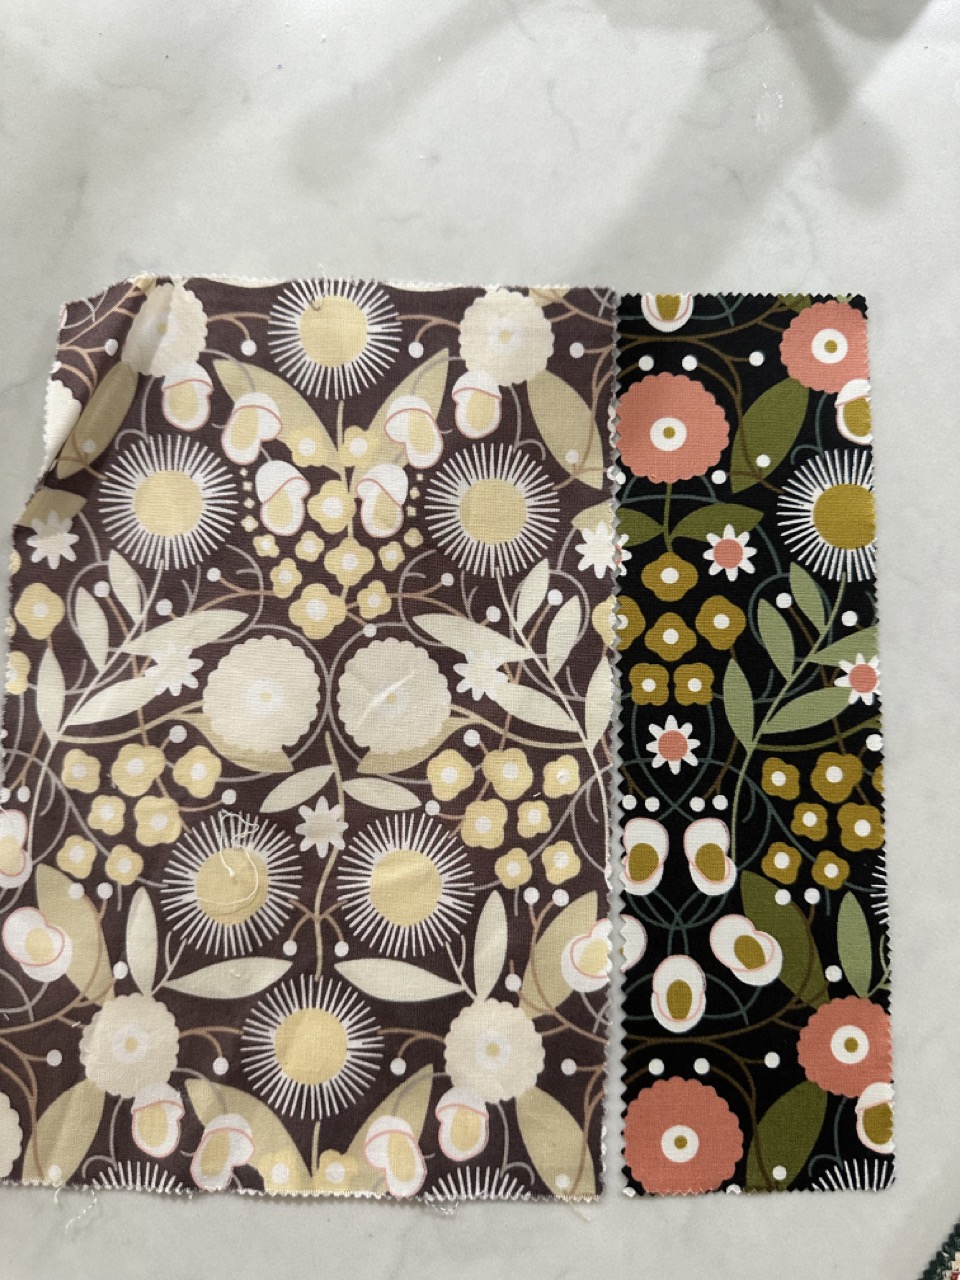
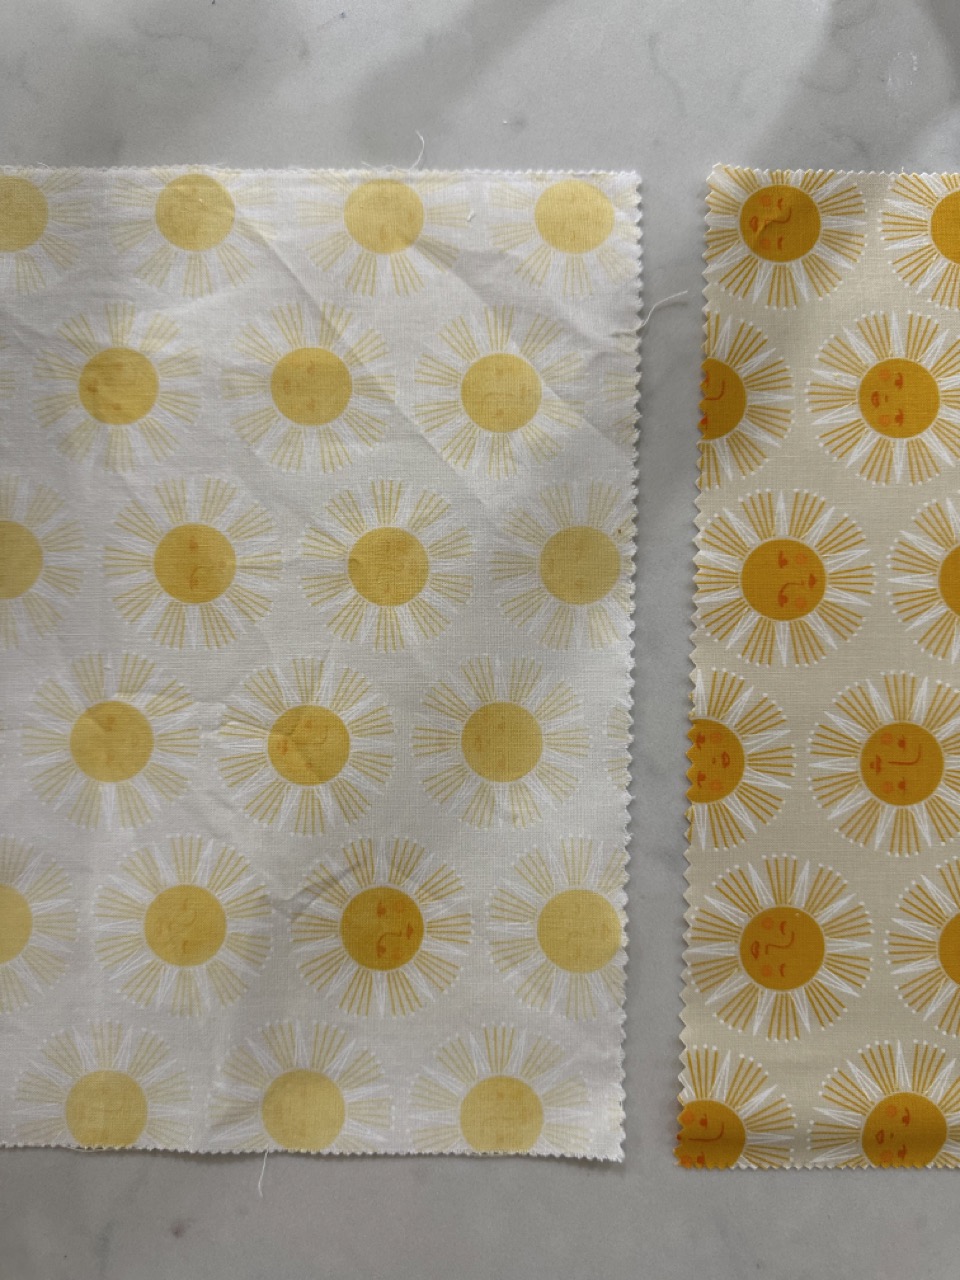
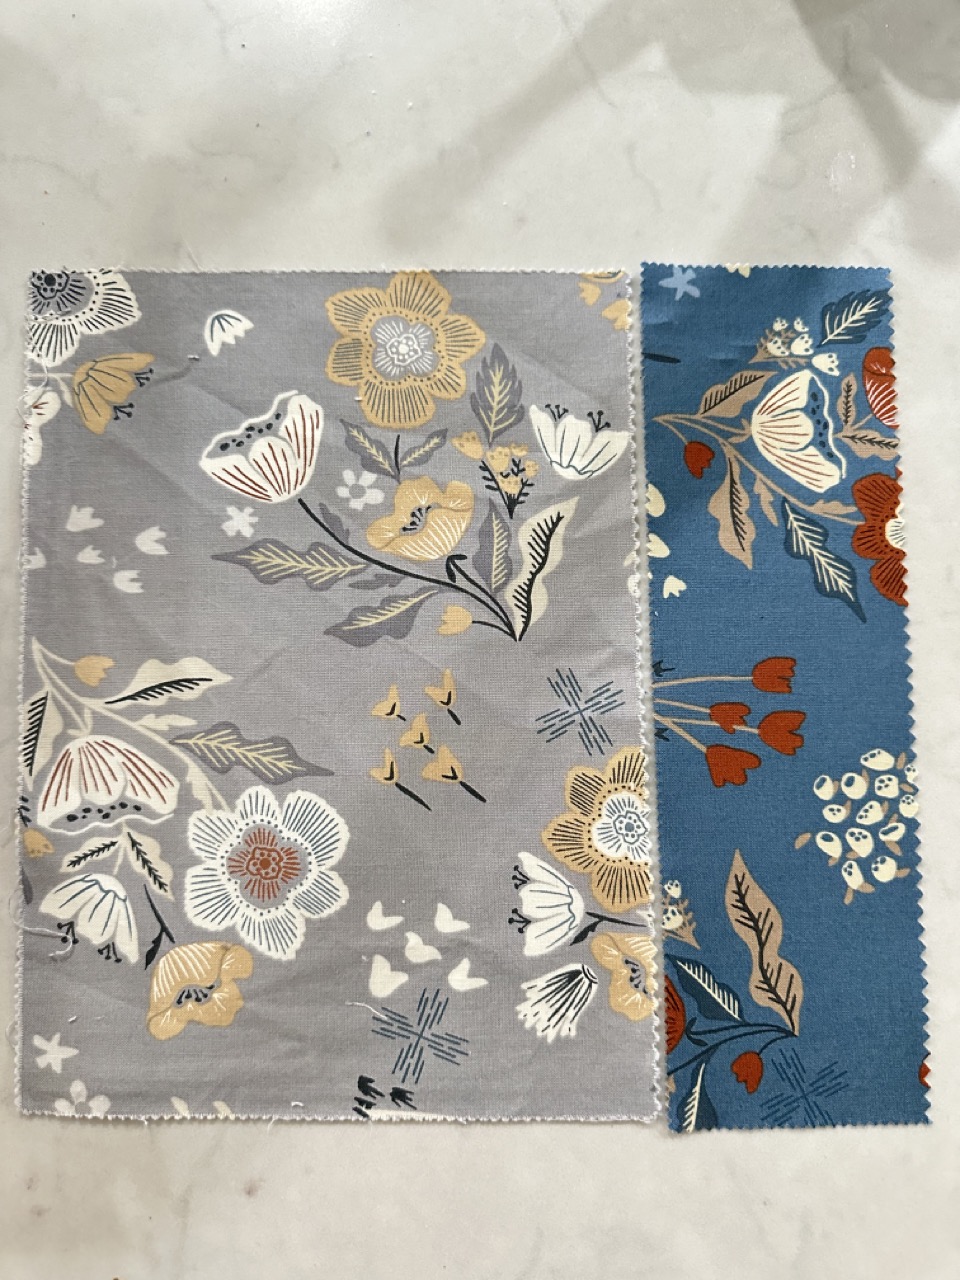
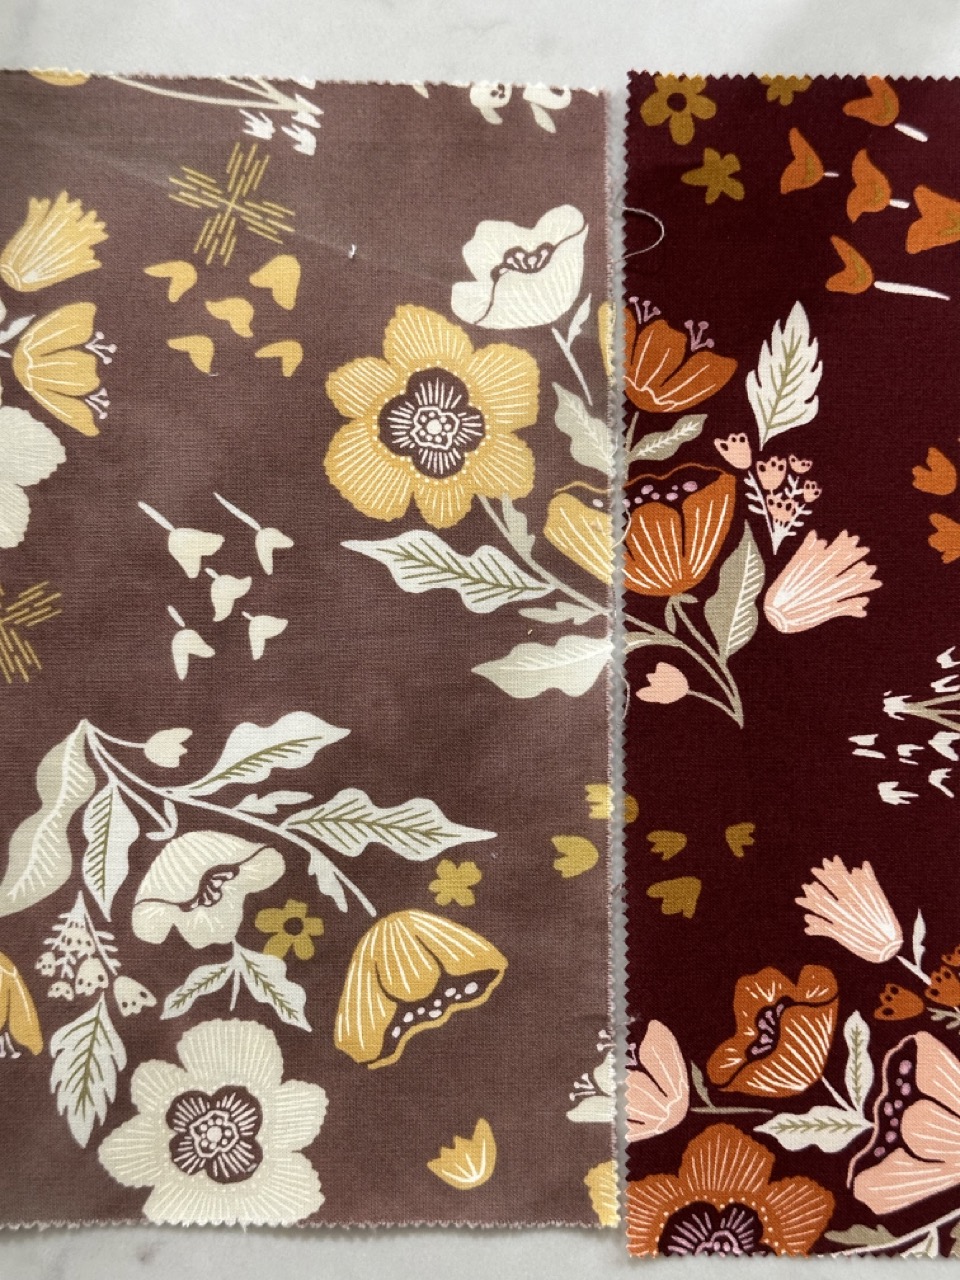
– **Experiment with Techniques:** Don’t be afraid to experiment with different dyeing and bleaching techniques to achieve unique effects. The beauty of vintage fabrics lies in their imperfections and individuality. I saved a piece of each fabric before bleaching. Some prints did not change much until they were compared side by side to the original. Others changed greatly so I have shared some side by side comparisons here.
Before and AfterBefore and AfterBefore and After
Before and AfterBefore and After
Conclusion
Creating faded, vintage fabrics is a rewarding and creative process. With overdyeing and bleaching, you can breathe new life into modern fabrics, giving them a unique, aged look that’s perfect for home décor, fashion, and quilting projects Now I just need to decide what project I want to use these in. Any suggestions? Leave a comment and let me know if there is a perfect pattern to use these fabrics.
I still have quite a few fabrics to sort through.
Please keep in mind this was just some mad, crazy, lab experiment. I never suggest to use bleach in washing quilts.
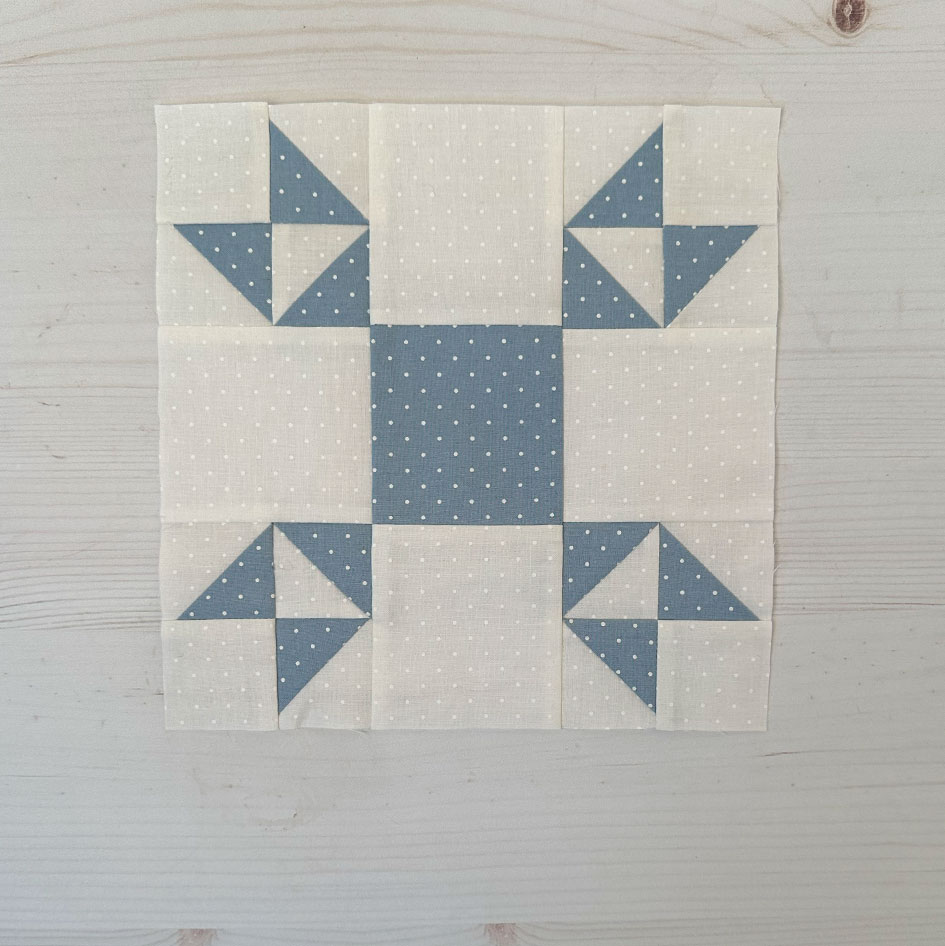
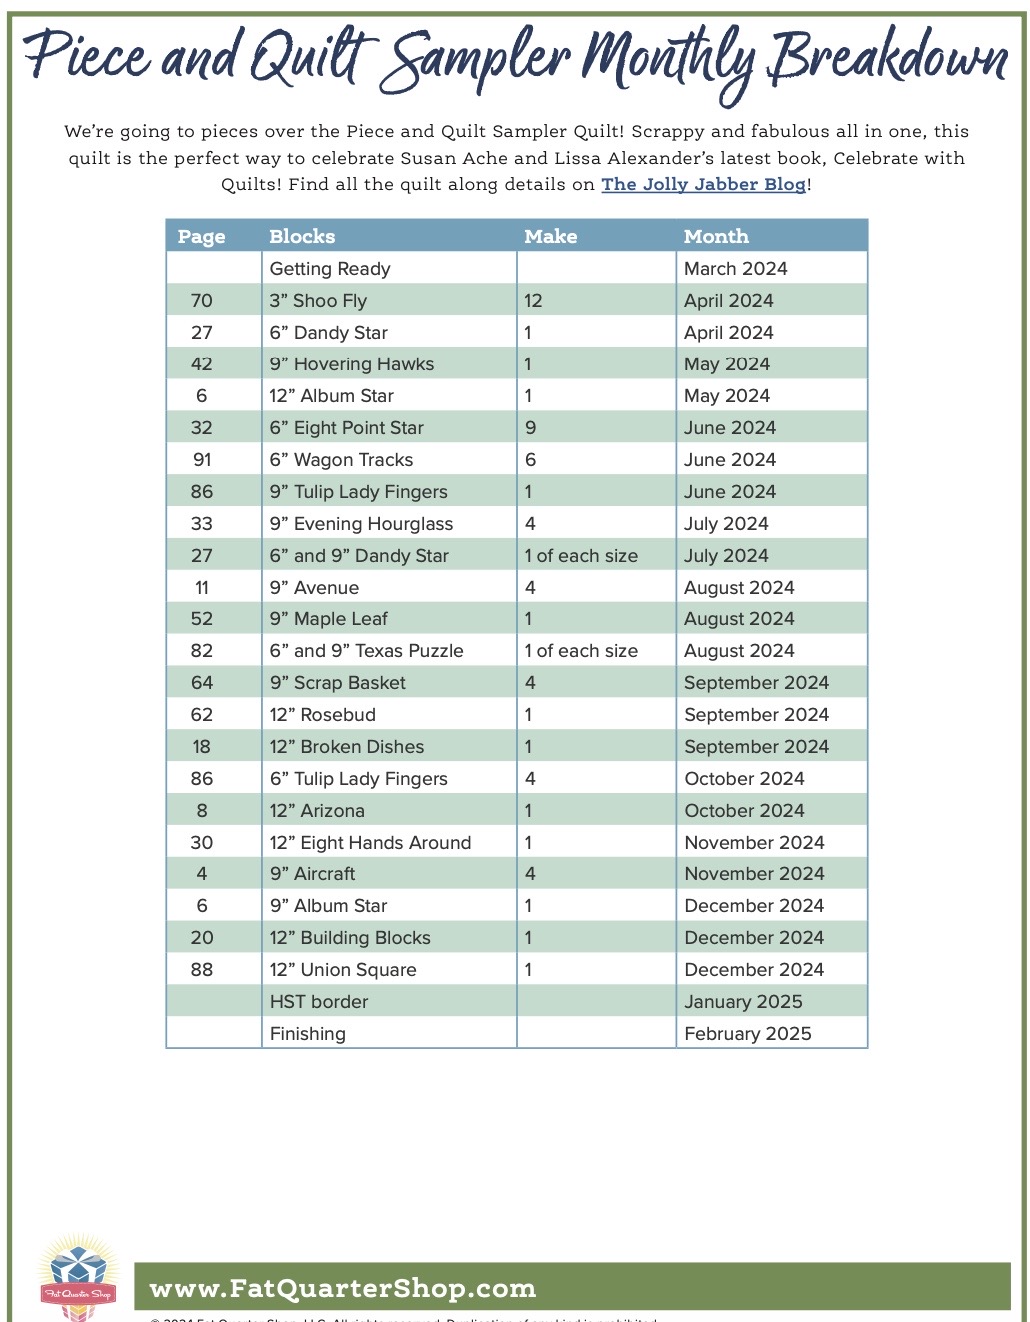
We are back again with month 3 of the Piece and and Quilt Sampler project.
There are 3 different blocks this month and there is quite a bit of sewing. Don’t worry, take your time. Lisa Bongean of Primitive Gatherings once gave me this advice and I am going to share it with you here.
– When you are working on a BOM, no matter what you do, go ahead and cut it out. This way when you have a few minutes you can sit down and sew a few pieces together. This uses different brain power than the concentration needed to cut. It really does work!
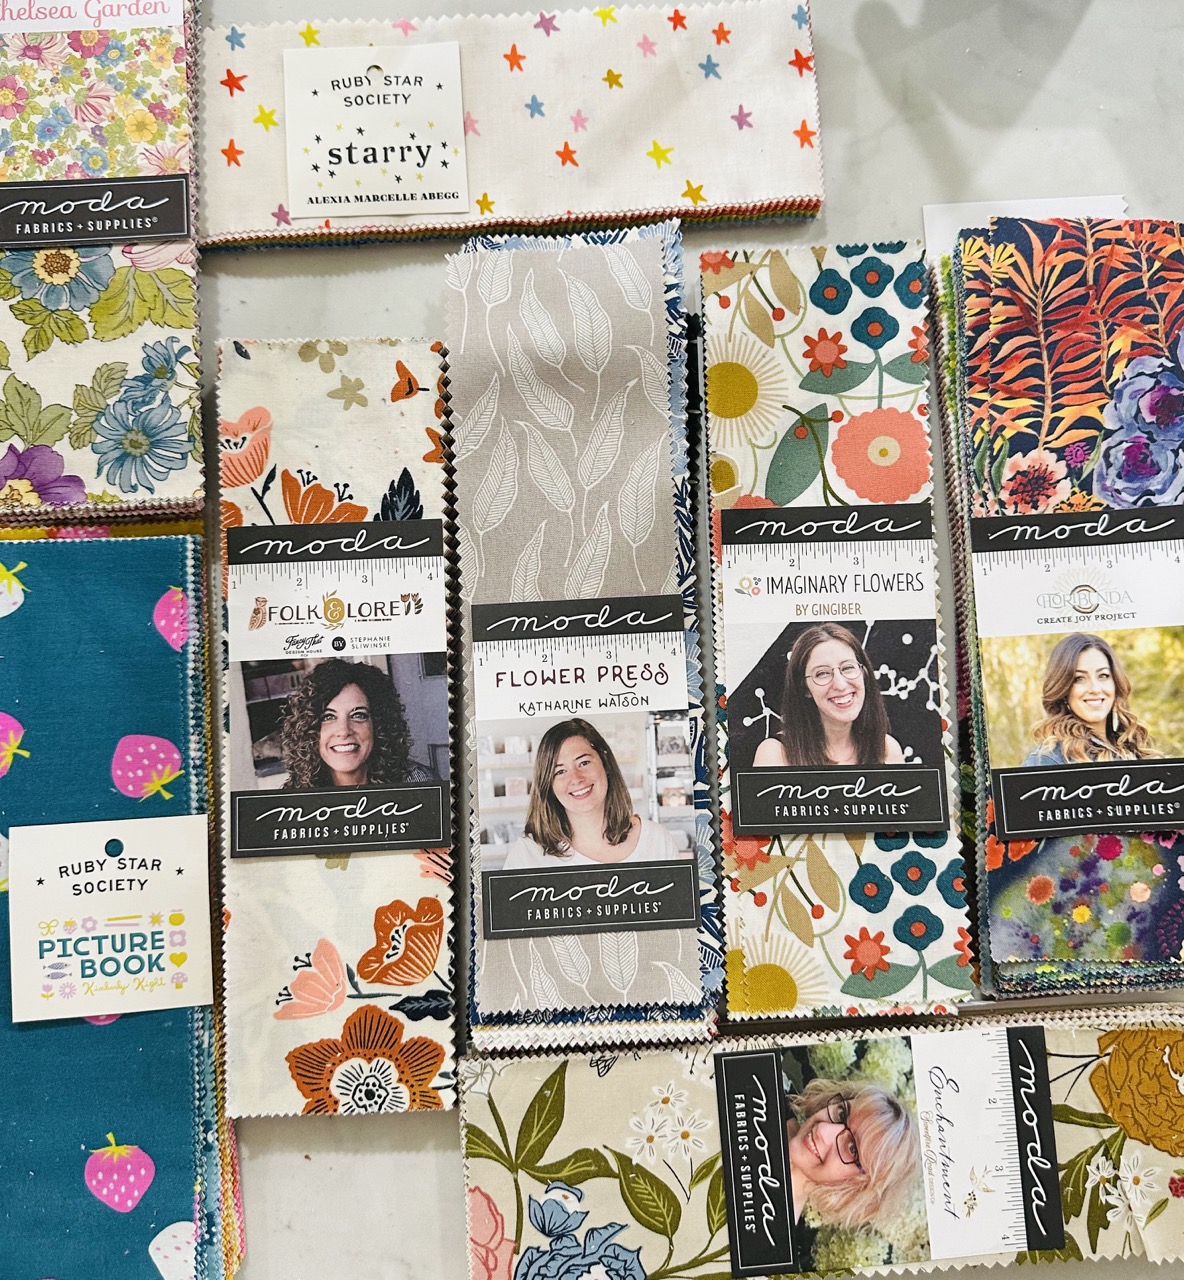
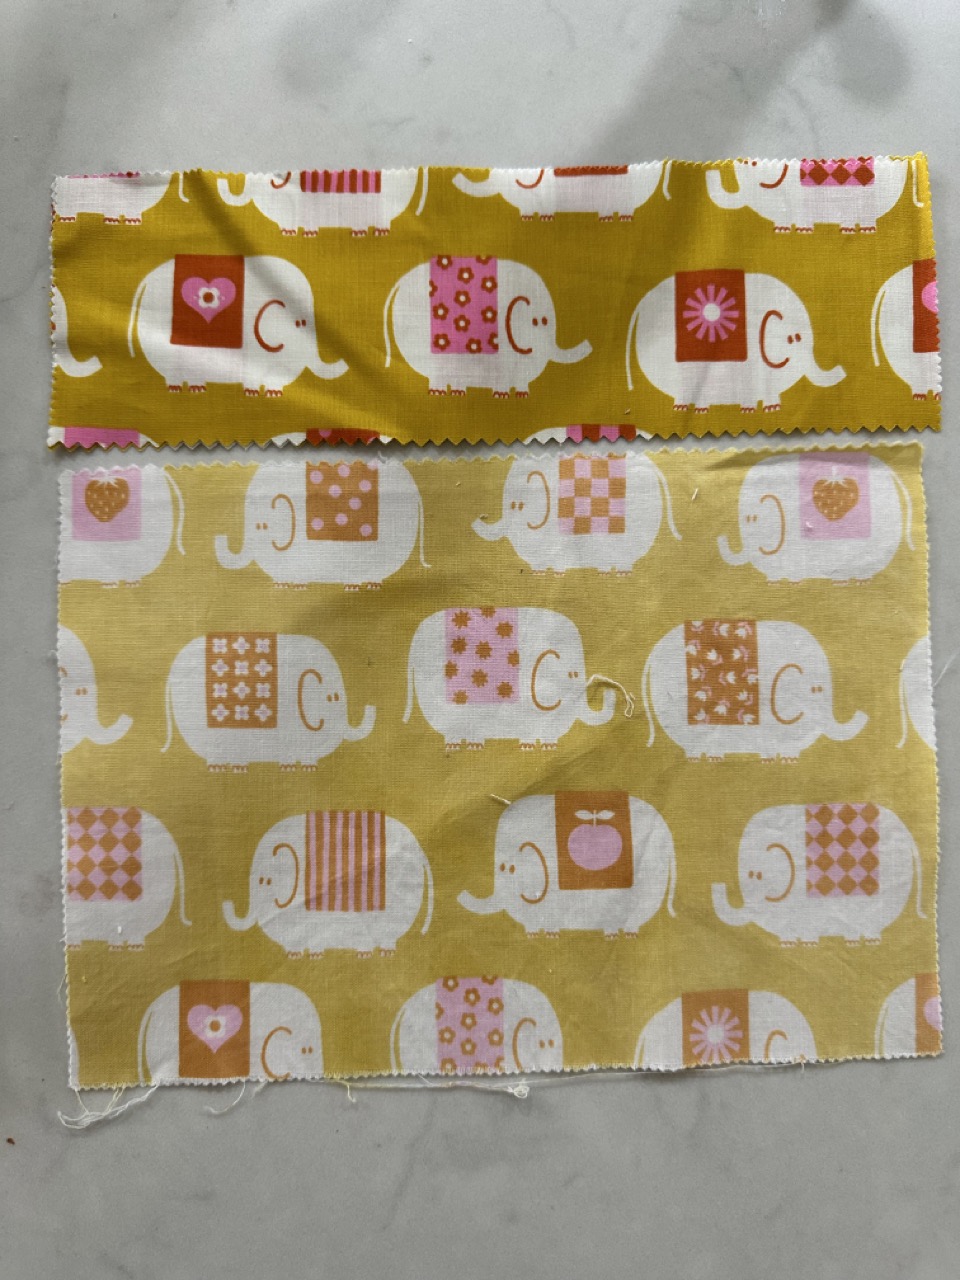
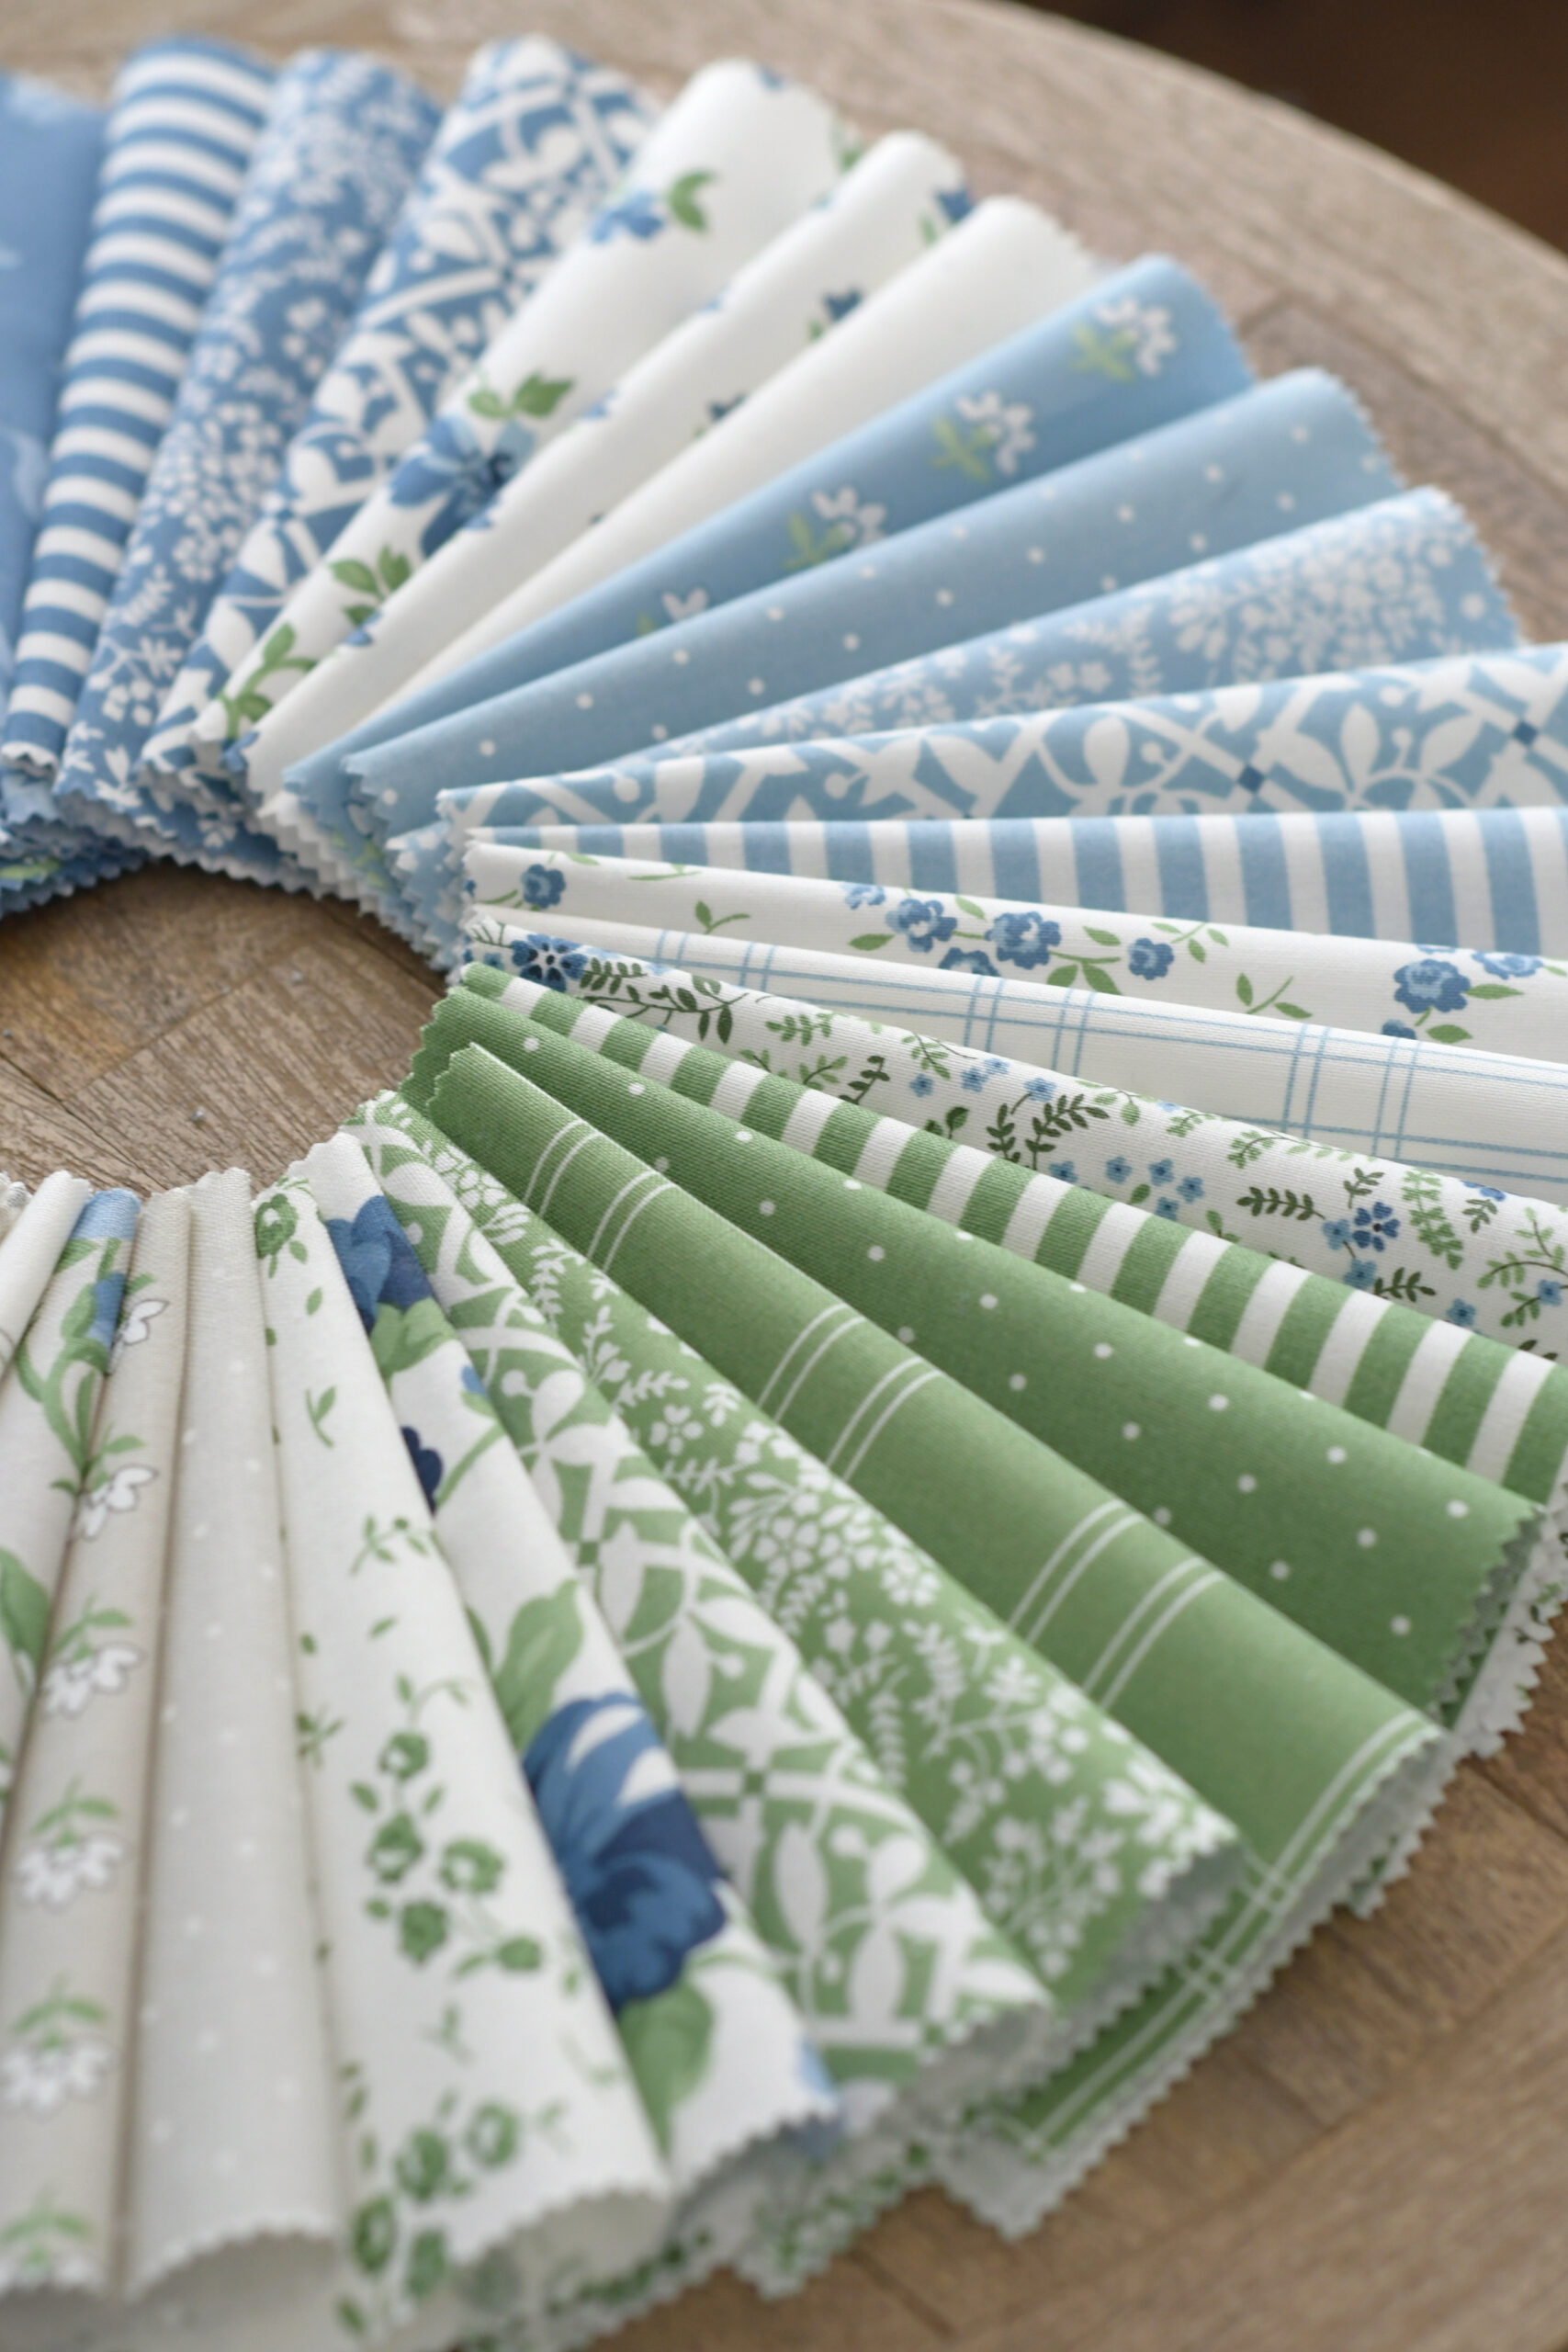
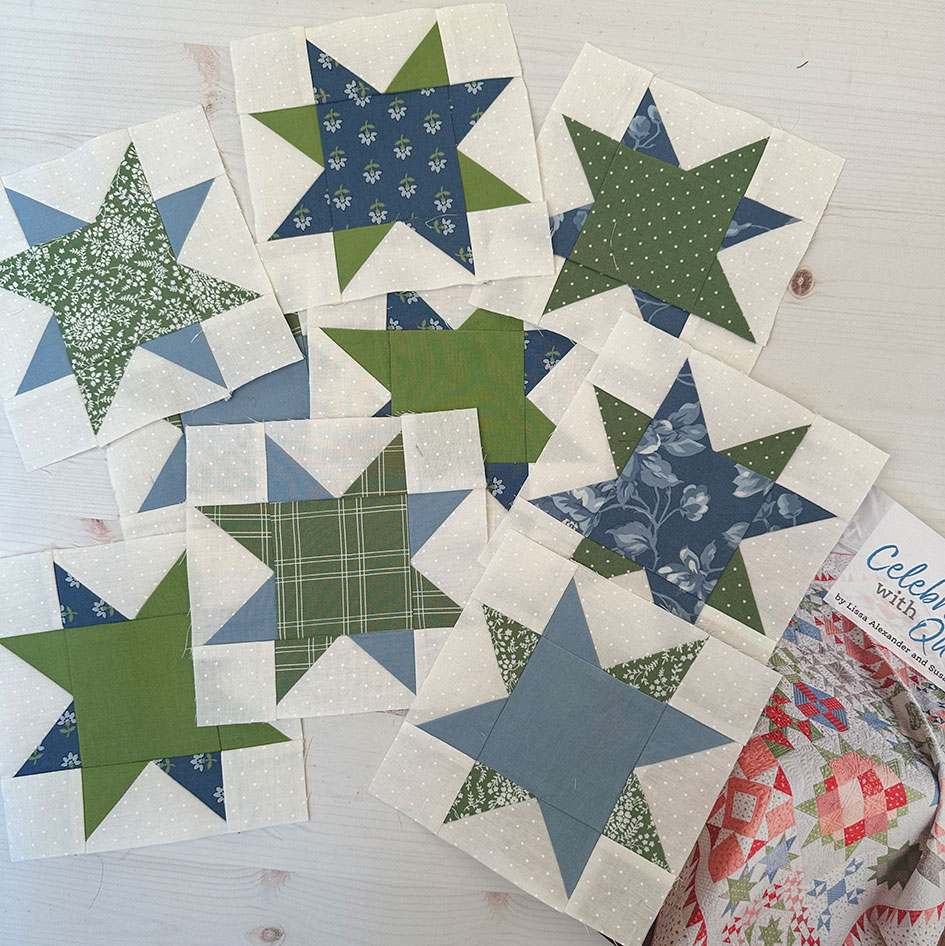
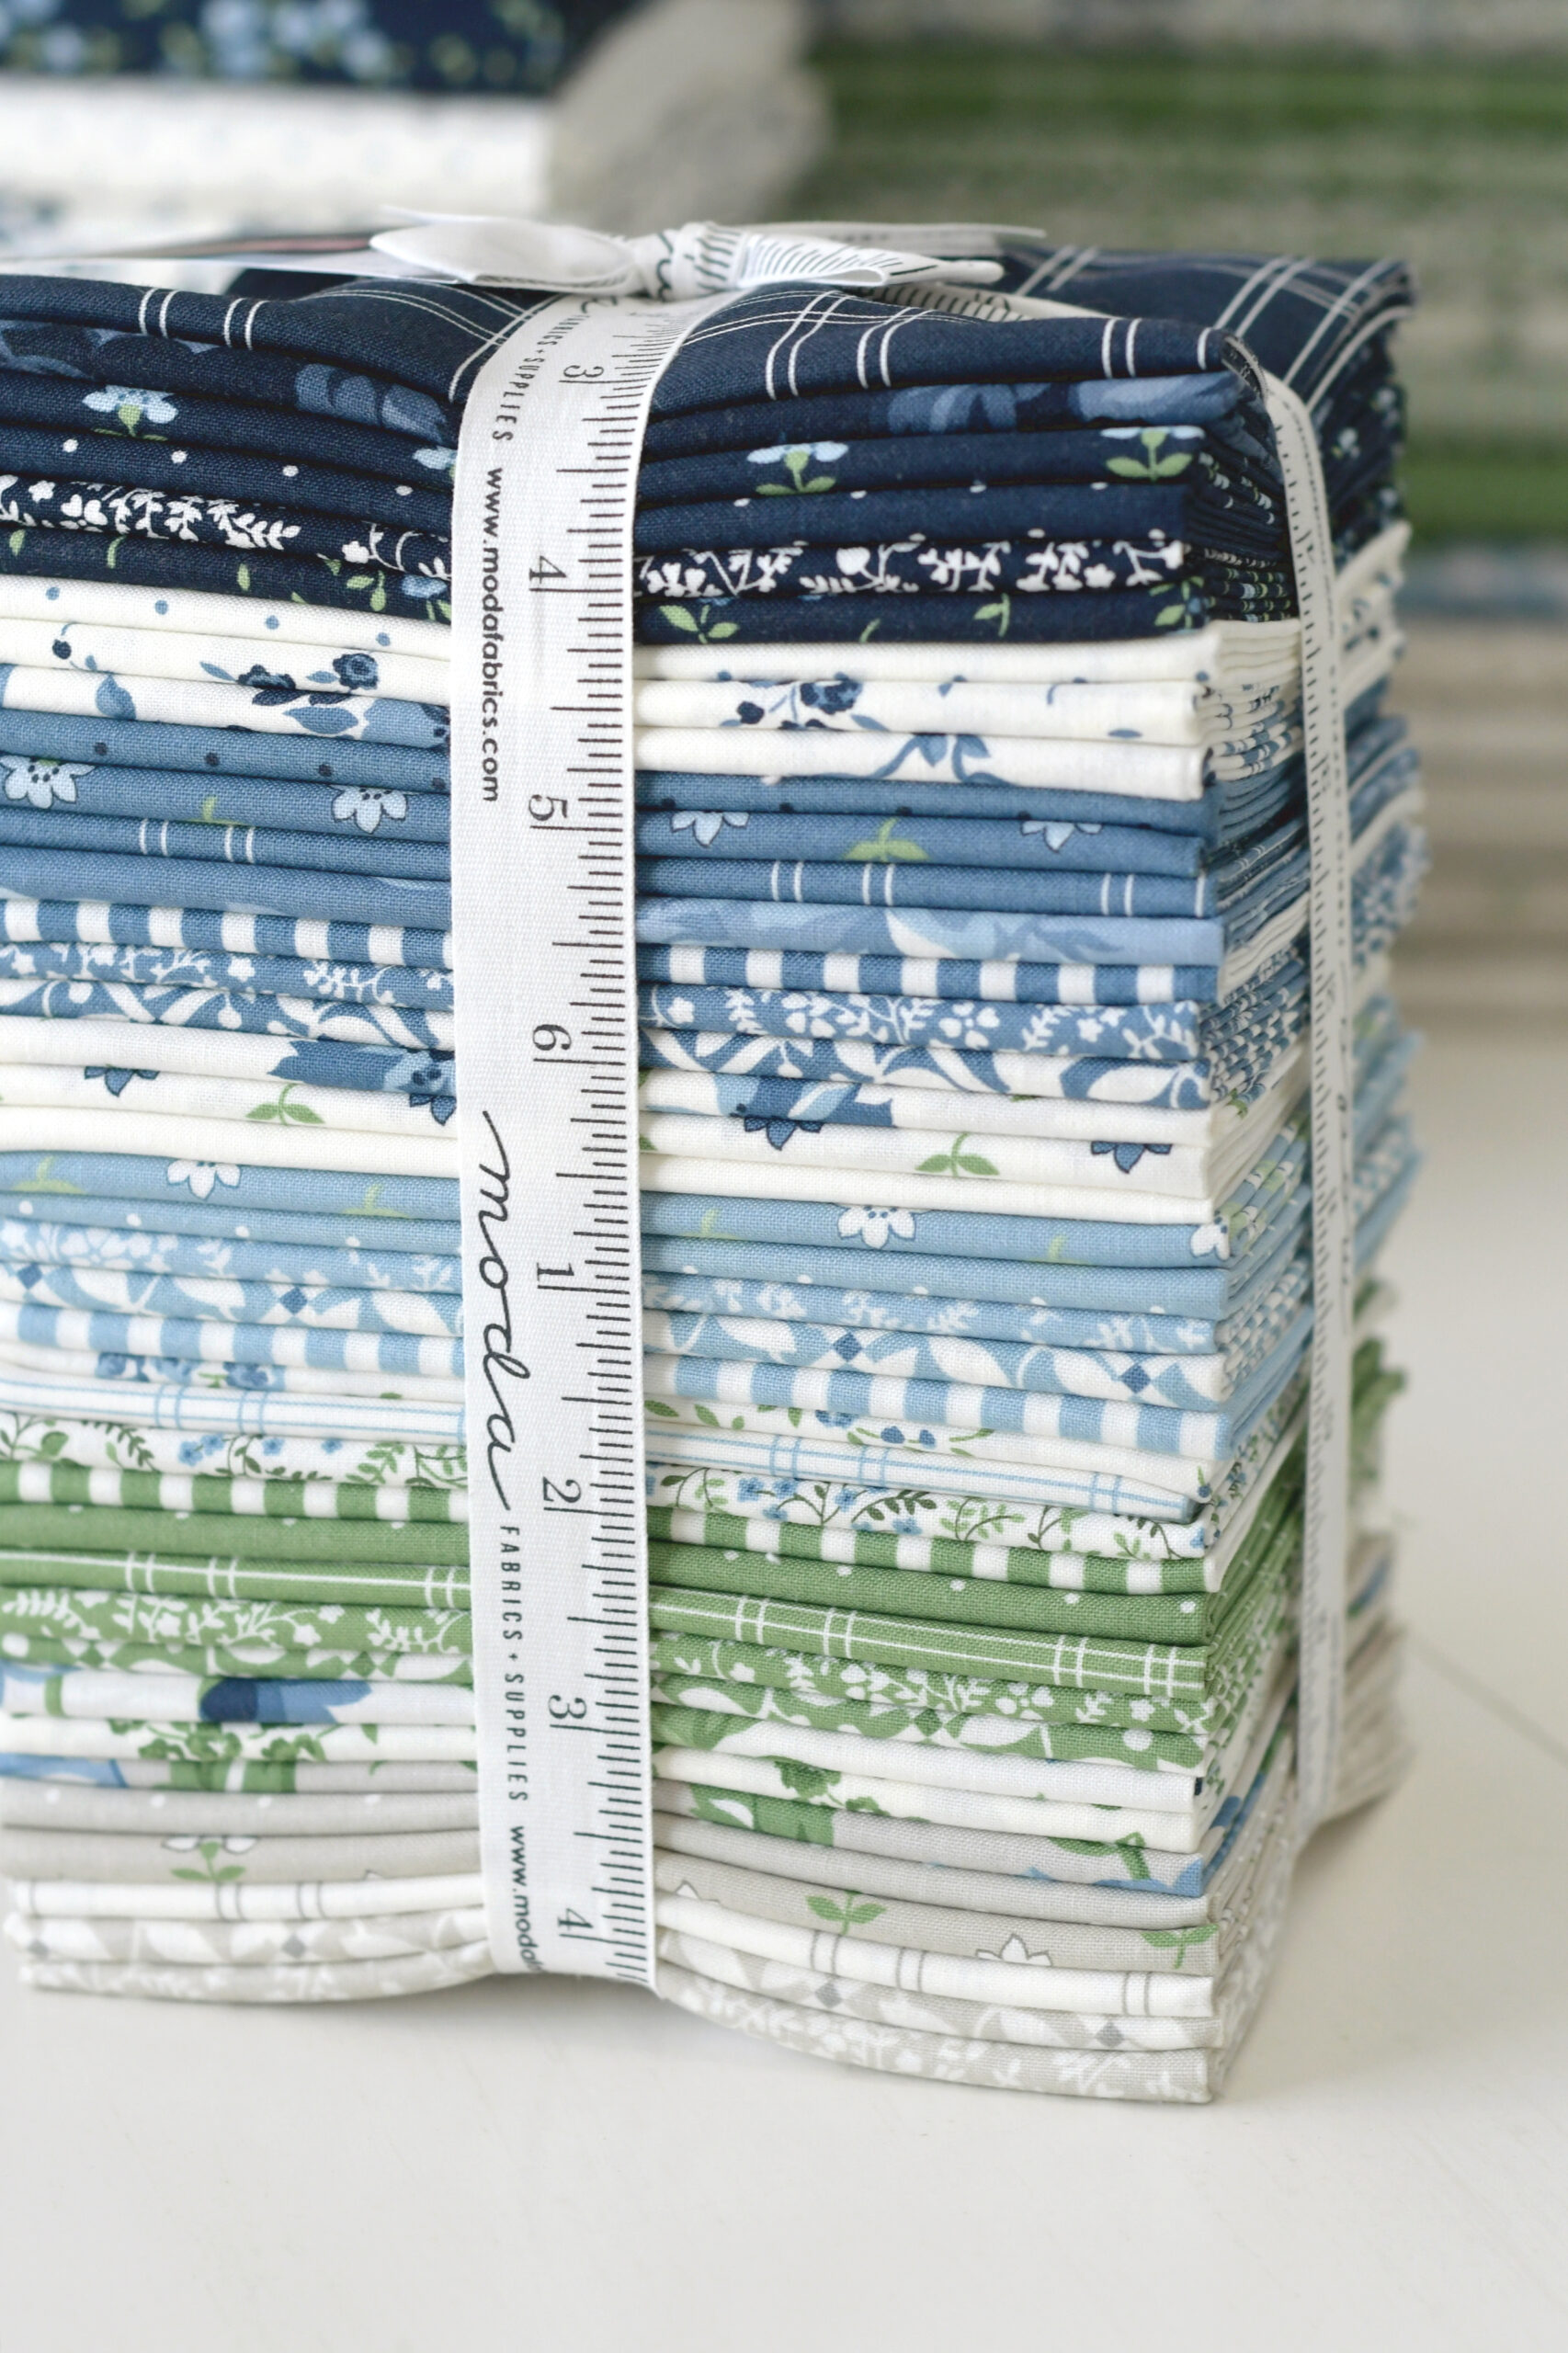
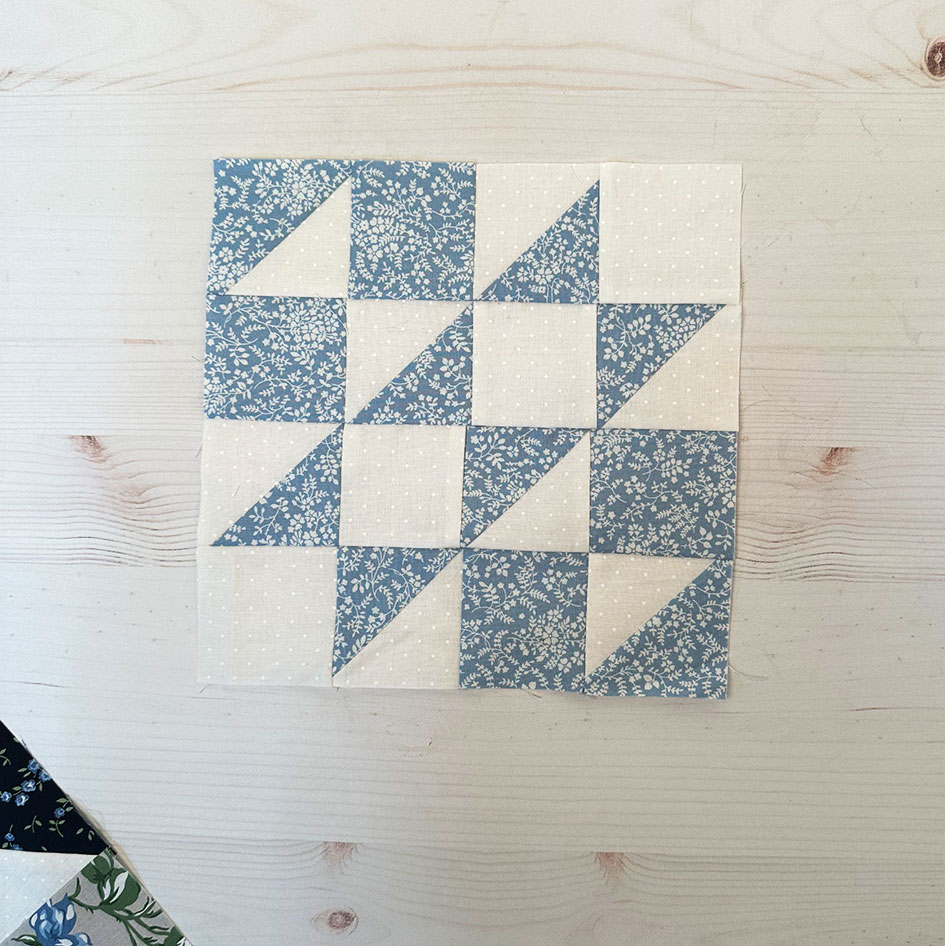
Shoreline by Camille Roskelley. Aren’t these fabrics yummy?!
I rarely use the same print in one block but the blue dotted fabric and the white dotted background almost make this a dainty delicate block.
To create this sampler with different sized blocks, I had to combine some of the blocks into larger ones creating a completely new block. I love how this one turned out. I love the look of using plaids. The navy here is a printed fabric so it was easy to use and still achieve the geometric look and feel.
My all time favorite block is the sawtooth star. It can be colored in so many different ways. This one with scrappy points adds a whimsical look and sparkles throughout the quilt.
I cannot get enough of this fabric. I am making this sampler and also my Moda blockheads5 quilt using the whites, light blues and greens.
Be sure and visit the following people as they sew along also.
I thought I was the kind of quilter that started a project, finished it and moved on. The majority of the time I am making a project that has a deadline for a trade show, book, blog post for work and more.
Recently, I happen to look up at my design wall and realized I have quite a few things going on. Time to start my progress reports again to keep me in line.
Moda’s Blockheads
Modalissa Blockheads
Blockheads is a weekly post sharing 6″ and 12″ blocks from various Moda and Ruby Star Society designers. Info is here.
I am making 6″ blocks and am in love how it is coming along. I am so excited and can barely wait to finish this. My setting is from Celebrate with Quilts book, using Susan Ache’s Blueprint design.
Modalissa Blockheads
I am hooked on Camille’s fabric line, Shoreline. I am making and hosting a QAL for Celebrate Quilts sampler quilt. This one is not on my wall, but on display at a local shop.
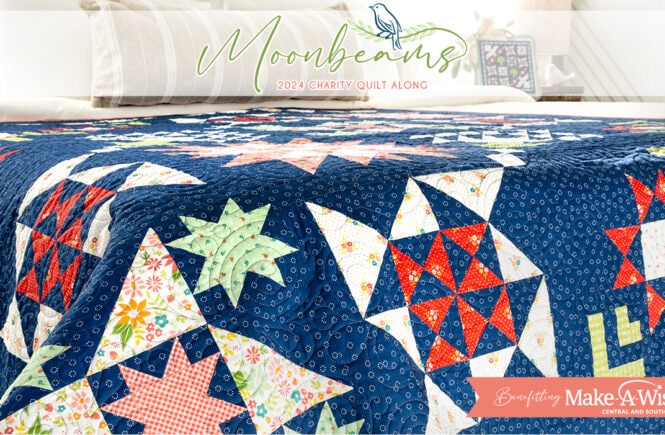
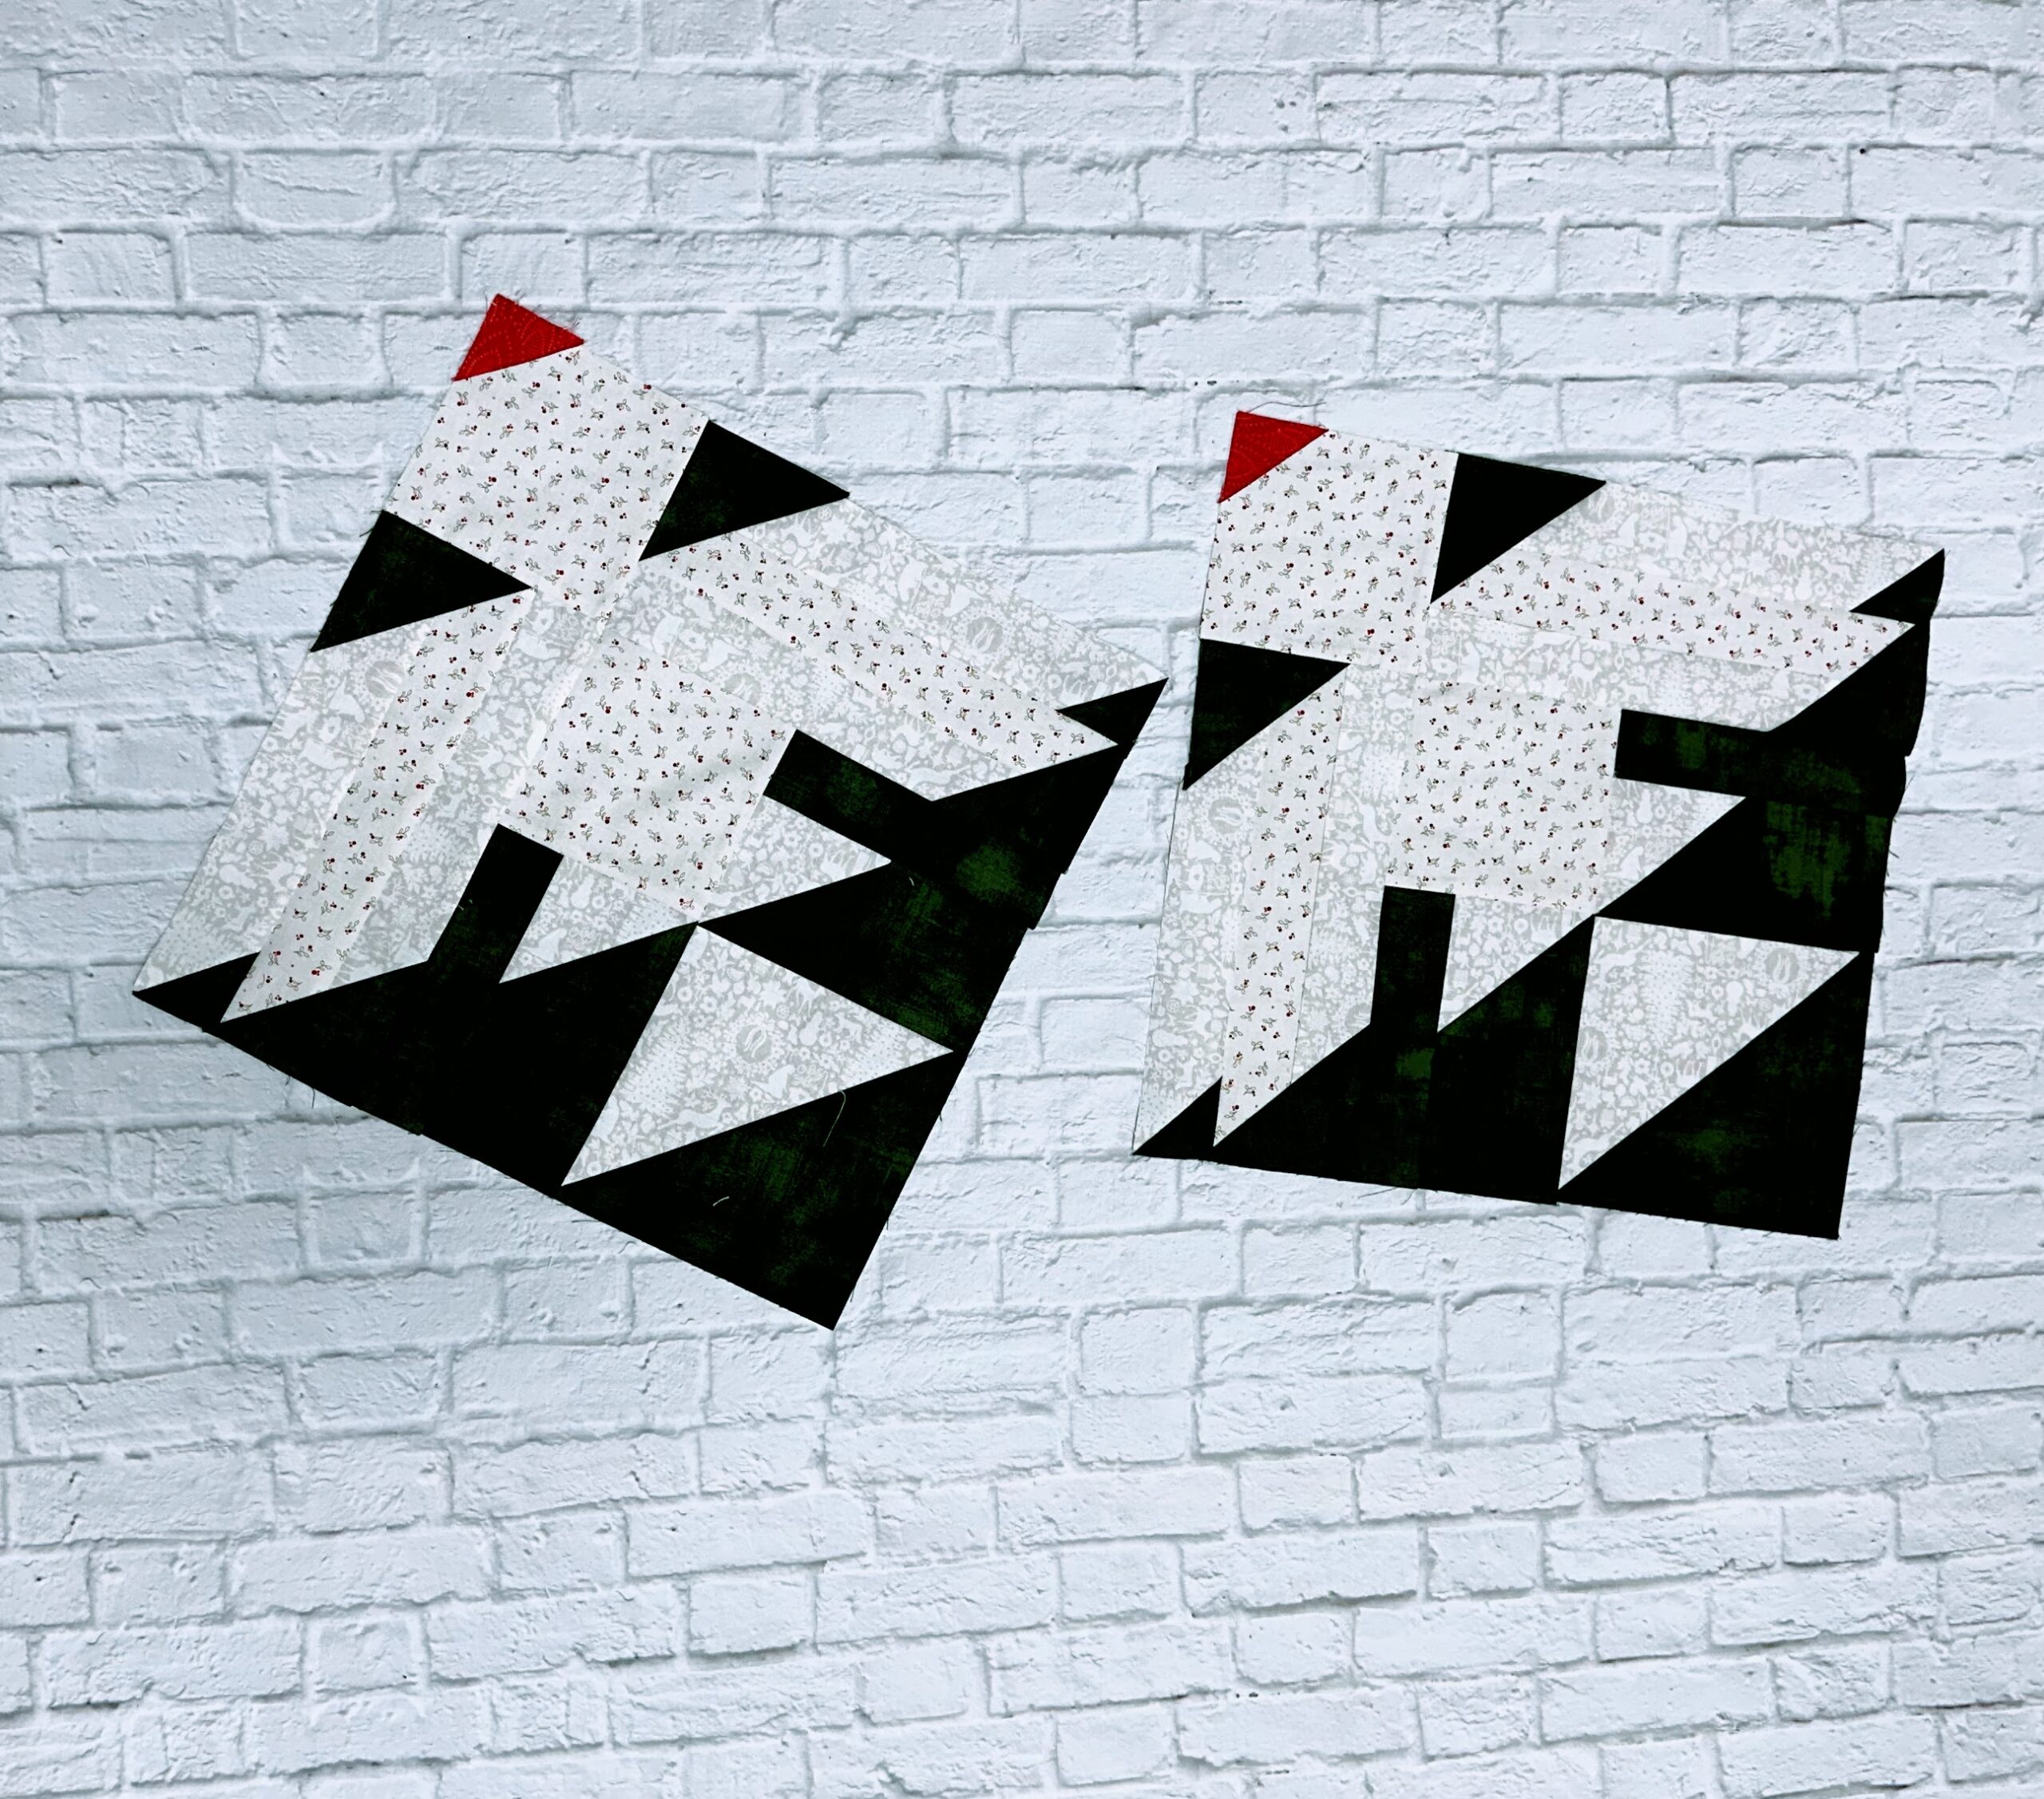
Three months in on the Charity QAL that Fat Quarter shop is hosting. This is a major fund raising project raising money for the Make a Wish foundation – Central and South Texas. The monthly patterns are available as a free download and in turn hopefully you will make a donation to Make a Wish.
I decided to use a Basic Grey Christmas collection with a dark green GRUNGE background. Once completed this quilt will be donated and auctioned for Make A Wish.
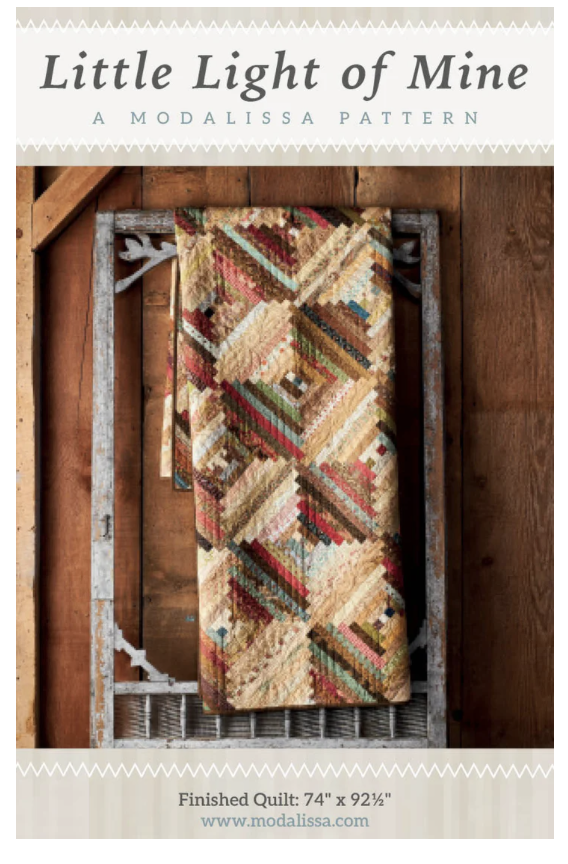
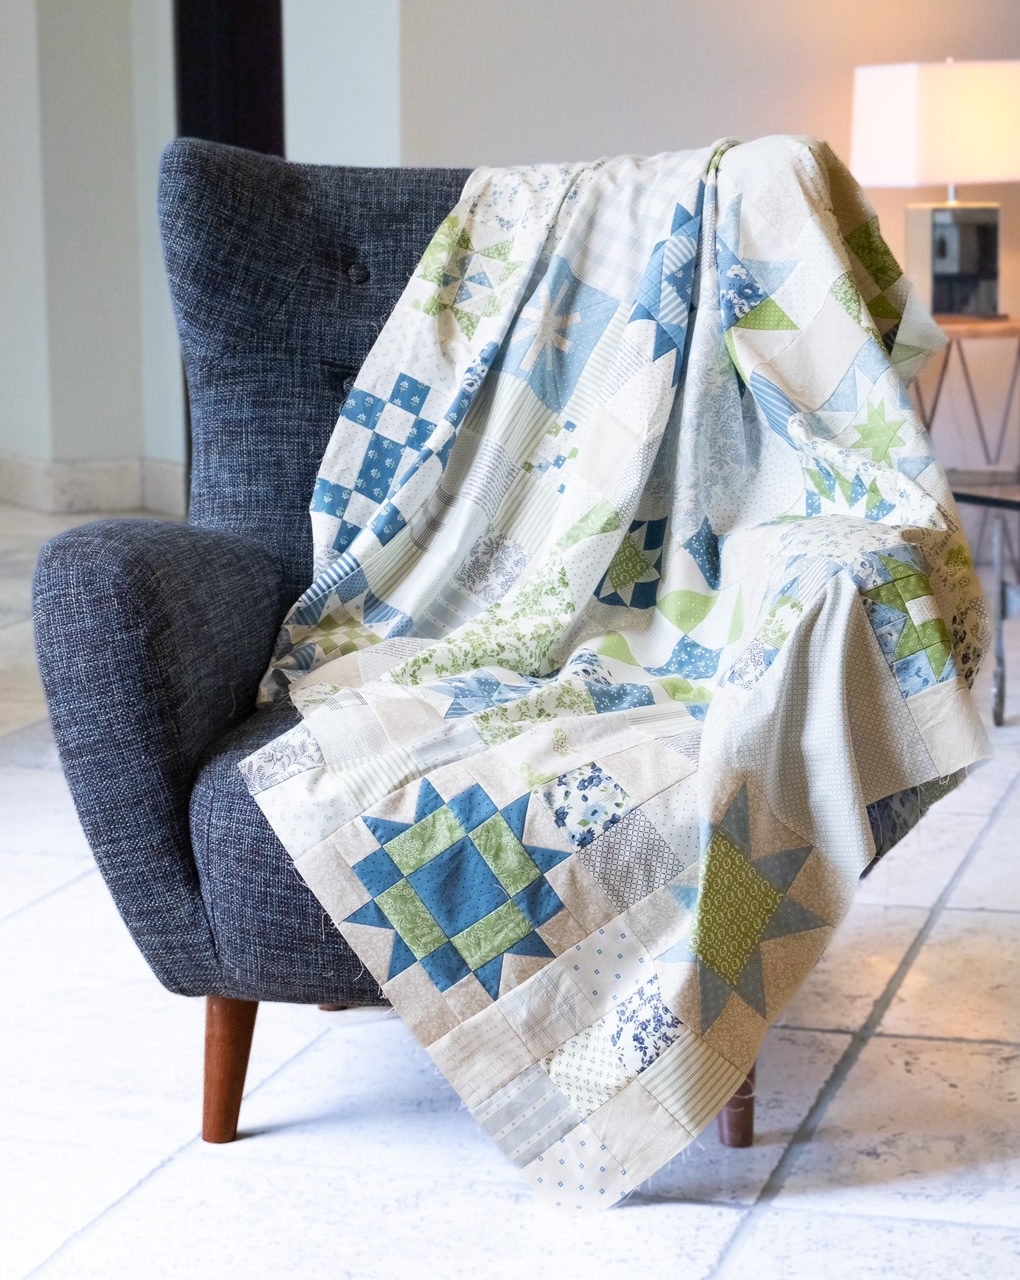
Little Light of Mine
I have been working on my pattern line and decided to make some color options for some of them. My THIS LITTLE LIGHT OF MINE pattern was so well received that I started with this one first.
I can barely sleep, I am so excited to be making this in Red, White and Blue. Have your ever had a project that keeps you up at night in a good way? This one is certainly doing it . A local store wants to have a QAL using this pattern so I will probably do a few more mock ups before this happens. Any color suggestions?
Modalissa Pattern
My Scrap pile and orphan blocks will be joined together and will turned into zipper bags. I am obsessed and you can never have too many bags on hand. Gifts, birthdays and just because are all perfect reasons to gift someone a zipper bag whether your put anything in it or let them fill it with their choice of goodies.
I will keep making progress on these knowing that a couple of the QAL’s will take the rest of the year to finish up. I will have some zipper bags completed which is always instant gratification.
Stay tuned. I will share updates and any new projects that get added to the list.
Check out the Modalissa pattern line, here.
I am also getting a wild hare that I need to clean my sewing room cabinets. Could be trouble!

