Tag: pillowcases

Travel Pillowcases

Travel Pillowcases
I have been having so much fun making travel pillowcases. 
All you really need is 14″ of fabric plus a band. 
It is pretty cool how the construction of this pillowcase is done.
 Don’t get me wrong making the standard pillowcases with the
 sausage technique is absolutely amazing. 
The travel pillowcases are made completely different using 1 width of fabric. 
These are fun to keep in the car for road trips or the occasional road side pillow fights!
How about using them as pillowcases/gift bags!

FABRIC SUPPLIES

Body- 14″ by 44″
Trim- 1 3/4″ x 14″
Band- 8″ x 14″

INSTRUCTIONS

1. Trim- Fold in half lengthwise and press
2. Band- Fold in half lengthwise and press
3. Lay the body of the pillow case face up and layer the raw edges of 
the trim and band. Pin in place.
4. Sew along the 14″ side keeping all the layers together .
5. Press
( this is where it can be a bit tricky to understand from written directions)
6. On the opposite end of the pillow case, fold under 6″. 
Press. Fold under 1/4″ of the 6″ and press to create a hem.
look close at the words on picture
7. Fold body right sides together.
8. Fold the flap over the top of the band creating an envelope and pin in place.
9. Sew the 2 side seams.
10. Trim corners to eliminate any bulk.
11. Turn the pillowcase right sides out. The envelope flap will hold 
the pillow in 
place and cover the top 6″ of the side seams.
12. Press and add a 12″ x 18″ travel pillow.
thank you Carolyn Tover for the machine embroidery
Doing some research on travel pillows and found that the size of 
pillows can vary by manufacturer. You may want to decide what size 
your travel pillow is before cutting and vary the  pattern slightly.
For some of the pillowcases I used flannels.
top-Apple Jacks by Tim & Beck
Marmalade by Bonnie & Camille
bottom 2- Cottons from Bear Country School by Berenstain Bears
Sleep tight!
-modalissa

Moda Retreat 2010

Moda hosted it’s annual retreat this past weekend. Joining us were stores from all over the country for 3 days of classes, demos, shopping, food and fun. I realize as I post these pictures that it is kind of like having a dinner party and only taking pictures of your home. I didn’t do that. I took pictures of the people that came to the party! If you want to see more pictures of behind the scenes, check out some of our guests’ blogs.
Julie from Keepsake Cottage, Susan Fuquay from American Quilt Retailer and more. Let me know if you have blogged about the event and I will add a link.
So now I will show off the quests of the party!
Several of the shops participated in our Pillowcase sew-a-thon. The pillowcases were made and will be logged in the grand total over at the Million Pillowcase Challenge.
Which by the way is half way to million mark!
pillowcase-challenge
The first night we had a Cupcake Carnival, so we cold all let our hair down and have some fun before dinner. One of the most popular carnival booths was our BUTT SKETCH artist. Yes that is what i said!
 Butt Sketch. It was great fun!
butt-sketch
Melba from the Old Craft Store,  I know that is you! I would recognize that Butt anywhere.
Deb-Quiters-general-Store
Deb From The Quilter’s General Store in Rockford, Illinois , proudly displaying her Butt Sketch.
quilters-garden-the-stitchery
Quilter’s Garden in Princeton, IL and The Stitchery in Delavan, WI  hamming it up.
the-old-country-store
Kaari Meng from French General with  Rachel from The Old Country Store, Intercourse, PA.
calico-house
Janeese and Patt from Calico House in Lincoln, NE
baloon-heads
Mandy from Over the Rainbow sported the perfect balloon hat.(get it? Over the rainbow!)
Several of the moda staff quickly followed. ( they will remain nameless) Twyla-Pease-Sewin-Heaven
Twyla from Sew in Heaven in Holiday Island, AR was sitting quietly. She was probably hoping that I would not hunt her down and add her to the Balloon Head group.
yo-yo-compl
Roseanne’s booth was a ton of fun. It was a Yo-yo competition. Not the toy kind, the sewing kind.
How fast can you sew a yo yo while the clock is ticking?
project-fig-tree
Since Project Runway is all the rage, we set up a FIG TREE RUNWAY. 2 teams of 2 competed to create there own  original fashion design using precuts, ric rac, trims, buttons in 5 minutes or less. We even had a men’s round, after all most of the best designers are men. We knew our own Mark Dunn was very fashion savvy but who would of thought John Atkins our color blind IT Director would have added so much to the team. Hilariously fun!
gene-and-melody
This picture just makes me smile! 2 of our long time sales reps on hand to help us out.
Gene Stewart and Melody Busch
mark-and-brian
Brian Dunn  & Mark  Dunn
some-staff
Just a few of the people that make it all happen EVERY DAY!!
Thank you for coming to the retreat and choosing moda!
  

Prairie Points and Pillowcase tutorial

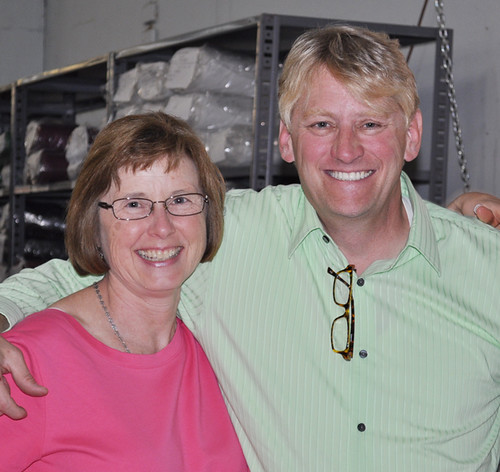
Moda Fabrics is a sponsor of the Million Pillowcase Challenge with American Patchwork & QuiltingI asked Jennifer Keltner, Senior Editor of American Patchwork & Quilting, what her inspiration was for such a big project. Here is Jennifer’s reply.
 The inspiration for the project came from wanting to launch something that everyone could participate in—no matter what your skill level. With a pillowcase, it is fun and easy to make, doesn’t take a lot of time, and is certainly a way to showcase great fabrics you might not otherwise work with (don’t fit your usual style, color, etc.) It’s also a great way to practice a new-to-you technique such as prairie points, foundation piecing, diagonal block seams, etc. By incorporating that technique in a pieced pillowcase band, you can experiment first before making a commitment to a big quilt project.

On a very personal level, I was touched by two stories which made me think about the power of pillowcases making a difference. One was from a guild member who knew that in her area foster children had all their possessions tossed into a trash bag when they were moved from place to place. She vowed to have her guild donate pillowcases so every foster kid in the county could tuck their few possessions into a handmade case and have a soft place to rest their heads during trying times. The second was a story of a mother who made pillowcases for her son who was in a cancer ward—she was desperate to brighten up his room and his day. She did, and after he passed away, she had the courage to keep on creating them for the other people’s kids in the same tough spot. She and her husband eventually formed the ConKerr Cancer Foundation to make a difference for kids with cancer around the country by making pillowcases. Turning their grief into an ongoing effort for good really spoke to my heart.

I’m so touched by the hundreds of stories and emails I’ve read about where and how people are donating cases. The ultimate story of how the Million Pillowcase Challenge is an outreach to others came to my attention last week. Check out this girl learning to quilt with her mom, very inspiring girl (you’ll know what I mean when you check out her blog). Scroll down to the Tuesday, February 23 posting and make sure to click on the link to her friend Kristen’s blog to see how touched her friend was to receive the pillowcase. If this story doesn’t give you goosebumps….whoa! The power of quilting and motherhood and pillowcases and big hearts all rolled into one!
http://sarahely8989.blogspot.com/

Thank you Jennifer

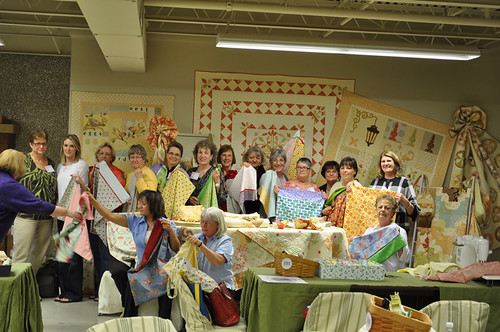
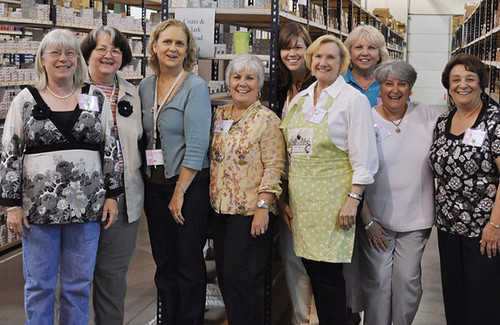
The staff here at moda fabrics have been feverishly making pillowcases. We are addicted! Jennifer also told me that they have a goal of 1000 pillowcases to be made by their staff. I will have to let the Moda crew know about that goal. The following pillowcase is a tutorial of the pillowcase I sent to APQ.

finished-pillowcase

The following is actually 2 tutorials, Prairie Points and Pillowcases.
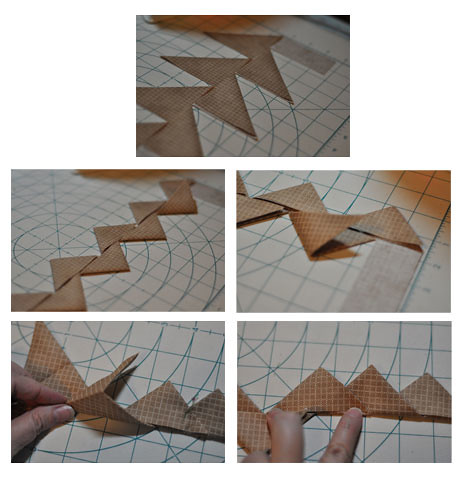
PRAIRIE POINTS
Determine the size of Prairie Point you need. (I used a pattern from APQ  that required 3″ prairie points.)
I doubled that size and cut a strip, 6″ wide x 45″ long.

Fold the strip in half length wise and press to determine the middle. Start on one end of the strip and cut every 3″ stopping at the middle fold. From the other side of the strip make your first cut at 1 1/2″ then start cutting every 3″ being sure to stop at the middle fold. Your strip will look like the one below.
strip-cut-every-3-inches
6″ strip cut every 3″ alternating on each side so it it staggered

Lay the strip on your ironing board and press all the squares in the same direction. Leave the 1 1/2″ strip
loose. You will get rid of it later.

press-in-all-one-direction-with-a-tail

Then continue pressing all the triangles back onto themsleves in the opposite direction.

points-pressed-beforf-folded

 The strip of “Points” will fold together to create your strip of prairie points.

ironing-and-folding-the-points

By pressing the points in the same direction you can “nest” each of the points into each other as shown in the picture shown below.

folding-points-tino-themselves

folding-points-tino-themselves2
The points all line up nicely and rest inside each other. This step if reminds me of a caterpillar. To hold the “caterpillar” in place you can now top stitch this down to hold them in place.

A couple of other notes before moving on to how I used it in my pillowcase.
If you want a strip longer than approx 41″ of points just make another strip and nest it into the last point on your strip. This is the perfect size  for making prairie point border on a baby quilt or throw.
The length of the prairie point strip will always be the length of the fabric. The only thing that varies is how many points and how far apart they are.
For example, cut an 8″ strip for 4″ prairie points and you will have fewer but bigger points. The strip will still be approx 41″/42″ long.
Cut a smaller strip 4″ for 2″ points and you will have a bunch of cute little tiny points. The strip will still be approx 41″/42″ long.
 NOTE TO SELF: Love the 2″ point idea. Go make some tonight.

DISCLAIMER:
The instructions listed below are almost like doing a magic trick. Everytime we finsh one we say Ta Da!!
However it is very hard to illustrate it in pictures. So my word of advice is to make a sloppy copy pillowcase just in case you mess up. And I also want to say TRUST ME! you will love this method. It is two seams! remember Magic! TA DA!

PILLOWCASE CONSTRUCTION:

Pattern used is one of the free downloads from APQ.
Fabric featured  is Whimsy by Fig Tree & Co.
Casing- Cut 9″ x 45″
Body of pillow 28″ x 45″
You choice of small flange, ric rac etc.
In the instructions below I have used the prairie points from above.
prairie-points-pinned-to-casing
 Lay CASING piece right sides up. Pin the points or trim of your choicealong the edge.
With me so far?

prairie-points-pinned1

Lay Pillowcase fabric right side down towards casing fabric.  Lightly roll the pillowcase fabric until you can see the casing fabric below. This will seem odd but it does work.

casing-pinned-to-pillowcase
 Taking the exposed casing fabric and roll it up to the top enclosing the entire pillowcase fabric. Pin  together. Now you may think that you are making fabric sausages, but you’re not. This is also where you have to really trust me.

pillowcase-rolled-in-tube.

SEAM 1: Sew the tube together. I know it seems odd, but this IS where the magic happens.

casing-sewn

Once you have done this step, literally grab a section from inside the tube and start pulling. (Love my great picture?This is where I needed the video.) Keep pulling until you have turned the entre thing right side out.
TIP: You must say TA! DA! as you pull so that the magic happens!

in-a-knot

This is what it looks like when it comes out of the tube. The casing is completely sewn without doing any handwork!

pillowcase-flat

Fold the Pillowcase right sides together.
SEAM 2: Sew down the side and across the bottom.

sides-pinned

You now have a finished pillowcase. Serge or Zig Zag the edges if you choose.

finished-pillowcase

Sleep tight!

Pay it Forward

Now that Friday the 13th has come and gone, I want to talk about the upcoming holidays.
When the kids were little, we all gathered to watch Charlie Brown’s Christmas. Ya, I know kind of lame for teenagers but my husband still insists. Sometime between Halloween and Thanksgiving I offer to cook (of course nothing entices grown boys to come see mama like a home cooked meal)and we all watch Pay it Forward. This movie is NOT for the little ones but it’s meaning is.
If you have not seen this movie, here is some of the info from the web.

Like some other kids, 12 year old Trevor McKinney believed in the goodness
of human nature. Like many other kids, he was determined to change the world
for the better. Unlike other kids, he succeeded.
Sometimes the simplest idea can make the biggest difference.

This brings me to Quilter’s!! YES! Who better pays it forward?

Quilter’s are the best people in the world, Right? Any disagreements ?
Just look at how quick Cherri House was to respond to the injured soldier’s at Ft. Hood. Quilter’s quickly jumped on board making and sending quilts.

This is my favorite book of the season, Quilt for Peace. The message is wonderful. The author, Katherine Bell has great projects and wonderful charities to make and sew for. This pretty much sums up a quilter’s heart and spirit.

What about Camille and the Kimberly at Fat Quarter Shop? Both of these people realized the power of “The Quilt” by raffling a quilt with all the money going to this sweet family.

Talk about a great project for a Stashbuster? Check out American Patchwork & Quilting’s,
A MILLION PILLOWCASE CHALLENGE. Does a million sound like a lot? It does if you are talking $$, but did you know there are over 800,000 kids in foster care in America?
Let’s get a pillow case in each of their hands!
How are you going to Pay it Forward?
The holidays are upon us and it is probably best not to send out cards such as these.
I am working now on Moda’s Christmas collections for 2010 so just in case I am snowed under,(Ha! Ha!) I am wishing you a Happy Holiday now a reminder that it is not to late to finish up those new year’s resolutions from 2009!

One last bit of info and kind of a tutorial:
Seems like everyone I know is having twins. This is my fourth set of twin quilts in the past year! All BOYS!! I am kind of liking making 2 at the same time. Deb Strain is the proud grandma of 2 little boys, Graham and Finnegan. I won’t post a tutorial on COIN QUILTS, because there are lots of good ones already out there. What I will post is my tip on being ready. Any of my leftover strips I keep adding to a running length of “Coins”. I have a couple of different ones hanging on my bulletin board and add to them constantly. I make good use of some of the fabrics I may have thrown in the trash. Instead I just keep adding them to the strips. I keep a bright fun kid one going along with what some may call a dark and dingy one.
I am ready at a minutes notice. All I have to do is choose the color of fabric to go in between my rows and how long I want to make the project.

The area in between is the perfect place to quilt the names, date of birth etc. I tell my quilter Maggie that I am just lazy and do not want to make a label so she is so kind to quilt it in for me.

Maggie also isn’t afraid to quilt with the moda snuggles. Makes a great backing!
Kuddos to all you quilters out there for spreading the love!!
Covering the world one quilt at a time!