How many times I have I said I have the greatest job ever?
I am saying it again.
I DO.
This week I will be attending the Hiemtextil show in Frankfurt, Germany with the VP of design from Moda.
This is a huge show for the home dec world. 10 separate buildings full of everything from mattress, machinery, curtain rods, blankets and more. There are vendors from all of the world exhibiting their newest products. All it would take is a couple of pictures sent to some knock off country to ruin their campaign.
This is the show where hotels go to design their towels. They don’t order them right off the rack at JC Penney. Who knew? It is an interesting show that covers completely different industries and certainly opens your eyes to the fact that there is a market for pretty much everything.
I wish I could post pictures to share the adventure with each of you but pictures are strictly, I mean STRICTLY forbidden. I have even seen someone try and sneak a picture and immediately security guards swarm the perpetrator.
The booths are incredible. They actually build entire structures. I will share whatever I am legally allowed in a future post.
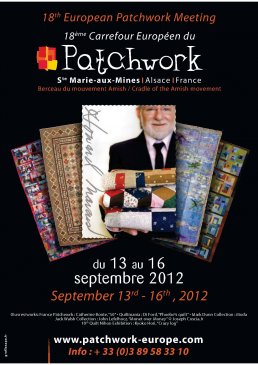
Then we are visiting the venue for European Patchwork 2012 in Alsace, France. We are excited about this show because they are doing an exhibit about Mark Dunn, the President of Moda along with several other exhibits, contests, and classes. The exhibit is going to have some of the quilts and textiles from his collection on exhibit for the first time anywhere. More to come on this event also.
So while we are in that neck of the woods, we thought we would visit the venue. Pray for me because we are renting a car and I am the designated driver through the beautiful countryside from Frankfurt to Alsace. I am sure this will bring some interesting stories about U-turns and more.
I titled this post Disclaimer and the real reason I wanted to do this post is to let all of you know that if there is a random post on my face book page it is probably because my favorite son (in his mind) has hacked into FB and left posts to the other kids. He gets bored easily! Please disregard them.
Be back in a week and a recap of the trip.
happy quilting,
lissa