Slice and Dice 9 Patch
and a few tips thrown in along the way.
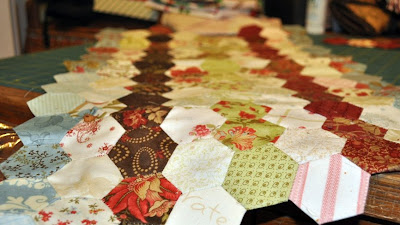
This is a picture of a quilt I was going to make. It features the Wee Woodland collection from Moda.
I have always loved the Slice and Dice 9 patch technique. BUT once I was ready to sit and sew, I realized I had already used one of the layer cakes for another project. So I moved on to
PLAN B: I also love the red cross block exchanges that are all over the world wide web. Once I think about red, it makes me start thinking of aqua. Digging around in my stash I found the perfect reds, whites and aquas to make my own interputation of the slice and dice 9 patch. Variations of this pattern are all over the place, so the following info is not a complete tutorial. There is a pattern attached at the end for the complete instructions. I wanted to give you some time saving tips that work on this or any other quilt.
One more short story: Many years ago, a friend of mine (Hi Kara!) came by my house to drop something off. I was not going to be there so I left the door open for her. Later, she called and couldn’t believe that there was a project in the works at my machine. I think I had even left the pieces chain stitched laying on the throat plate of my sewing machine. I had just up and left it just as it was. She told me she could never do that. She couldn’t even start something unless she had a block of time set aside to work on it. This event has stuck with me for over 20 years.
Some of the suggestions listed below are things I have learned to be able to have mindless sewing time, whether it is 15 minutes or 3 hours.
SLICE AND DICE 9 PATCH
Lay out 2 -10″ squares right side up. Make 2 cuts using a variety of cuts divisible by 10.
(see complete pattern for chart)
EXCERPT from moda’s project sheet.
These whimsical Nine Patches are made by cutting 10″ squares into strips following these guidelines:
– make 2 cuts resulting in 3 strips
– cut the strips at least 2″wide
– the total of the width of the 3 strips equals 10″
I do not what your “sewing time” is like but I have had to learn to sew with interruptions. Sitting down to sew a few seams while the rolls are cooking. This gives me 10 more minutes of stitching before dinner goes on the table. I do have a reputation for a wonderful dinner and sometimes burnt rolls. Sometimes sewing for just 10 minutes is tough and I can’t STOP! The following tips help me keep my projects in order for when I do return to them.
Very systematically, I cut the sections and layer them in one stack. The above pieces are cut from 10″ squares so I placed the cut pieces on a layer cake cardboard. This makes the stack easy to move as needed.
I sew on an old school teachers desk so I have these great pull outs on 2 sides to hold my fabrics. And a diet cherry limeade from sonic is a must.
I start chain sewing working in the following order:
Join row 1, piece 1 to row 1, piece 2.
Then row 2, piece 1 to row 2, piece2.
Then row 3, piece 1 to row 3, piece 2.
This basically gives you the first 2 vertical rows chain sewn together. Do not cut the threads between the rows. The threads are what help keep the rows in order.
The above picture is what the stack looks like as I worked my way done the rows. It is easy to come back and pick up right where I left off………….. if I have to turn off the smoke alarm
from the burning rolls!
Repeat this process until all of the first 2 sections of the nine patches are done. You will be left with a nice tidy stack in the correct order to add to the other sections.
Then repeat the process with the third row pieces. Starting at the beginning section of your chain, add the 3rd piece to each of the pieces as shown below. Notice how the threads are not cut and the chain sewing keeps feeding the next section?
See how the thread or “chain” keeps the pieces in order if you have to tend to other things.
Chain pieced sections are tough to press and keep the blocks joined by the threads. When sewing the sections together I “force” the seams allowances in the direction I want them to go. When keeping the sections chain sewn together like this, I rarely ever have to pin the pieces together. I wait to press
until the block is completed.
This looks like a big mess but it is actually all the rows in order.
The chain can be cut after every 3rd section. This keeps each block together and ready to sew together.
No pinning! Just SEW!
Each set of 2 squares makes a positive / negative block.
Arrange the blocks in a pleasing order and join into rows. I made 2 baby quilt tops
4 rows by 5 rows long. (36″ x 45″)
Have I told you how many people I know are expecting babies in November and December? A LOT!!No twins boys that I know of but I have the quilt tops ready just in case.
What are some of your time saving sewing tips?
For a print out of the complete Wee Woodland pattern,
Click here:


 Bear with me while I talk about myself a little more!
 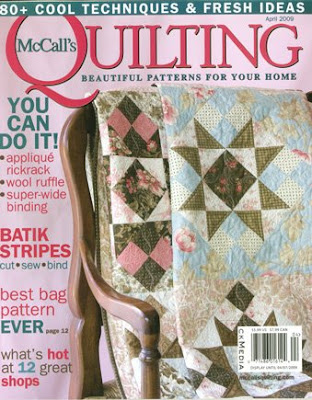 Yes, I was a cover girl on the April issue of McCalls Quilting. (no honey, not the cover of the sports illustrated swimsuit issue!) I just found out that this quilt will also be hanging in
 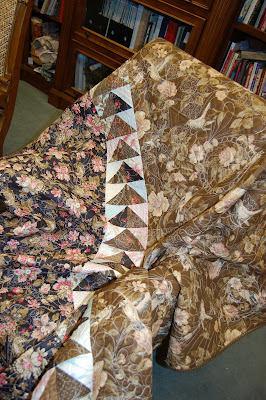 I took a quick picture of the back before I had to SHIP MY QUILT TO PADUCAH.
 Okay I admit it, they use a picture of me from when I was 40. Thank you, Beth!
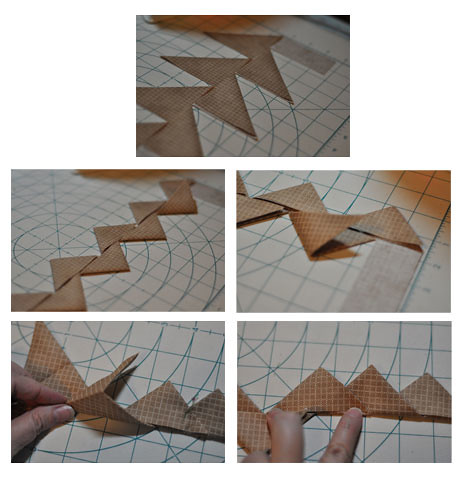
 Easy, easy. easy and fun! With quiltsmart the templates are printed on lightweight fusible interfacing. First cut the interfacing, sew them to the fabric pieces and turn like a pillow. The exposed side of the interfacing is fusible so no or little pinning is required. Iron it in place and sew it down with whatever method you prefer. You can leave the interfacing in or cut it out from the back side of the quilt. Viola! Viola!

 With that being said I felt like I should follow-up on some loose ends.

 Here are several rows sewn together. How long would this take by hand?
 Once the rows and or sections are arranged you can continue to join the sections using the same technique. You do not have to have an entire section down to start sewing them together. More can be added section by section.
 A section sewn together!